I started building a table back in October and I figured I would post a few pics and incorporate some lessons learned. I have been welding at the self taught, amateur level for a long time, but this is my first serious project. Feel free to let me know if you have any "tips or tricks" for me to use in the future. I am using a gantry from Precision Plasma and using his blueprints as well. The electronics are from CandCNC. Many of my modifications have been plagiarized from other builds found on the interweb, but some are actually my own. Feel free to make fun of all the crap in my garage.

- IMG_3162.jpg (67.83 KiB) Viewed 1994 times
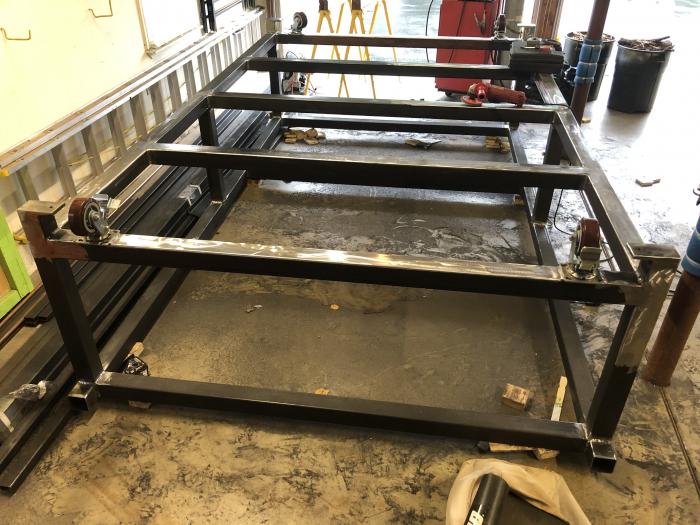
I ordered and received most of my tubing and flats from McKnight Steel in Warminster, PA. I laid out the frame and built it upside down to make it easier to keep the top flat and square. This worked out well but I made one mistake here that should have been avoided. After tacking it up, the far right corner was out of plane by a smidge and I ground out the tacks to re fit. In the process I removed enough material that when I finished welding it up, the tube contracted and the long bars are out of parallel by 1/8" over 12'. This should not affect the performance, but it annoys me. Lesson learned; avoid distortion by good fit up and controlling heat.

- IMG_3163.jpg (67.26 KiB) Viewed 1994 times
- IMG_3200.jpg (71.5 KiB) Viewed 1994 times
I put the feet facing inside to increase the angular clearance between the feet and the casters for instance when rolling up or down a ramp. I also increased the distance between the top and bottom tubes to allow for material storage, and provide appropriate clearance for the 6.5" casters. 23.5" vertical tubes allowed for 4" total foot length. The casters are double locking from Service Caster; they are pricey but the double locking feature has come in handy.
If you take your time you can hand tap a 1/2" hole in 1/2" plate 15 degrees off, even when the hole was drilled perpendicular. Lesson learned; be careful when starting threads and make sure to use an appropriately tapered tap.
- IMG_3204.jpg (74.69 KiB) Viewed 1994 times
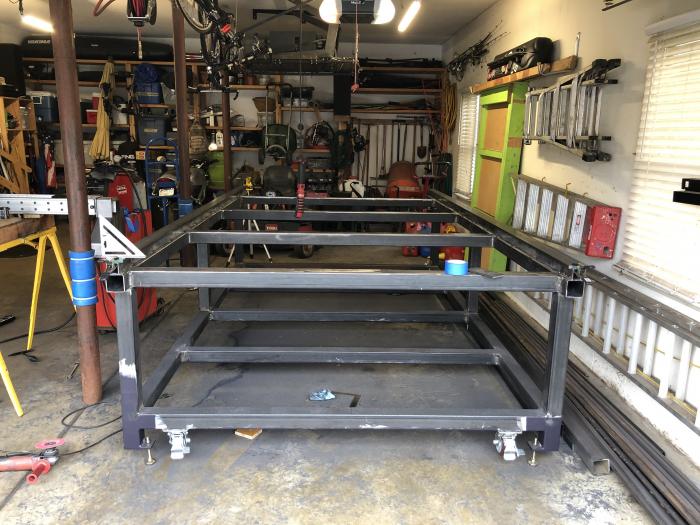
After painting the bottom I flipped it over (with the help of some friends and the wife) and started working on it right side up. Before installing the gantry rails I noticed that the middle vertical tube had expanded and caused a slight bow in the top tubes. I spent about an hour grinding the top tubes flat using an 8' straight edge. At this point i decided to get serious about learning to control distortion and that's how I found this forum. After a lot of grinding drilling and tapping I have the rails on parallel and level in both axes. Lesson learned (again); avoid distortion.

- IMG_3231.jpg (67.41 KiB) Viewed 1994 times
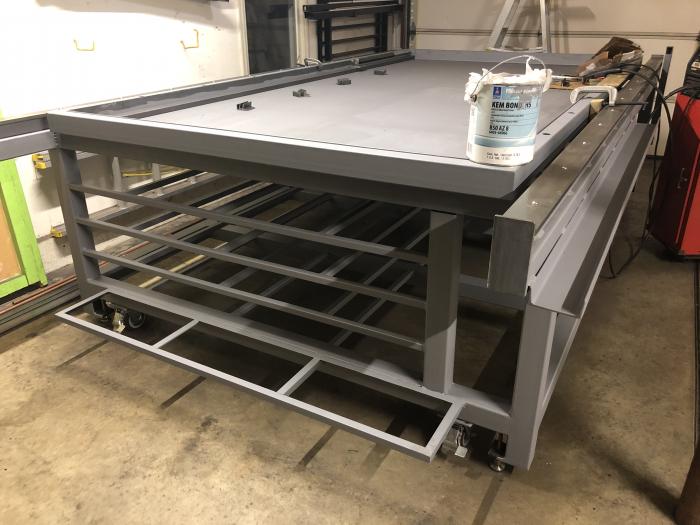
I had a 66" X 126" water pan bent up by Hoover Steel in Schwenksville, PA. It took a while to find a shop with the capability to bend that size, but it came out nice. I welded up the corners and primed it and the surface it will sit on. I built a computer/monitor stand based on the example form M FAB on the Precision Plasma site. I also installed racks for sheet material using 1" tube and 3" end posts. I just tacked in the end posts to avoid distortion.
- IMG_3240.jpg (54.71 KiB) Viewed 1994 times
I added a 2 x 3 rectangle tube frame around the water pan and drilled 1" holes in it for Hudson Bearing 5/8" drop in transfer bearings. I primed it with Sherwin Williams Pro Industrial Kem Bond, a direct to metal primer.
- IMG_3251.jpg (49.35 KiB) Viewed 1994 times
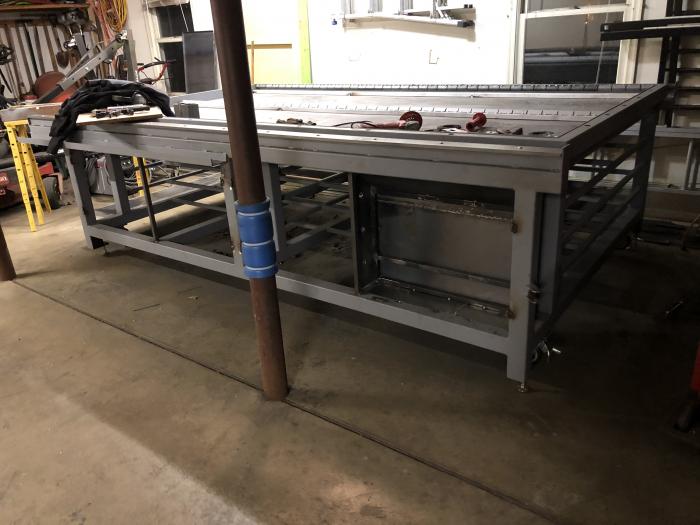
I built an enclosure for the CandCNC controller under the 0,0 corner with a sloped top to drain any splashing fluid, and some holes for cabling.

- In Paint.png (325.42 KiB) Viewed 1994 times
I added a shelf in the back for the Hypertherm Powermax 65. CandCNC recommend keeping the power supply and the controller separated by 5-10 feet, so the PM 65 is in back and the controller is in front. I then painted it up in Sherwin Williams Pro Industrial High Performance Epoxy. If this seems like a Sherwin Williams ad, it is. My brother works for them and got me a discount so I figured, I'd give them a plug. It is expensive stuff but I was able to get the whole thing primed and painted with one gallon of each.
I have some doors and panels to paint, but other than that it is just a matter of installing the gantry and controls. I'll try to continue this topic as I wrap it up.
Thanks in advance for any suggestions or advice
Mike