Metal cutting - oxyfuel cutting, plasma cutting, machining, grinding, and other preparatory work.
User avatar
  • Posts:
  • Joined:
    Sat Nov 29, 2014 6:30 pm
  • Location:
    Farmington, MN

As I started to work with steel tubing to build different tables and carts for my shop, I struggled with my buddies dry cut saw because I'm so used to a wood miter saw with stops. It took me forever to cut all the part that I wanted and to get them to the exact length I needed. I was really frustrated!
I researched and found that what I wanted in a metal miter saw was way more money then what I wanted to spend.
The only other option for me was to build my own.

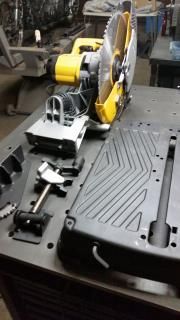
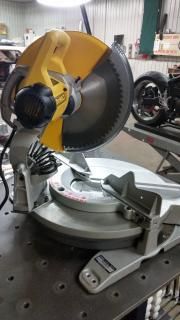
I bought a new RIDGID 12" compound miter saw because of it's swivel base that I really liked,
Image
and a Dewalt 14" Multi Cutter Dry Cut Saw that had very good reviews.
Image

I took the Dewalt saw of it's base, and figured out the location of the saw kerf and mounting holes with a cardboard template, so I could transfer it to the RIDGID base.
Image Image
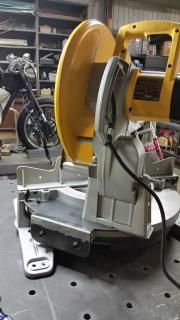
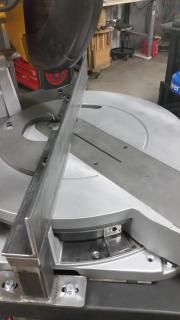
After I chopped off the compound mounting swivel section of the RIDGID base, I took my paper template to check the possibilities for my Dewalt saw on the RIDGID base in regard to cutting miters to the left and right.Image Image Image Image Image
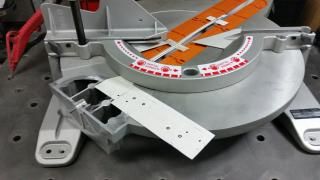
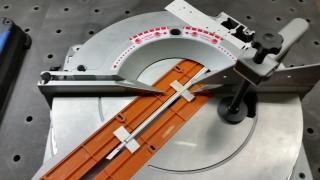
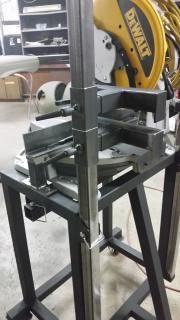
I'm able to cut 45 degrees to the left and 22.5 to the right, because of the offset of the mounting base to the left as shown in the pictures.
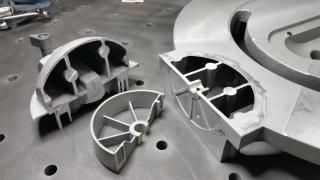
I drafted all the moving parts in CAD and came up with a layout for the mounting plate to install the Dewalt saw on the RIDGID base
Image Image
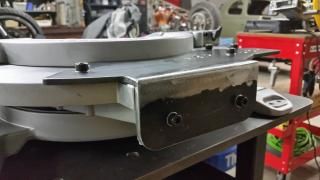
The parts were cut on a friends plasma table. I cleaned the parts, drilled the holes to the correct dimensions, and welded it up.
As luck would have it, everything lined up nicely and I was able to put the two pieces together.
Image Image

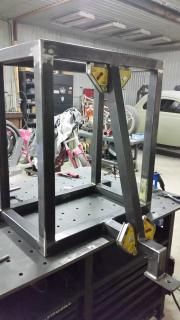
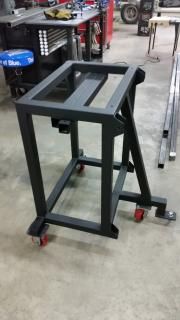
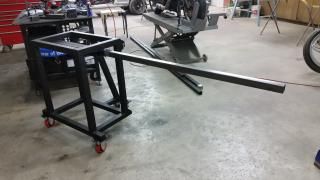
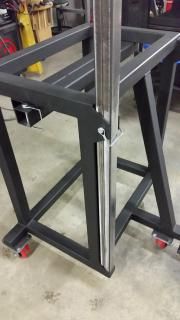
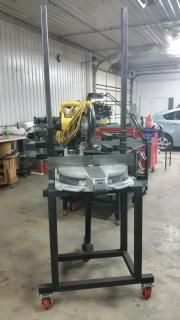
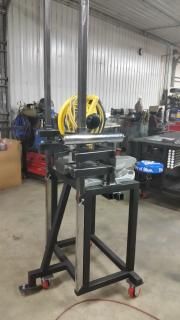
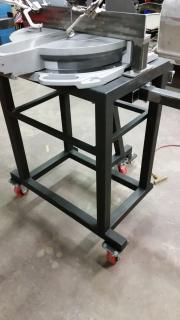
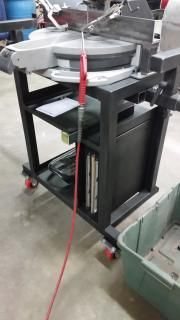
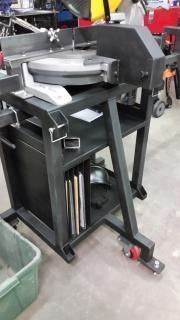
The goal was to have this setup as a mobile cutting station with a compact design for a cart.
I've been working with CAD in my cabinet business for years, and I hardly build anything without developing it first on the screen.

As soon as the concept took shape in CAD, I started cutting and welding.
Image Image Image Image Image

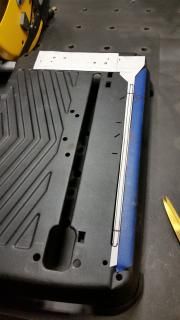
The existing fence (for wood trim) didn't seem strong enough to withstand the potential abuse for the new application and was limited in its adjustability for referencing a perfect 90 and 45 degree cut.
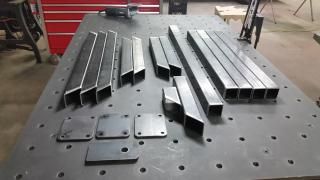
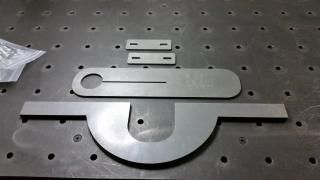
Another resource with a water jet was able to cut some parts for me form 1/2" and 1/4" plate.
Here are some images of the parts. The big piece is the fence base plate, the next piece replaced the plastic inserts in the table, and the two little ones are the base plates for the fence posts.
Image
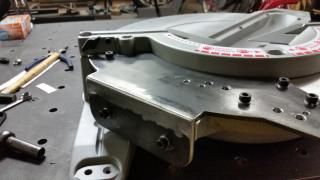
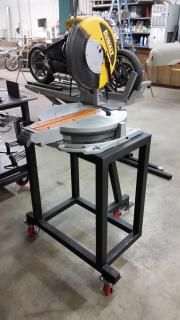
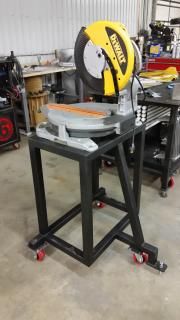
All the parts welded, bolted together, and mounted on the cart.
Image Image Image Image
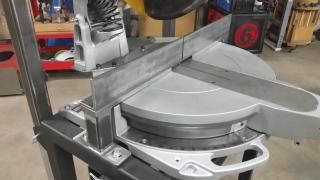
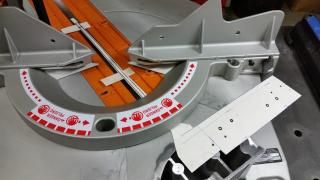
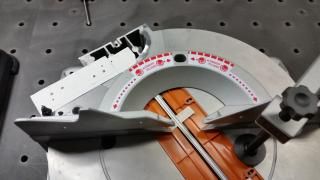
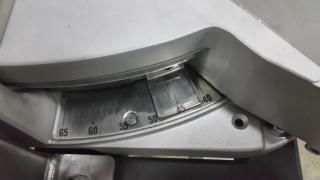
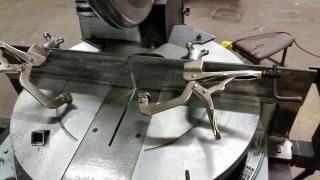
The RIDGID swivel base has several miter presets, and they are dead on and lock in place very easy. Here are my left and right max miter cuts.
Image Image
It took me about 2 weeks working on it in the evenings after my day job to get to this point.
I had a blast figuring it out and seeing it come together and working the way it did.

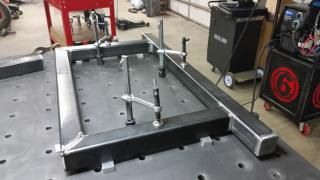
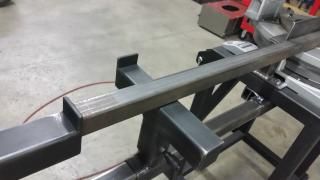
To be able to cut lengths repetitively with high accuracy and efficiency, I needed stops on both sides, sliding on removable rails and easily stored on the cart if not in use.

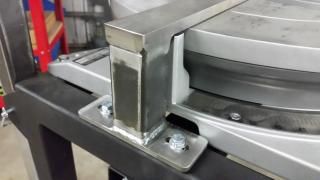
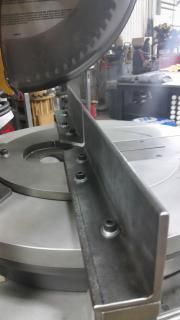
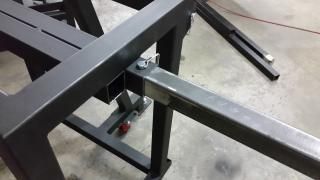
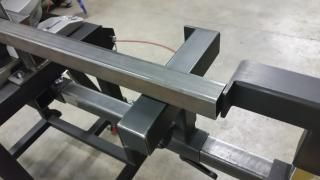
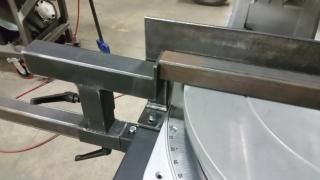
Here are the receiving sleeves, 2x2,welded to the cart, under the saw,
Image Image
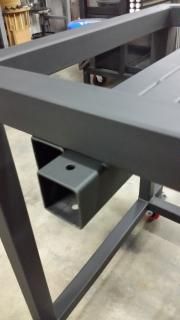
and with one of the sliding rails (1.75 x1.75) in place, locked by a pin.
Image Image

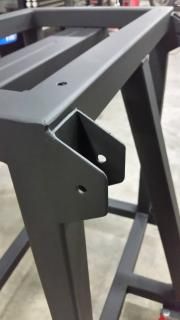
When not in use, the sliding rails are stored on the back side of the cart, held in place by a safety pin. The setup is very simple and quick.
Image Image Image

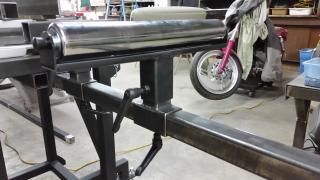
Here is a roller support, and the other supports, that also work as stops by turning them 90 degrees.
Image Image Image Image

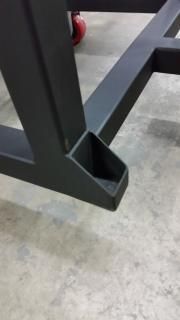
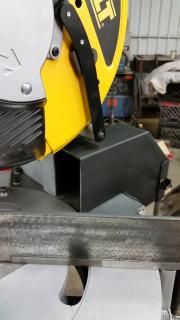
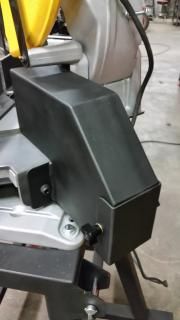
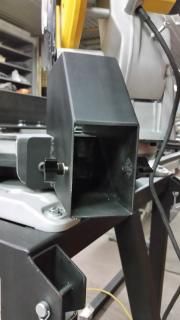
I needed something to catch the metal shavings and to reduce the mess behind the saW.
Here is my collection box, mounted to the backside of the saw, easy to clean.
Image Image Image
Some images with the slide rails and supports tucked away for a small footprint.
Image Image Image

I got some strong hand drill press clamps last week to hold my tubing against the fence and in place.
Image Image Image

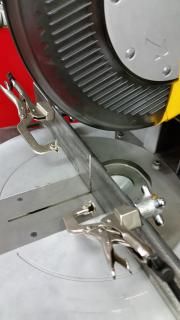
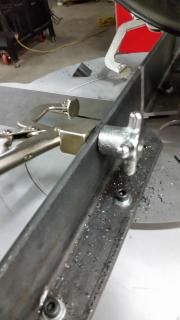
These things are really slick!!!!

I added some shelves and slots for saw blades the last two days to complete the setup.
Image Image Image Image

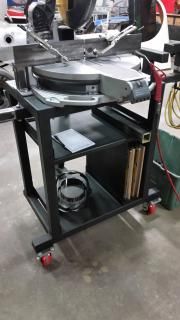
I'm a happy camper now!!!!! :D

Thoughts and comments welcome!
Last edited by Wolfgang on Sun Jan 25, 2015 12:10 am, edited 1 time in total.
User avatar
  • Posts:
  • Joined:
    Fri Apr 01, 2011 10:59 pm
  • Location:
    Australia; Victoria

That has to be one of the most impressive adaptions I've seen. What did the cost come in and besides the fun you had, how would it compare to a cold cut (coolant) saw?
User avatar
  • Posts:
  • Joined:
    Sun Sep 22, 2013 10:14 am
  • Location:
    Minneapolis Mn 55407

WOW!!!!!!!!
Everlast 250EX
Miller 250 syncrowave
Sharp LMV Vertical Mill
Takisawa TSL-800-D Lathe
Coupla Bandsaws,Grinders,surface grinder,tool/cutter grinder
and more stuff than I deserve(Thanks Significant Other)
User avatar
  • Posts:
  • Joined:
    Sat Nov 29, 2014 6:30 pm
  • Location:
    Farmington, MN

weldin mike 27 wrote:That has to be one of the most impressive adaptions I've seen. What did the cost come in and besides the fun you had, how would it compare to a cold cut (coolant) saw?
Total cost for saws, tooling, materials, everything else, close to two grand plus 30 hours for thinking and building.
I've never had a cold cut saw, so I can't make a comparison, but someone else here may have the experience and can chime in.
User avatar
  • Posts:
  • Joined:
    Tue Aug 19, 2014 2:34 am
  • Location:
    Short Creek, Arizona

Now you've gone and voided your warranty :lol:
Seriously, though, nice work. That's awesome!
Cheers.
-Eldon
We are not lawyers nor physicians, but welders do it in all positions!

Miller Dynasty 280DX
Lincoln 210 MP
Miller 625 X-Treme
Hobart Handler 150
Victor Oxygen-acetylene torch
Miller/Lincoln Big 40-SA200 hybrid
motox
  • Posts:
  • Joined:
    Thu Nov 28, 2013 12:49 pm
  • Location:
    Delaware

very impressive build
great job you just lifted the bar!
craig
htp invertig 221
syncrowave 250
miller 140 mig
hypertherm plasma
morse 14 metal devil
User avatar
  • Posts:
  • Joined:
    Sat Nov 29, 2014 6:30 pm
  • Location:
    Farmington, MN

Thanks guys, very kind of you!
User avatar
  • Posts:
  • Joined:
    Fri Apr 01, 2011 10:59 pm
  • Location:
    Australia; Victoria

A cold saw with coolant is a common animal here in Australia, but is pretty dear. Around 4or5 grand new. The main thing is they are barely limited to thickness of material. Except very thick solid materials. That is the domain of the power hacksaw or band saw.
User avatar
  • Posts:
  • Joined:
    Wed Jan 28, 2015 7:27 pm
  • Location:
    Portugal

Wow what an awesome project! Just one question, why didn't you use the ridgid saw?
Rick_H
  • Posts:
  • Joined:
    Sat Feb 08, 2014 1:50 pm
  • Location:
    PA/MD

Very nice build....I'm also a CAD junky, 22 years expierence in AutoCAD and Inventor. It will help you find those short comings before going to metal.

Again, top notch job!
I weld stainless, stainless and more stainless...Food Industry, sanitary process piping, vessels, whatever is needed, I like to make stuff.
ASME IX, AWS 17.1, D1.1
Instagram #RNHFAB
User avatar
  • Posts:
  • Joined:
    Sat Nov 29, 2014 6:30 pm
  • Location:
    Farmington, MN

DennisZ wrote:Wow what an awesome project! Just one question, why didn't you use the ridgid saw?
The rpm's are too high for the metal cutting blades I wanted to use.
1,800 rpm is the fastest you can go to use these.
Bobby Sixguns
  • Posts:
  • Joined:
    Mon Jan 05, 2015 9:48 pm

Very cool project.
culveres
  • Posts:
  • Joined:
    Mon Nov 10, 2014 8:04 pm
  • Location:
    Maryville TN

Does anyone have experience with the Evolution dry saws?
bryanwi
  • Posts:
  • Joined:
    Sun Dec 14, 2014 9:32 pm

I have a several years old evolution hand circular metal cutting saw (not a cutoff saw, more like skilsaw for metal)
It's OK, but would bog down on things like 1" aluminum plate.
I now have a steelmax version of the same idea - it can cut 1" aluminum plate reasonably well.
So I prefer the steelmax entries.
(But evolution may have changed.)
LWHiway
  • Posts:
  • Joined:
    Sun Mar 11, 2018 9:22 pm

Off site pic hosting like this kills a nice thread.

It's now totally useless.
Martyalot
  • Posts:
  • Joined:
    Tue May 08, 2018 11:13 pm

Yep, I’d love to see the pics, but apparently it’s a no go.
User avatar
  • Posts:
  • Joined:
    Sat Feb 17, 2018 10:10 pm
  • Location:
    Carberry, Manitoba, Canada

Martyalot wrote:Yep, I’d love to see the pics, but apparently it’s a no go.
Same here. Even just a couple pics to see what’s what would be nice I have no idea what the guys up top are seeing.
User avatar
  • Posts:
  • Joined:
    Sat Nov 29, 2014 6:30 pm
  • Location:
    Farmington, MN

All the pics of this project are back for all who want to see!
User avatar

Wolfgang wrote:All the pics of this project are back for all who want to see!
Thanks wolfgang! You certainly held nothing back on this project ;)
Richard
Website
User avatar
  • Posts:
  • Joined:
    Sun Nov 19, 2017 10:09 am

culveres wrote:Does anyone have experience with the Evolution dry saws?
I do. What's your question?
Lincoln MP 210, Lincoln Square Wave 200,
Everlast 210 EXT
Thermal Dynamics 25 Plasma cutter

" Anything that carries your livelihood wants to be welded so that Thor can’t break it."
CJ737
User avatar
  • Posts:
  • Joined:
    Sat Nov 29, 2014 6:30 pm
  • Location:
    Farmington, MN

I've cut a lot of tubing with this homemade setup over the last three and a half years, and I couldn't be happier!
It's still as accurate as it was the first day!
User avatar
  • Posts:
  • Joined:
    Wed Aug 21, 2019 5:43 pm
  • Location:
    Cape Cod, MA

Your work is fantastic. Also saw your Just another workbench build. Drool worthy work. Hope you post more builds.


Sent from my iPhone using Tapatalk
Learning is the best part of life and the most painful
User avatar
  • Posts:
  • Joined:
    Sat Nov 29, 2014 6:30 pm
  • Location:
    Farmington, MN

Radishfever wrote:Your work is fantastic. Also saw your Just another workbench build. Drool worthy work. Hope you post more builds.


Sent from my iPhone using Tapatalk
Thanks for your kind feedback! :)
User avatar
  • Posts:
  • Joined:
    Mon Dec 26, 2016 5:58 pm

Nice.
Post Reply