Hi All. This is my first post here so hi to you all and thanks for any advice you can give me.
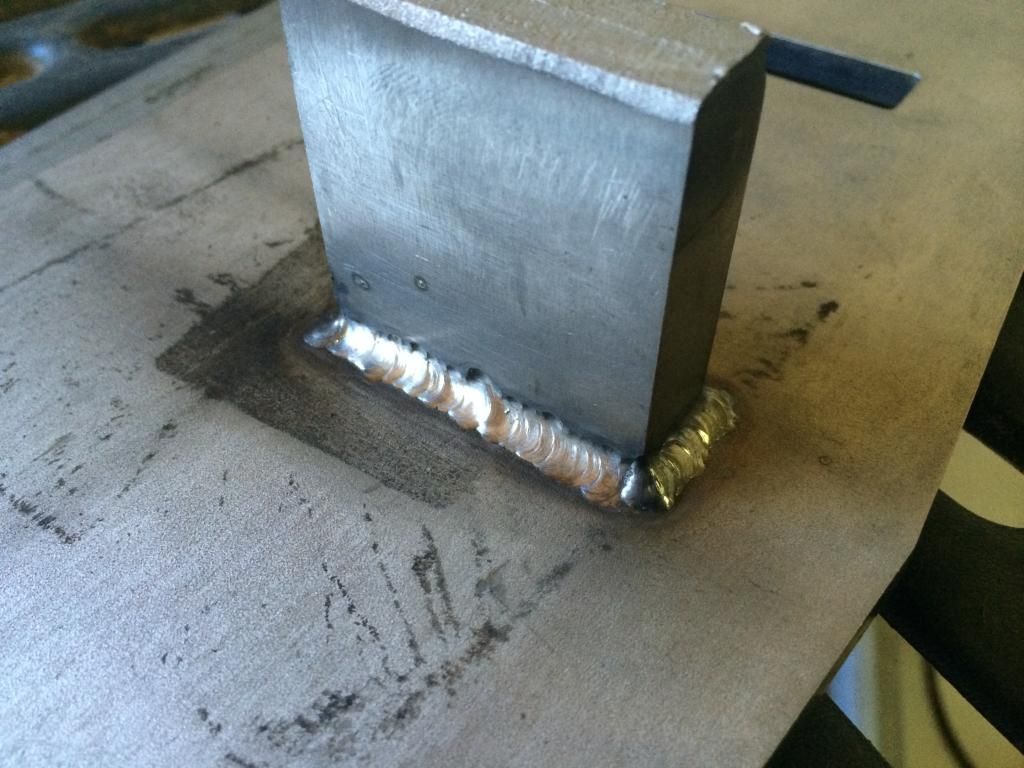
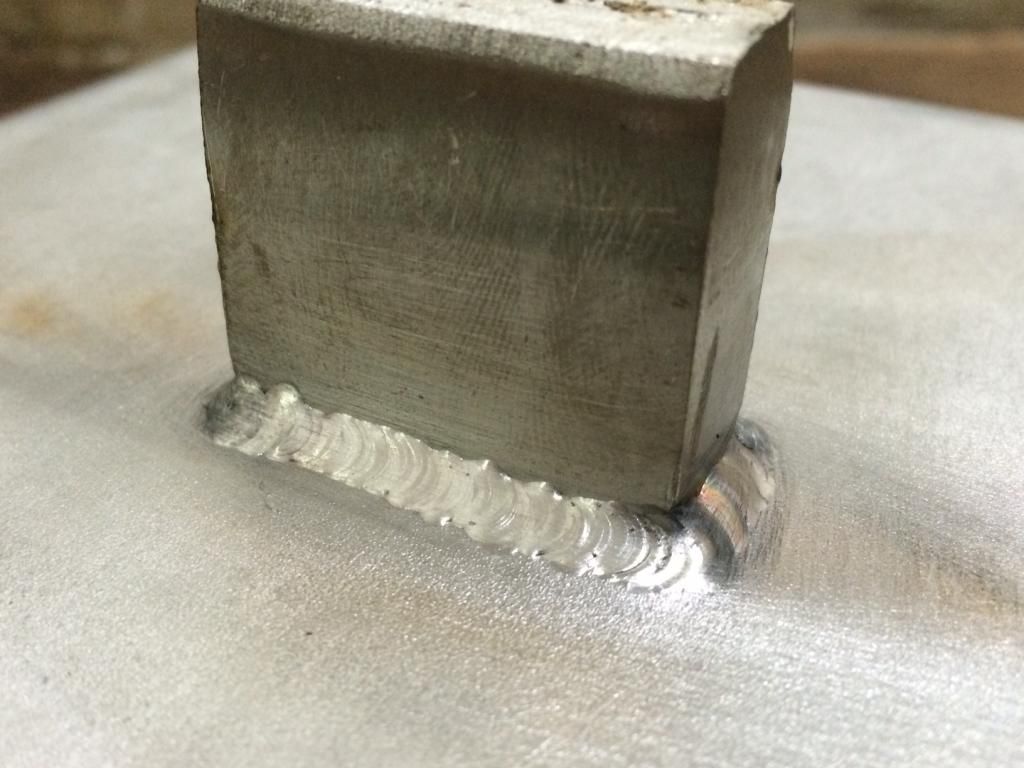
I am welding some 5/8" x 1.5" flat bar at right angles to a plate of 8" wide 5/16" thick stainless as per the pictures below (please ignore the undercut in the test piece). I have done a few test welds with different amps and weld paths but even with clamping a 1" thick alloy backing plate and letting the job air cool I am still getting distortion in the 5/16" plate. I realize that the position of the weld on the plate is always going to be problematic but because the underside will be mirror polished any distortion stands out terribly. The actual bar I will be welding will be wing shaped rather than rectangular but I cannot see that making too much difference to the distortion
I have thought of welding in smaller runs, letting it cool then do the next weld rather than get in , get out technique I am currently using.
If any of you could you offer me some suggestions in reducing the distortion that would be great.
First off, stainless always pulls like a mother, always. Its because of the low thermal conductivity. A good way of fighting distortion, is to "pre-set' the part that is distorting. This means finding out how much the part moves and pre bending it the opposite way before hand, so when it bends from heat, it ends up closer to where you want it. Also, if you have more than 1 to build, tack them together back to back, so that they pull against each other, maybe with a bit of tig wire in between to add some preset. PS with the ss, youll need decent tacks or it will just break.
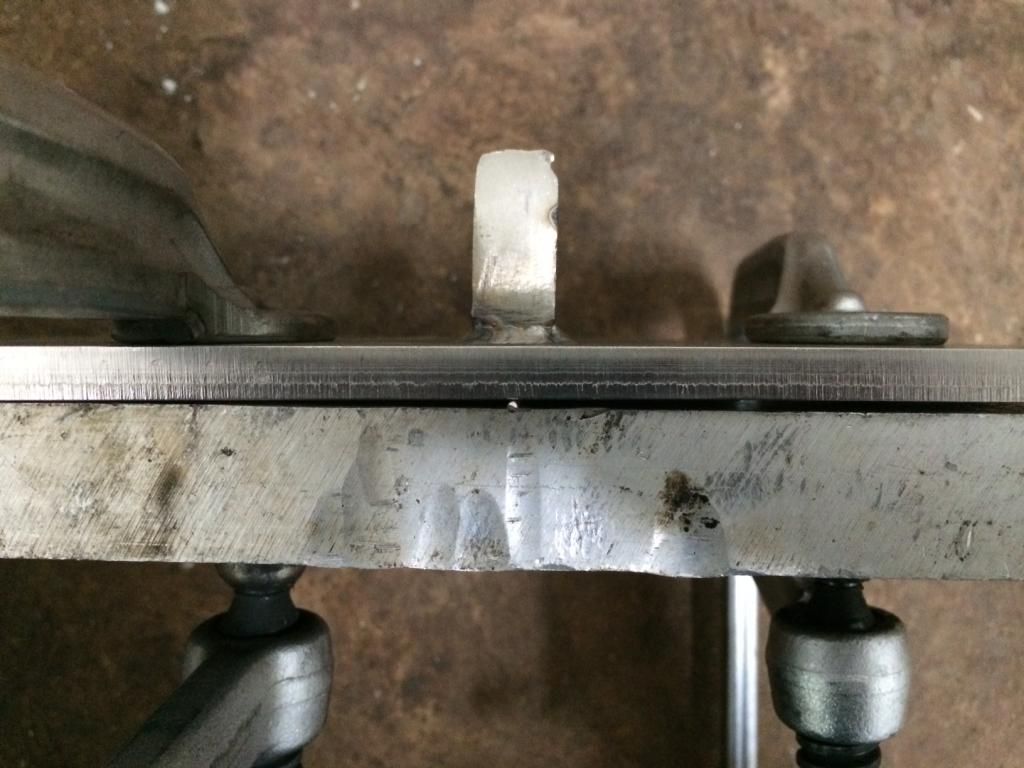
Thanks Mick. I pre-stressed the job using some 1.6mm wire underneath the weld zone and clamping either side. Hit it with 170 amps, let it air cool and it came out pretty much dead flat in all directions.
I use the same method all the time....amazing what just a little back bend will do.
I weld stainless, stainless and more stainless...Food Industry, sanitary process piping, vessels, whatever is needed, I like to make stuff.
ASME IX, AWS 17.1, D1.1
Instagram #RNHFAB
At what stage do you take out the wire? I guess seeing as you have to unclamp only when it's all room temperature again?
I mildly warped some 10mm mild steel plate doing something similar on the weekend even though I was careful, slow, stepping around and clamped it hard to some straight heavy square tube. I was thinking about the wire trick beforehand but didn't use it but still after cooling I got enough warping to annoy me.
Hey mate. Yep wait till room temp, or possible a little hotter but not too much. The way distortion works is that it expands as it is hot, the as it cools and then goes past where it started, hence the warp.
Legion wrote:At what stage do you take out the wire? I guess seeing as you have to unclamp only when it's all room temperature again?
I mildly warped some 10mm mild steel plate doing something similar on the weekend even though I was careful, slow, stepping around and clamped it hard to some straight heavy square tube. I was thinking about the wire trick beforehand but didn't use it but still after cooling I got enough warping to annoy me.
Yep, leave the wire in until it has cooled. I was shocked at how much warping I got clamping to 1" thick alloy plate as a heat sink. Stainless doese love to pull
That was an awesome video! I love how the progression of technologies have changed so vastly that stick welding is pretty much done in field environments and occasionally on high strength parts.
I worked in a shop building food grade augers and it was amazing how twisted they would get and with dial indicators and using our friend shrink you could easily bring them back to true.