Your cup is a limiting factor. I would not weld stainless with less than a #8 and only that small if it were out of position piping. For flat, lap, or tubing a #10-#12 all day long with a quality gas lens.
92 amps is high heat unless your travel speed is fast enough. Hard to do for new welders. Also filler could drop in size. I tend to use 70-75% of the 1amp/0.000 formula with stainless. If the material is 0.090 I’d run 70 amps, maybe 75 with filler. I also tend to run filler 1/2 the diameter max for tubing.
If you want to practice stainless, practice good habits. LET IT COOL. You can not make good decisions from bad choices.
When fusion welding(no filer) try and keep the speed even and tungsten centered directing heat on only at the weld joint. With the right technique and heat you should have smooth rainbow weld. Start small try only welding as far as your wrist allows ~25mm or so. You should try welding a "T" by tacking the bottom with a second piece in the middle at a 90. Try both fusion and with filler. This will give You a feel for how it acts and can pull toward the weld side.
Has the term "fusion welding" been redefined? I have noticed several people (no shots being fired) and some WEB sites call fusion welding without a filler "fusion welding". Fusion welding was always defined as (roughly) joining by melting parts together - whether or not a filler was used. Examples of fusion welding are ARC (Stick) and MIG. An example on non-fusion welding is brazing.
Some welding organisations (eg AWS) define autogenous welding as fusion welding without a filler.
Thanks
Jack
Brazing adds solder. I have fusion welded brass to brass. It may be just me, but when I was taught 30+ years ago in TIG welding, not adding any material to a joint and joining two pieces using just the arc of the torch was referred to as fusion welding.
Got Lumens? wrote:
Brazing adds solder. I have fusion welded brass to brass.
Brazing does not melt the base metal, that is why it is not fusion welding. Only the filler metal (not generally called solder) melts.
It may be just me, but when I was taught 30+ years ago in TIG welding, not adding any material to a joint and joining two pieces using just the arc of the torch was referred to as fusion welding.
It is fusion welding but it is still fusion welding if filler is added.
cj737 wrote:Your cup is a limiting factor. I would not weld stainless with less than a #8 and only that small if it were out of position piping. For flat, lap, or tubing a #10-#12 all day long with a quality gas lens.
92 amps is high heat unless your travel speed is fast enough. Hard to do for new welders. Also filler could drop in size. I tend to use 70-75% of the 1amp/0.000 formula with stainless. If the material is 0.090 I’d run 70 amps, maybe 75 with filler. I also tend to run filler 1/2 the diameter max for tubing.
If you want to practice stainless, practice good habits. LET IT COOL. You can not make good decisions from bad choices.
*like*
Years and years ago when I was building/customizing long-tube headers, I dabbled with stainless but at the time it was too time-consuming, and the overall difficulty level was more than I wanted to invest. I ended up with mild steel, but regardless, those items mentioned are a MUST
#12 or larger, #16-#18 preferable
0.7A per 0.001" material thickness is about all you need (maximum set at the machine can be higher, but it needs to be modulated by the footpedal.
2mm is roughly 0.080", so filler diameter should be no larger than 1.2mm (0.045")
Heat MUST be allowed to dissipate/extracted, whether by letting itself cool on it's own, or actively wicking the heat out through other means, such as additional aluminum/copper mass/chill-bars. There is no escaping this!
oh, and stop weaving the dang torch around like a drunk driver! Get the basics down first, then you can try for the "instagram" money shots.
There is no harm in practicing on stainless. Just do your best to incorporate some good habits and equipment changes until you have other material also.
I like welding stainless. It’s tricky, but is damn pretty if done right.
It is really important to be physically comfortable if at all possible. Do not let your arms support your body weight. Your hands should hold the torch very lightly and use your arm to move the torch, not your fingers or hand. Always take a few practice strokes to move the torch along your weld path to insure you are free, comfy, and no obstructions.
And breathe!!! If you are gripping the torch, you'll shake. If you are holding your breath, you'll shake after a few seconds. If you are trying to push the torch with your fingers, you'll shake. Relax, there's no life or death involved here. Turn on some music and just find a rhythm. This will take hours to get competent so you might as well enjoy the journey
I’m fairly new as well, and I’m trying to learn not to prop with my wrist stationary (easier but limits range and can curve off at the end) but set up so that I can slide along parallel to the weld. It’s not easy... Best advice I’ve gotten is to have a bunch of drops available to prop/slide on. I have pieces of cold rolled round and square tubing pieces, and will plop then down on the table in front of, and parallel to, the weld. The edge of the table will sometimes be fine, but I’ve found that I can get my hands into a more comfortable position by using something matching the height I need, and that I can position at any angle. Cold-rolled because smooth is better, and I’ve buffed some of the pieces so they will slide even easier.
I’m sure others with more experience can add more tips about positioning aids than me,
i want to learn tig welding for my header project(subaru boxer engine) .
my settings is,
16l/min argon : IF YOU ARE SO REACH THEN YES BUT NORMAL IS 12L/M
1.6mm tungsten(gray) FOR LEARNING IS BETTER 2.4 MORE STABLE AND WILL NOT BEND IF YOU DO SOMETHING WRONG
2mm electrode(308l) YOU MEAN ROD 308 OR 309 ARE FOR WELDING METAL WITH SS TOGETHER STANDARD ROD IS 304 OR 316 , FOR LERNING 2MM IS OK BUT NOT FOR WELDING IF PLATE IS 2MM THEN 1 - 1.6MM RODE
number 7 cup FOR LEARNIG USE CUP 6 AND DO 12L/MIN
and 92A for 2mm 304 stainless 92AMPS FOR 2MM IS TO MUCH FOR LEARNING , THAT MEANS MORE AMPS THEN FASTER YOU NEED TO RUN .. SO YOU NEED FIRST TECHNIQUE AND THEN SPEED UP , USE ALUMIUM BELOW IF YOU WANT TO RUN 92 I WILL DO 65 - 70 AMPS
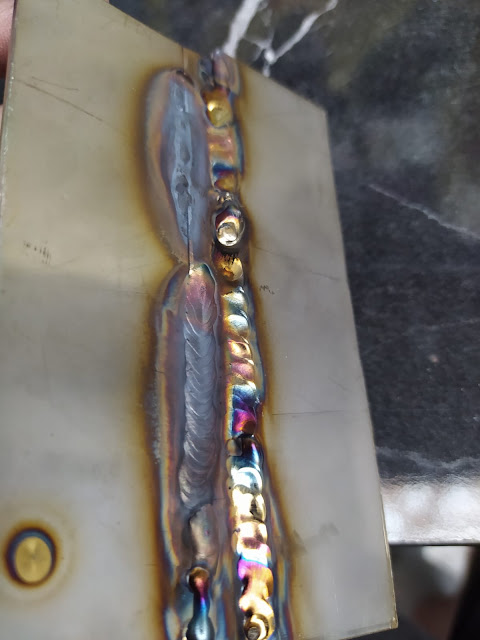
some welds are very bad i know, i want to practice so, i didn't wait cooling or cleaning etc.
DONT WORRY YOU DOING GREAT JUST NEED MORE PRACTICE AND TRY TO FOLLOW WHAT I SAID ABOVE
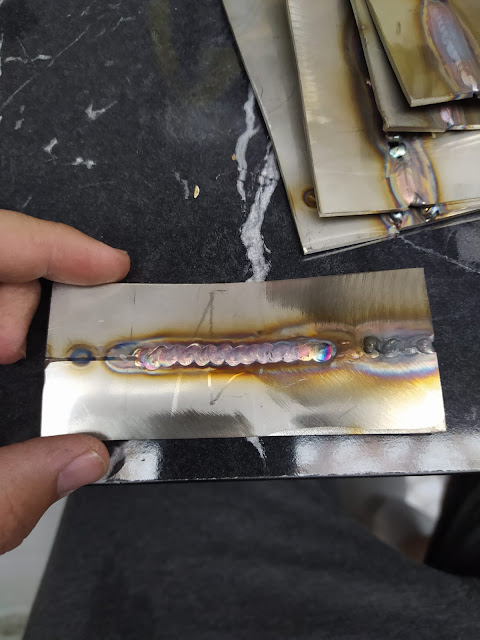
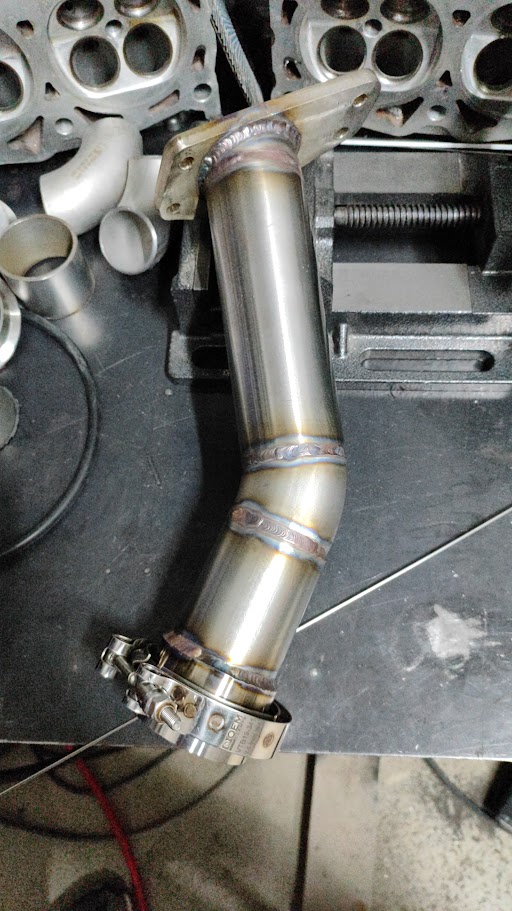
some welds are without filler and i didn't make bevel my main concern is stainless pipe welding(304l now)
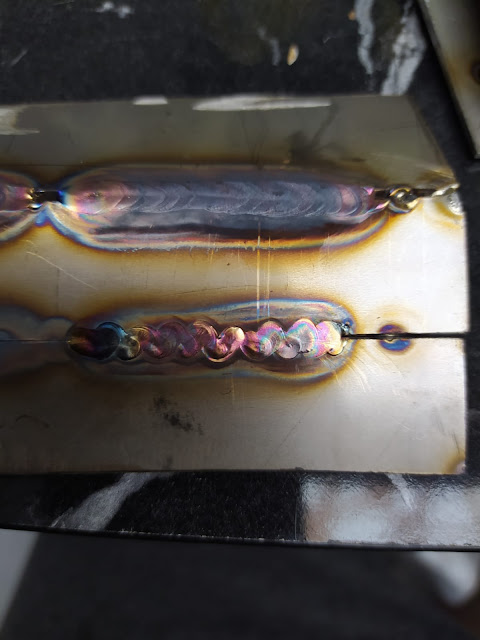
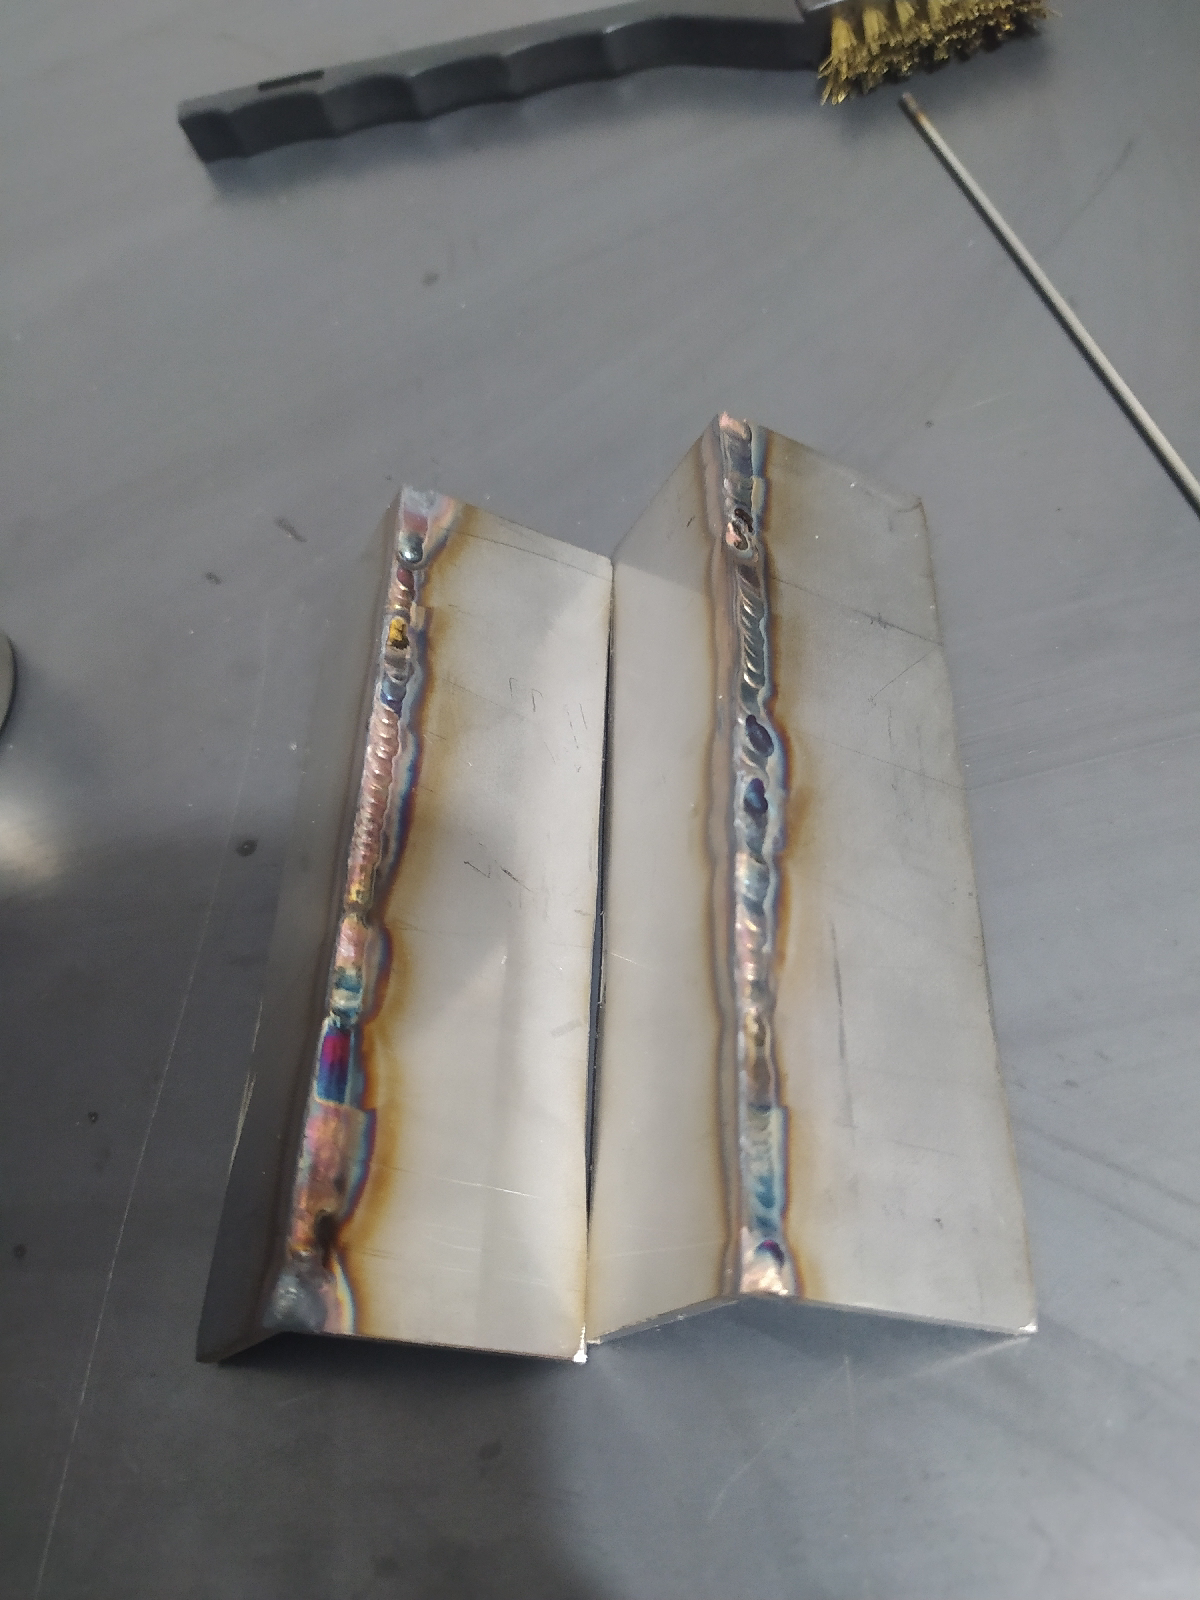
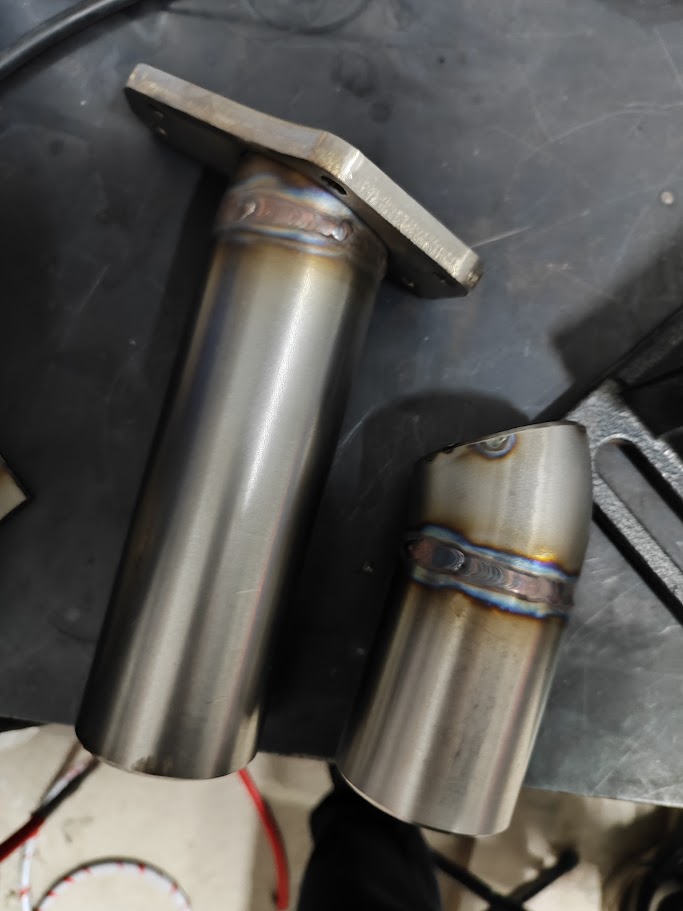
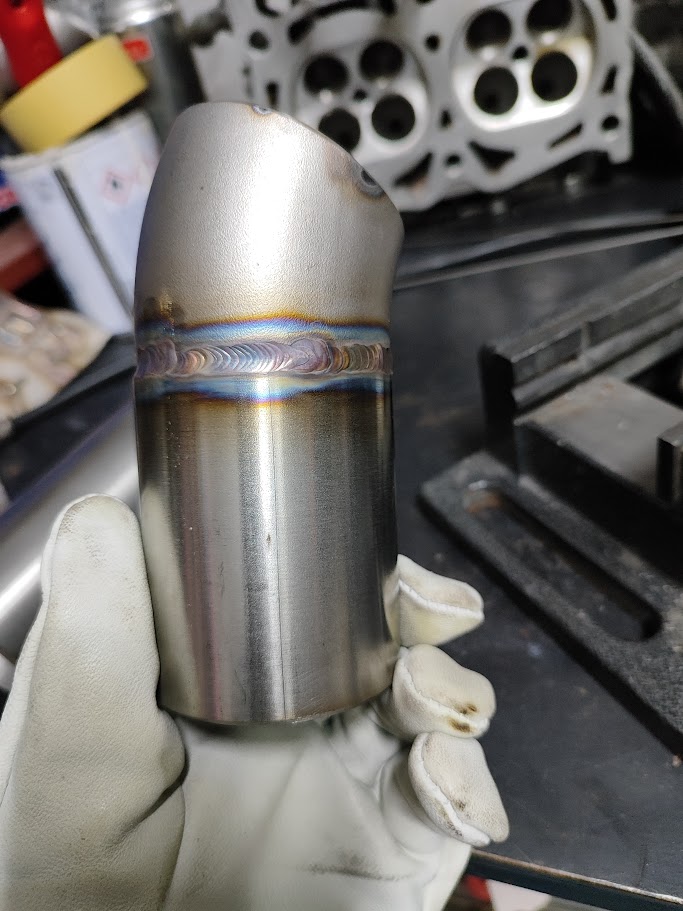
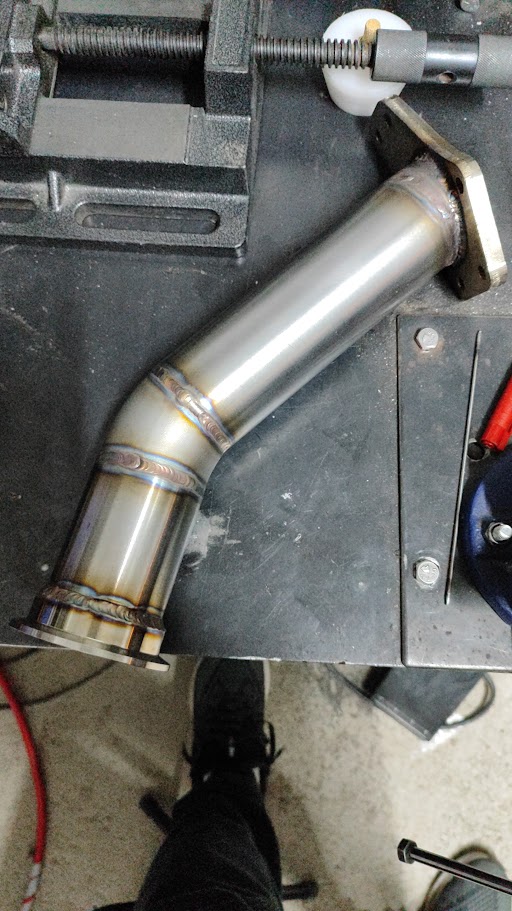
Looks much better, congrats.
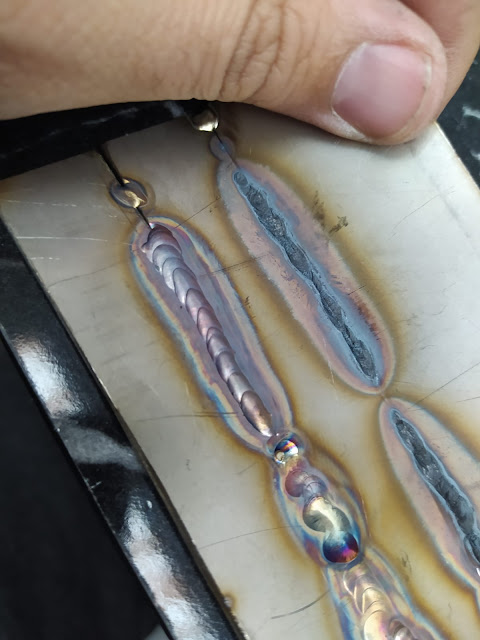
The fusion welds can be colorful.
When needing to add rod, it will
most likely blacken the weld, and
need polishing if necessary.
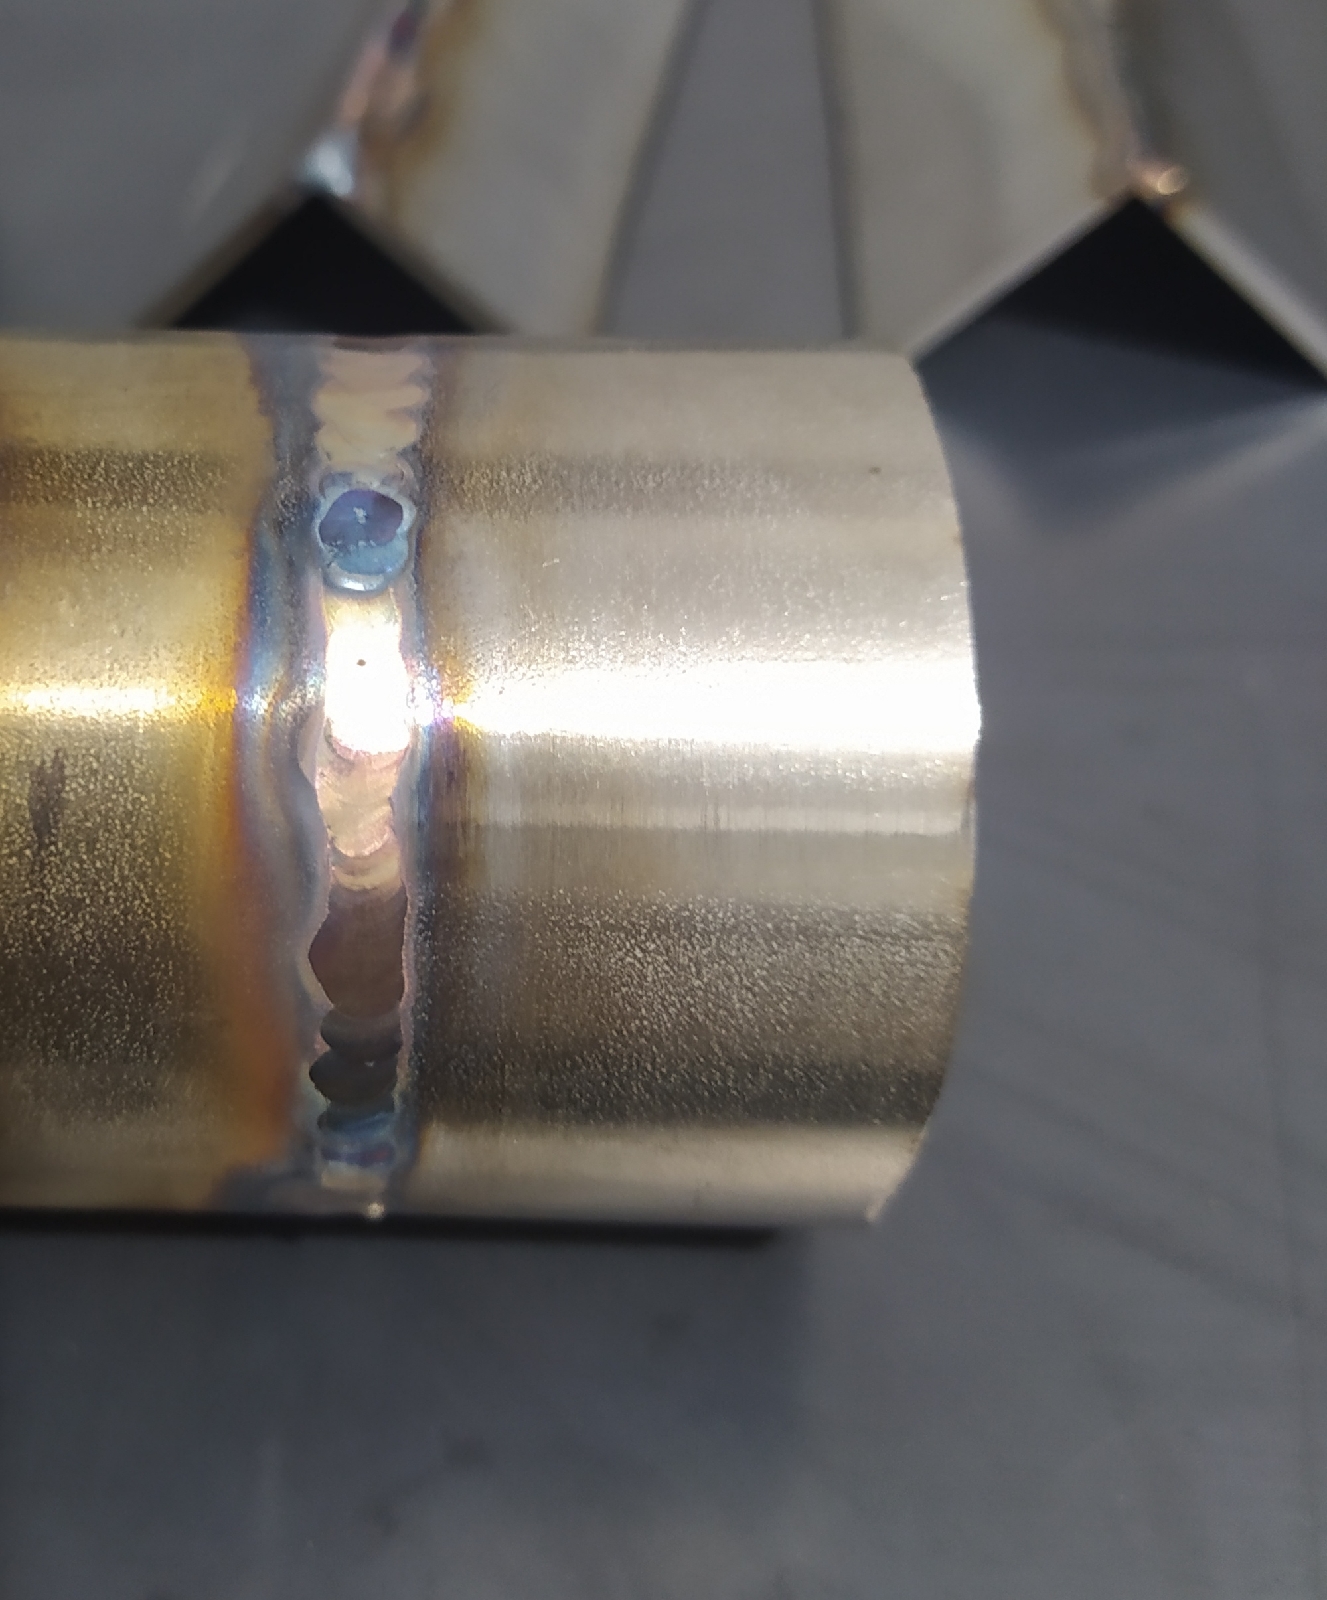
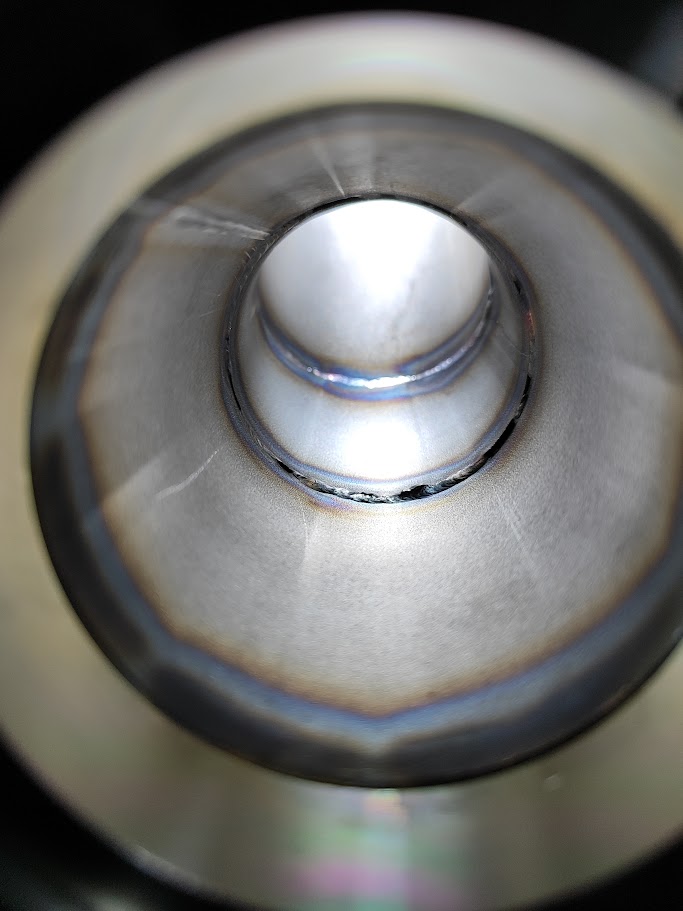
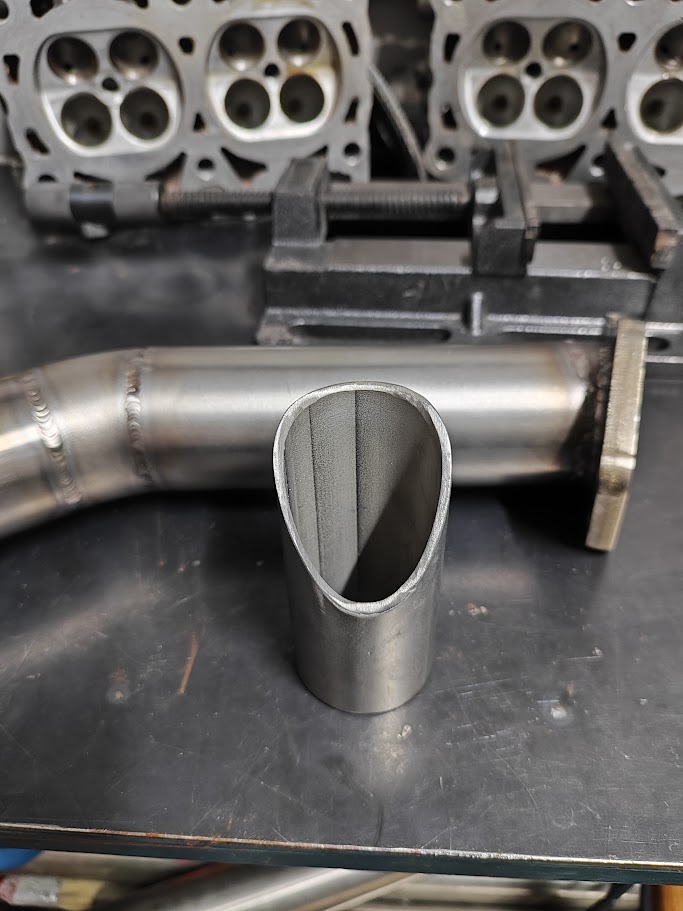
first welds with no gap and no bevel(just i want to try) and i did not do full penetration(I welded it with variable amperage so I could experiment, between 75-100amps)
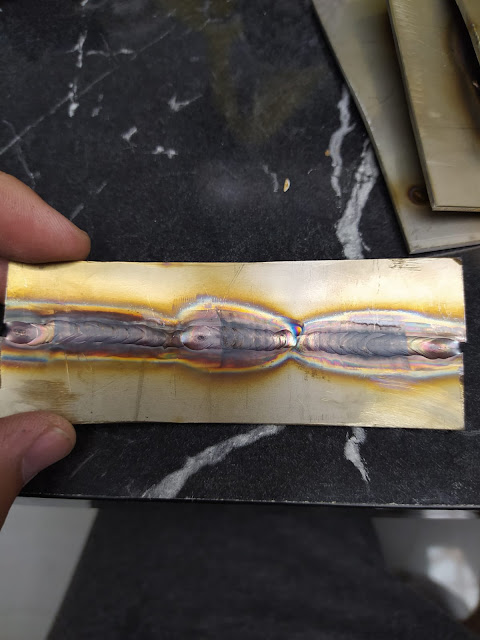
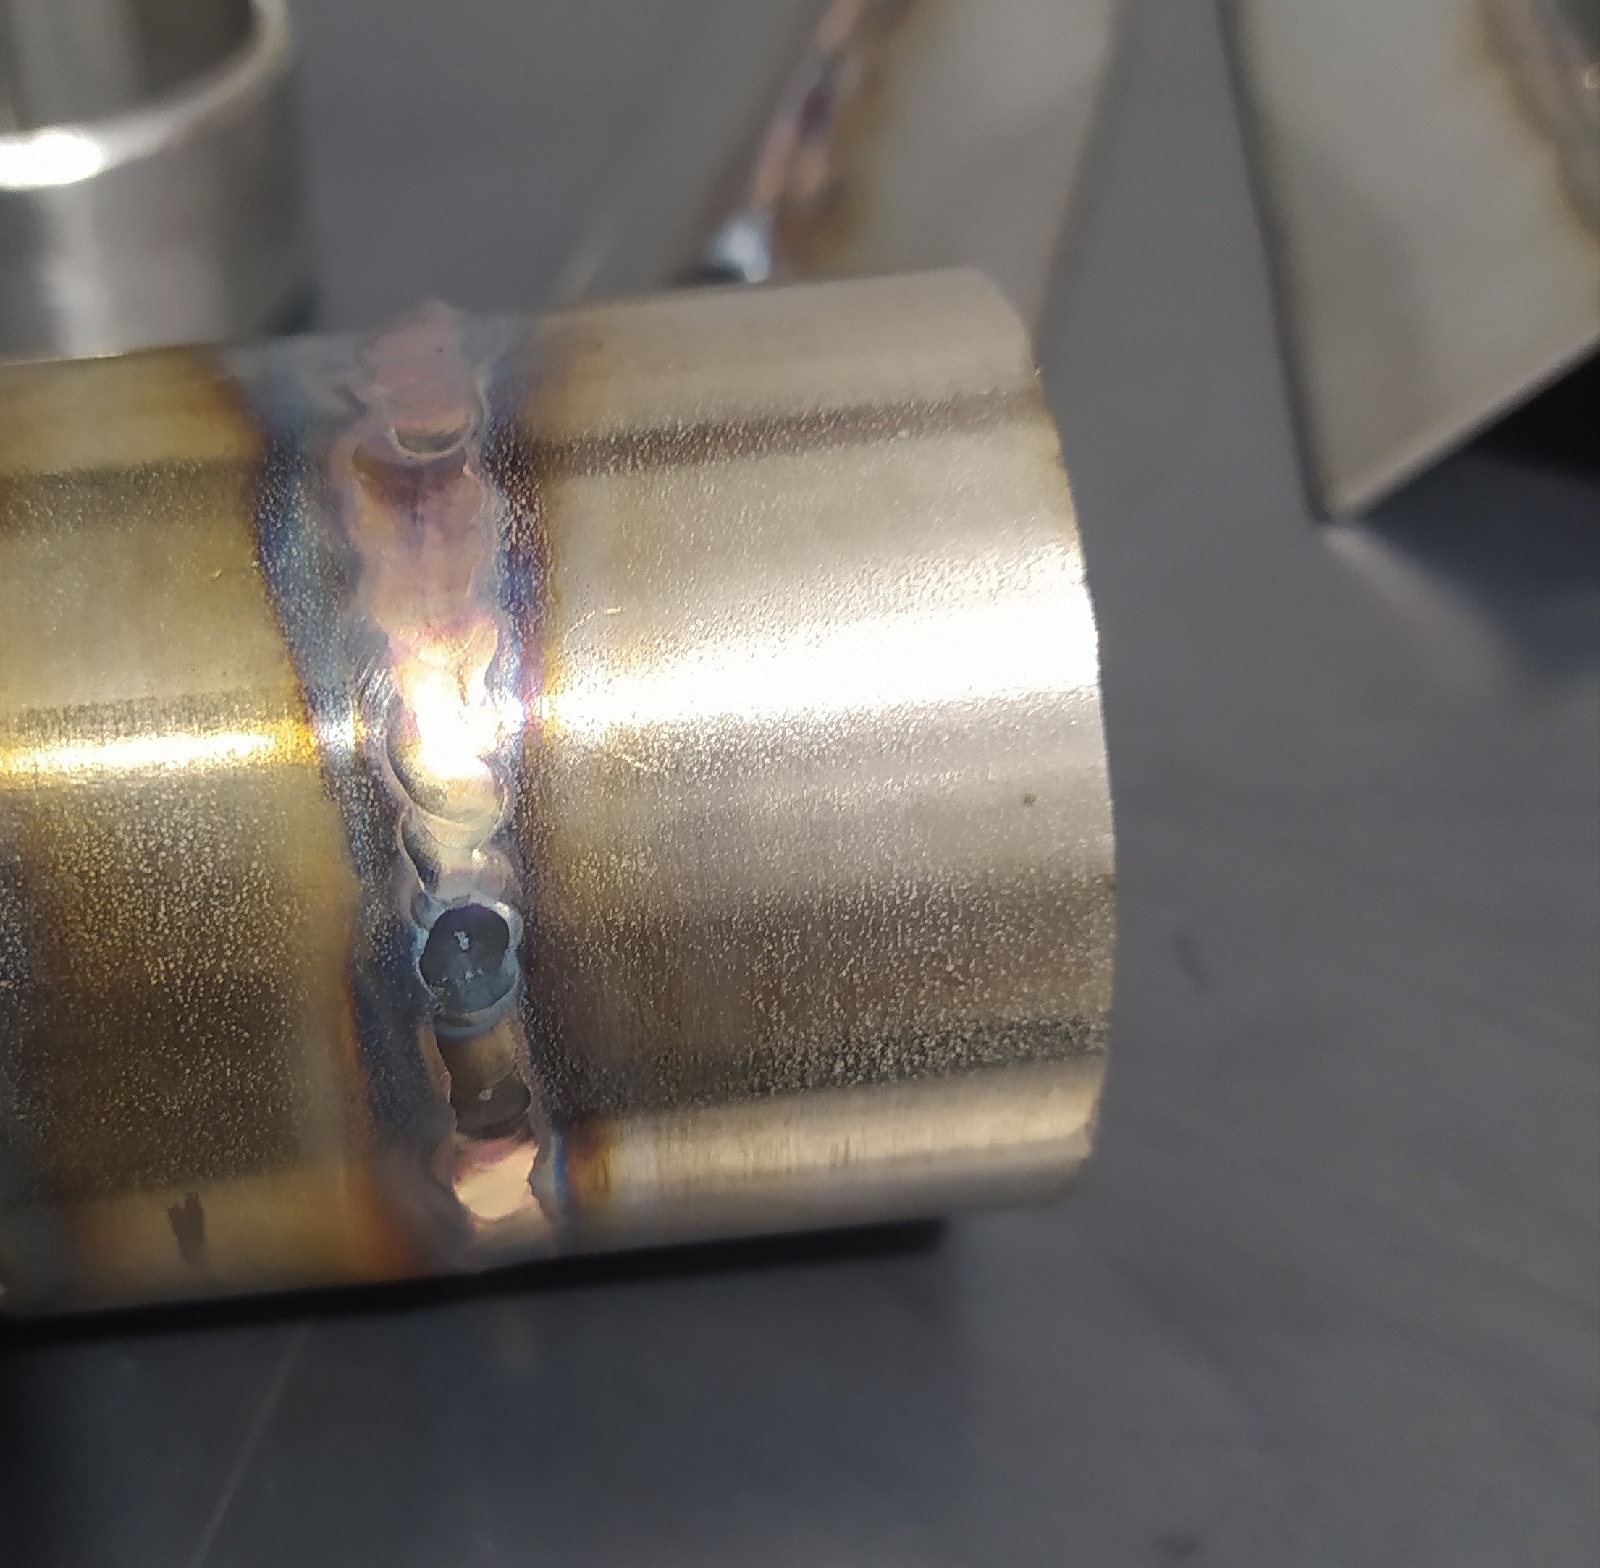
than i welded with gap(about 0,024"(0,6mm)) and no bevel (about 90 amps, 8cfh purge)
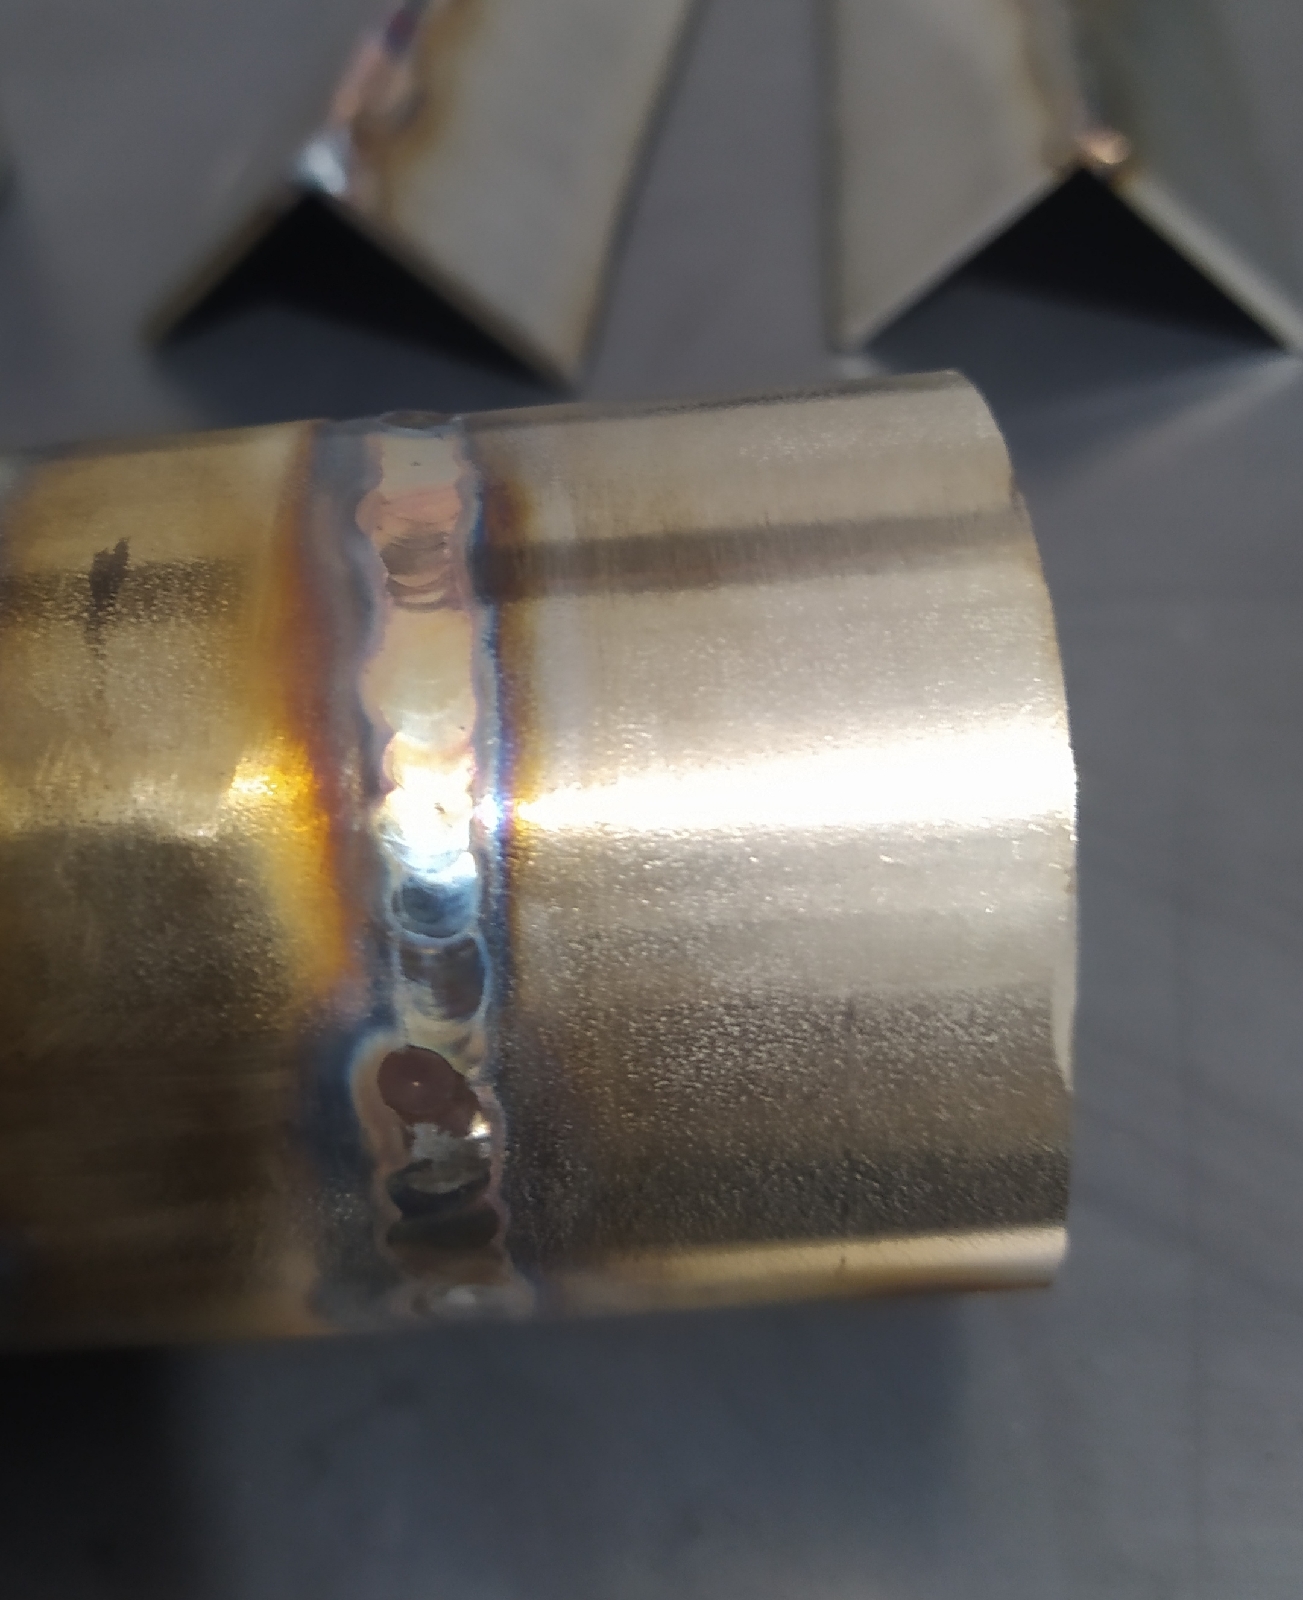
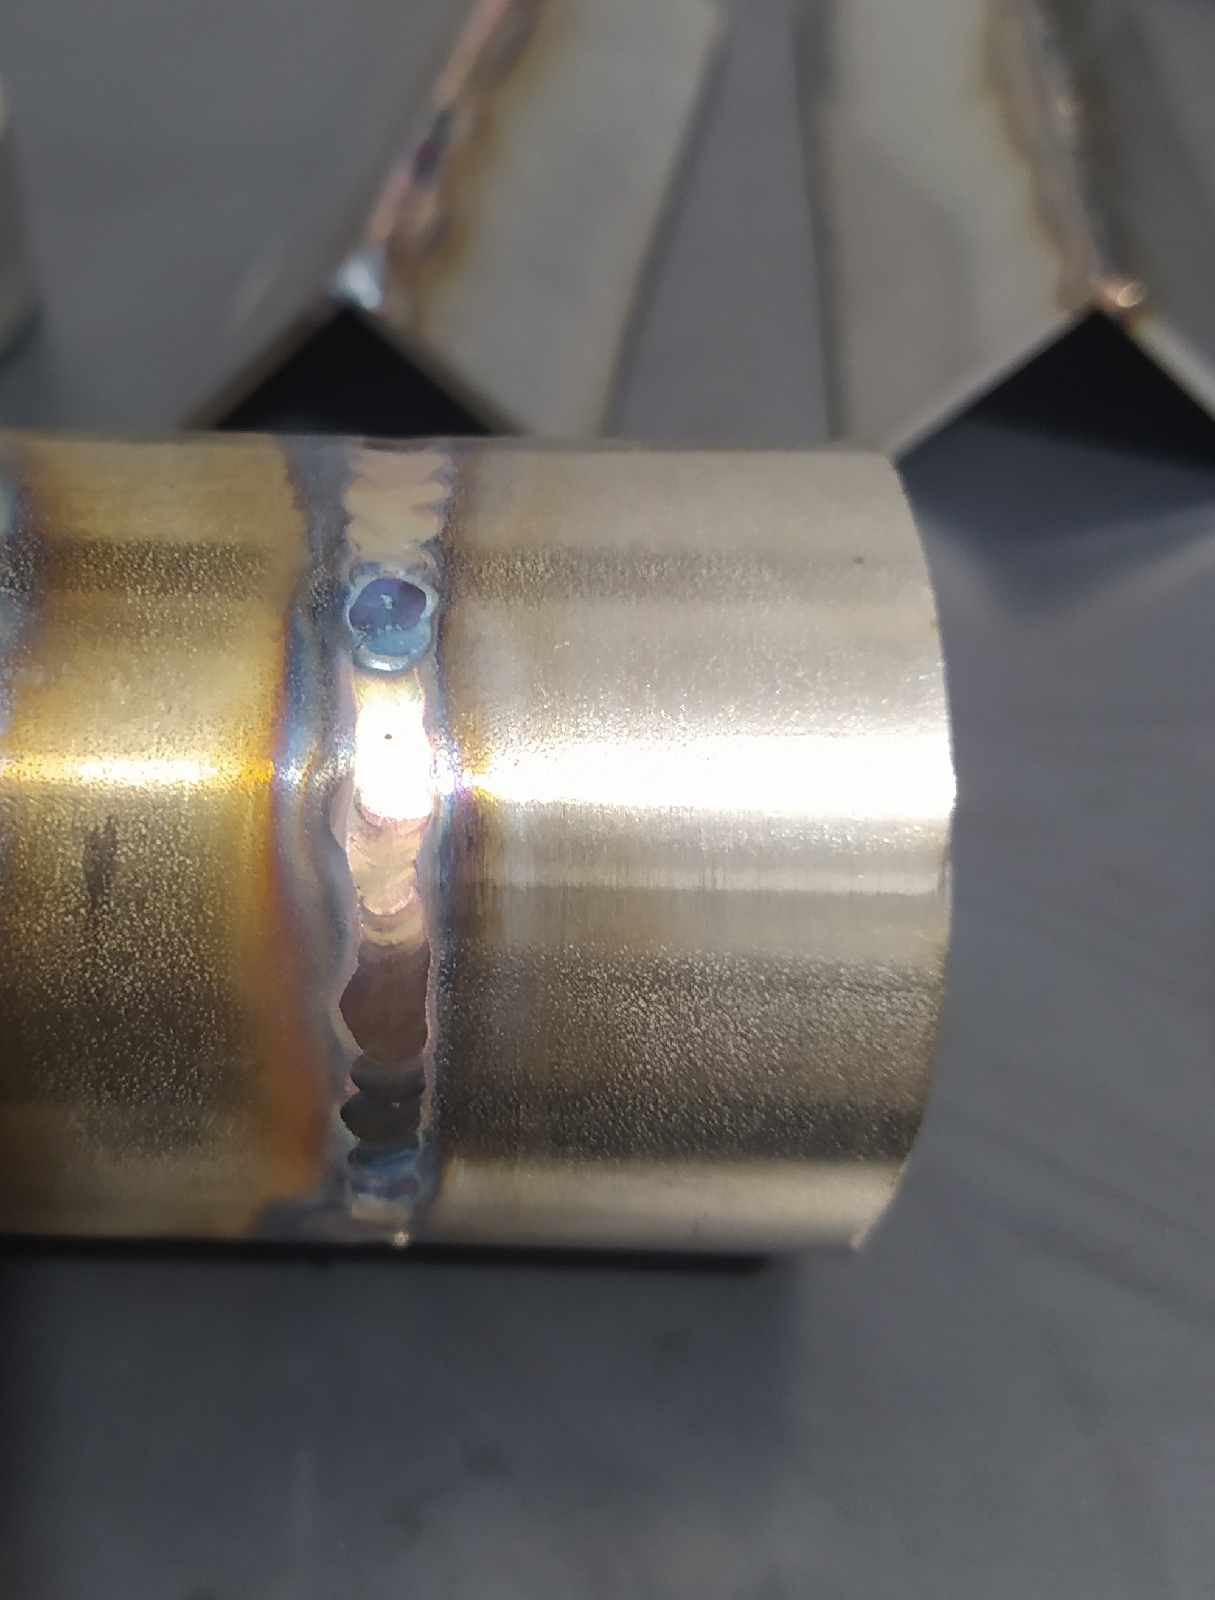
I did the welding on the outside for the first time without the purge for testing purposes, please ignore it.
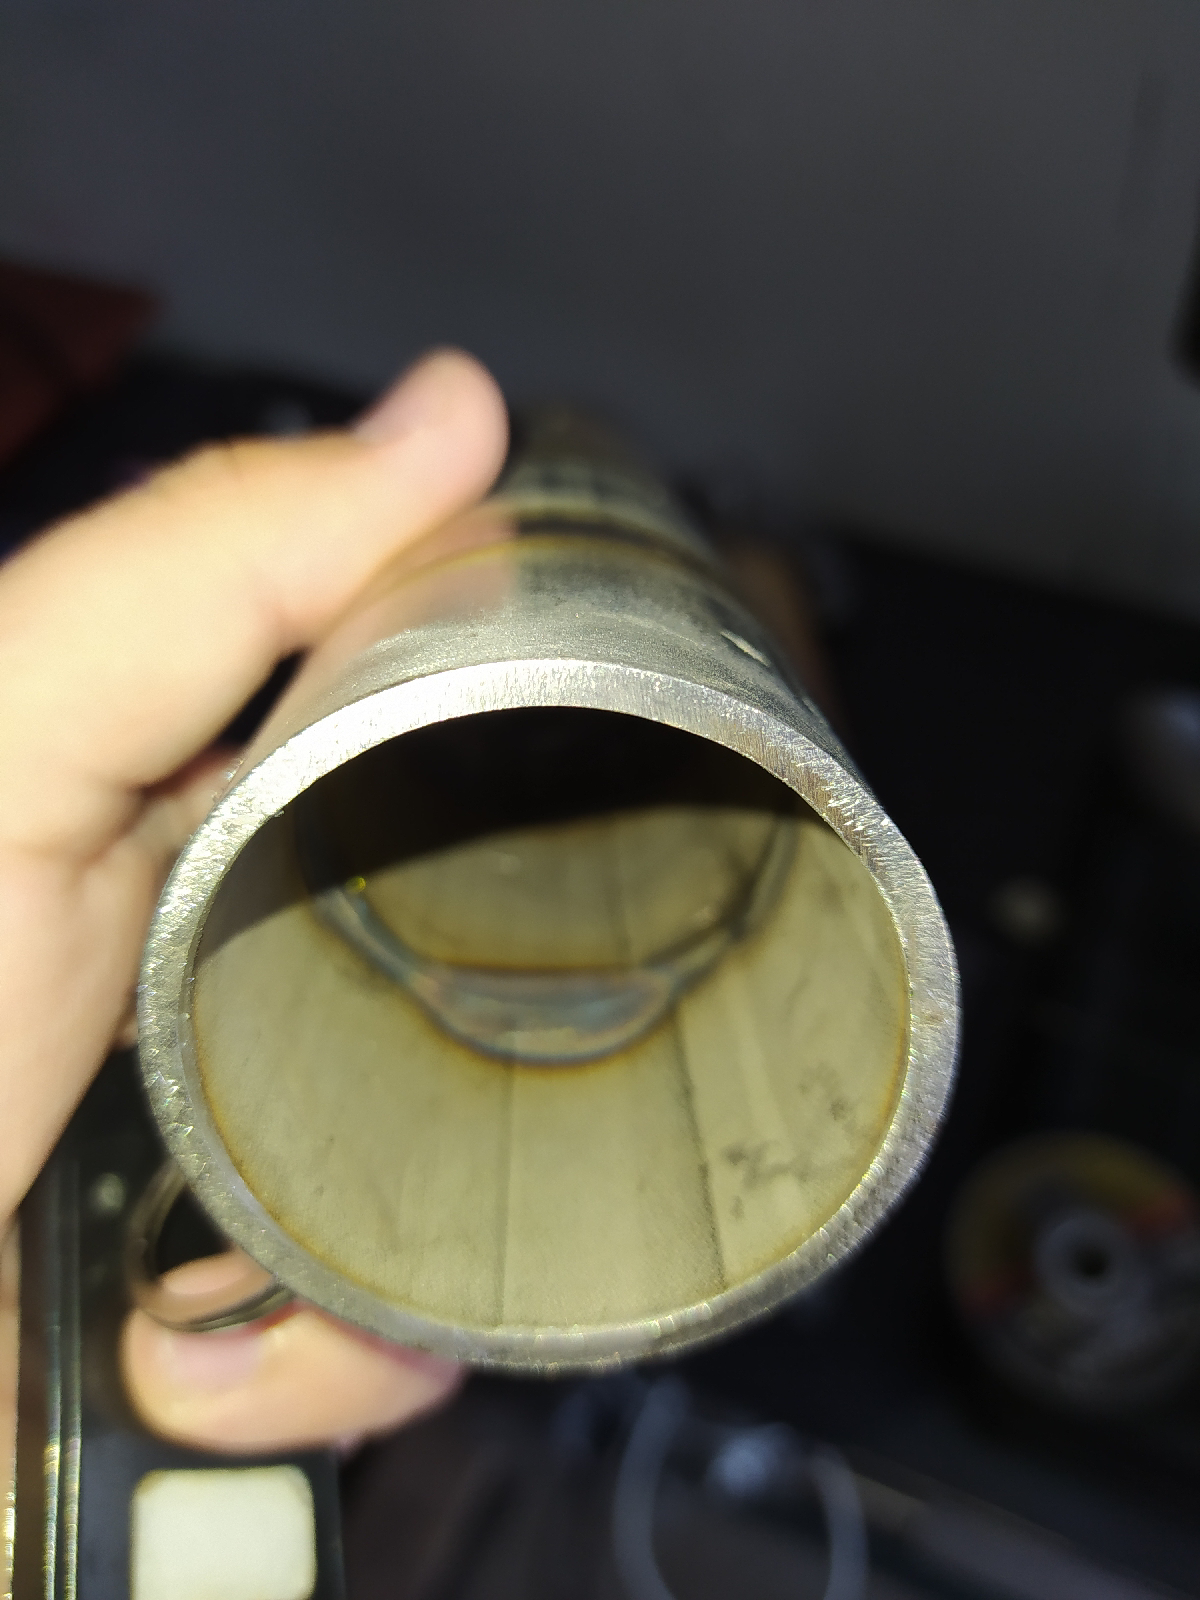
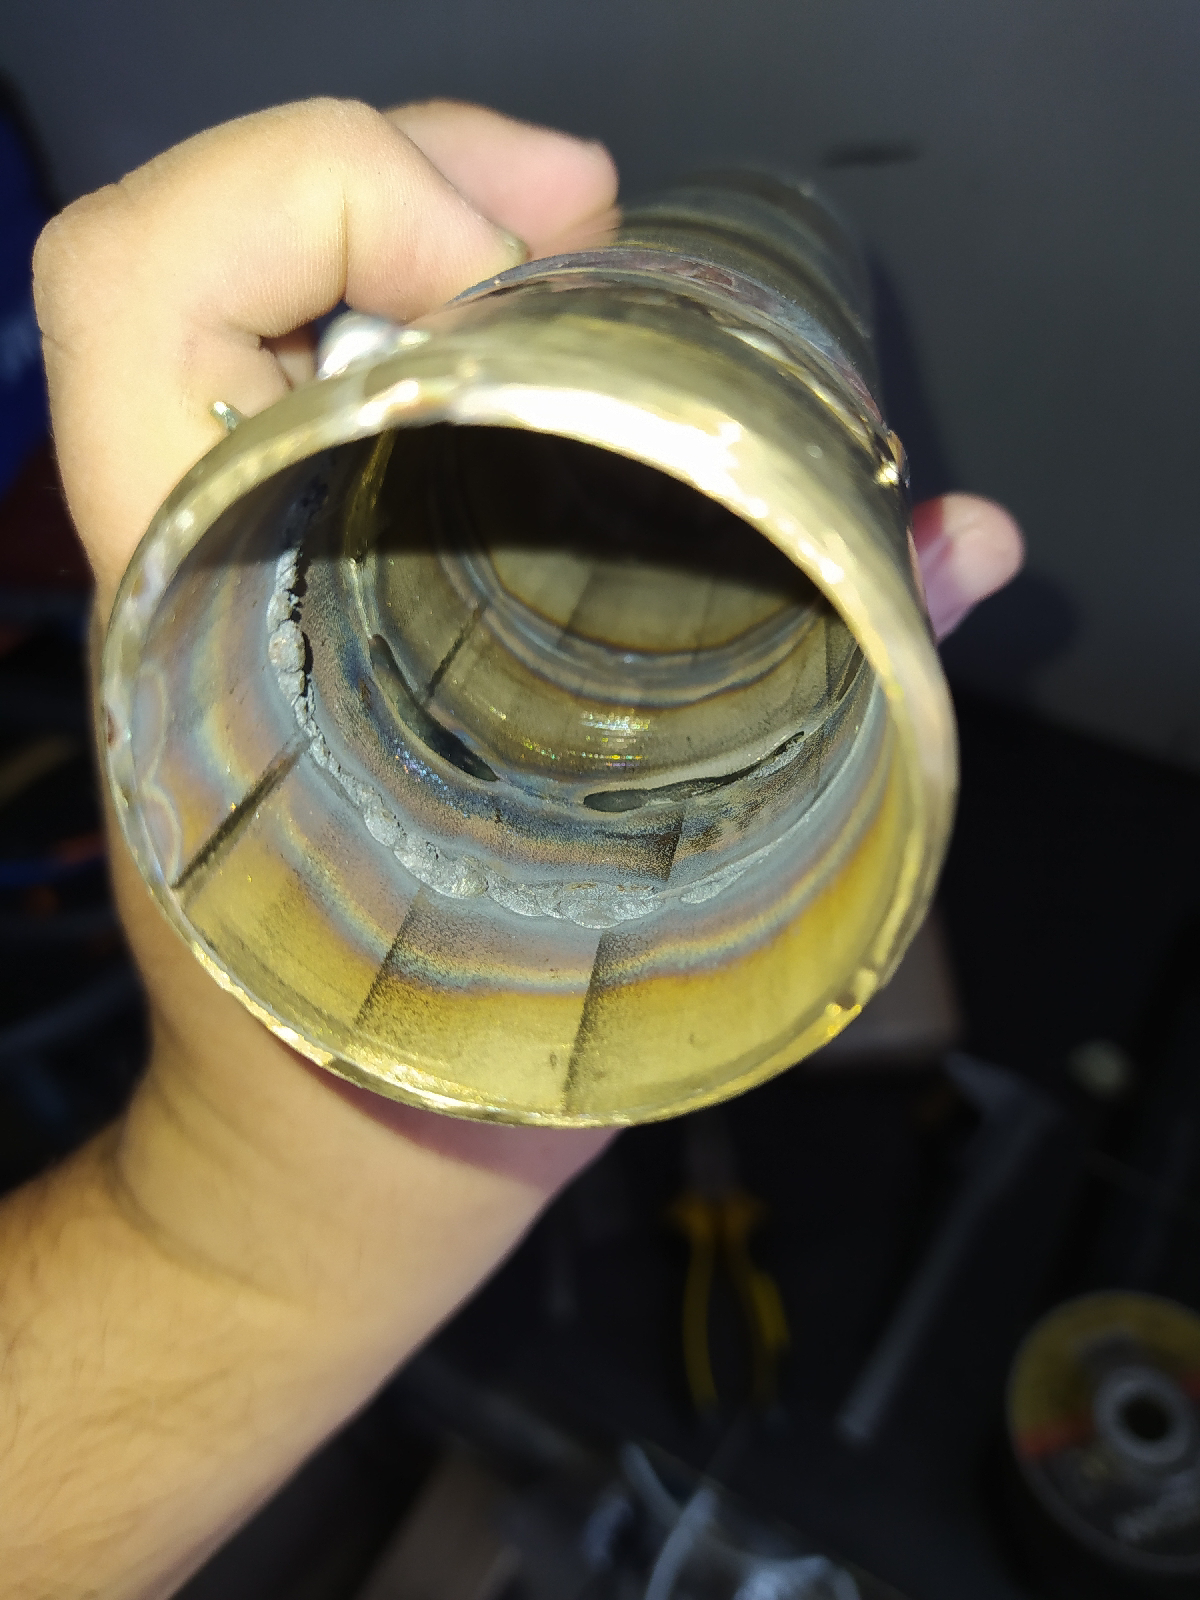
I think I couldn't adjust the gap very well, but thanks to the purge inside, I was able to catch the proper penetration, even if it was partial(i saw gold/colorless color inside)
The gapped and purged weld looks great. When you have a gap, tack in several places. Then expect the gap to close during welding due to material expansion, especially stainless. If you stay with Sch10 piping, you may need to increase the gap and filler, 1/16 for gap, 3/32 for filler. This may change your amperage requirements too.
Don’t do a second pass. If the weld is fully penetrated through to the inside, you’re perfectly fine for strength. Stainless welds are very, very strong. I have made lots of stainless headers, mid-pipes, even welded up the exhaust manifolds and up/Y pipe on my diesel and never used filler. They are still going strong after 9 years. But, all of this welding was done with a complete, careful purge.
That has to be your rule: internal purge and full penetration for exhausts.
Realize that stainless won’t corrode like carbon steel, but it also will crack due to thousands of heat cycles if not welded properly. Carbon steel exhausts don’t have this cracking tendency but they corrode. Trade offs for both materials. The welding procedure becomes your decision criteria: if you’re willing to do it properly, stainless is the advantage.
Lastly, I think you could reduce the wall thickness a LOT for that pipe. For an up pipe, 0.063 is more than adequate. Headers and mid-pipes I use 321 stainless and 0.053-0.039 depending upon the vehicle.