
Found out the TIG machine I'll be using at school is a Miller Dynasty 400.
Looks way more complicated to set up vs my Lincoln Precision 225 (which I have also never used).
When I get started in a couple of weeks, maybe you guys could help me out with the settings.
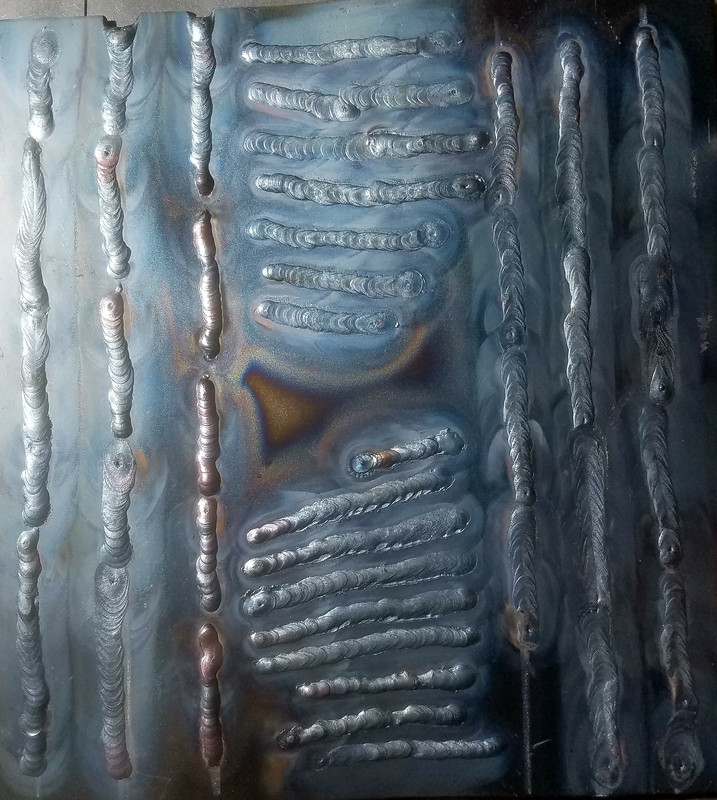
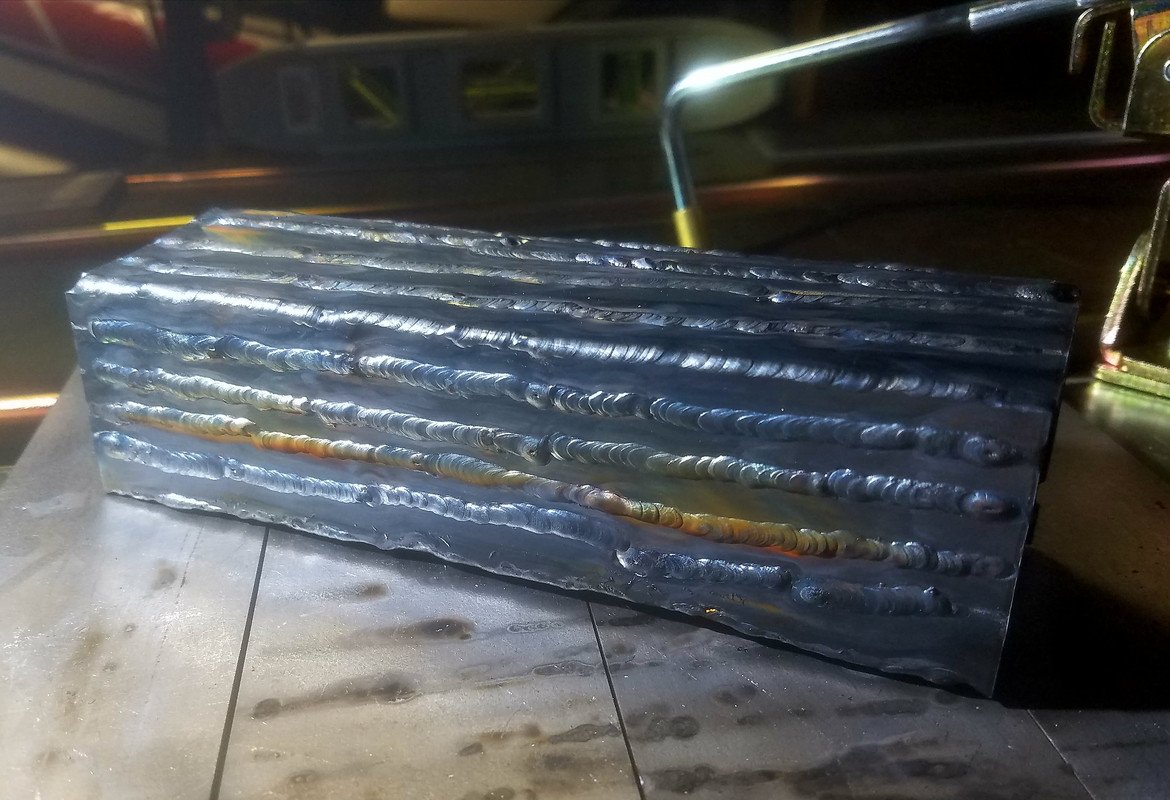
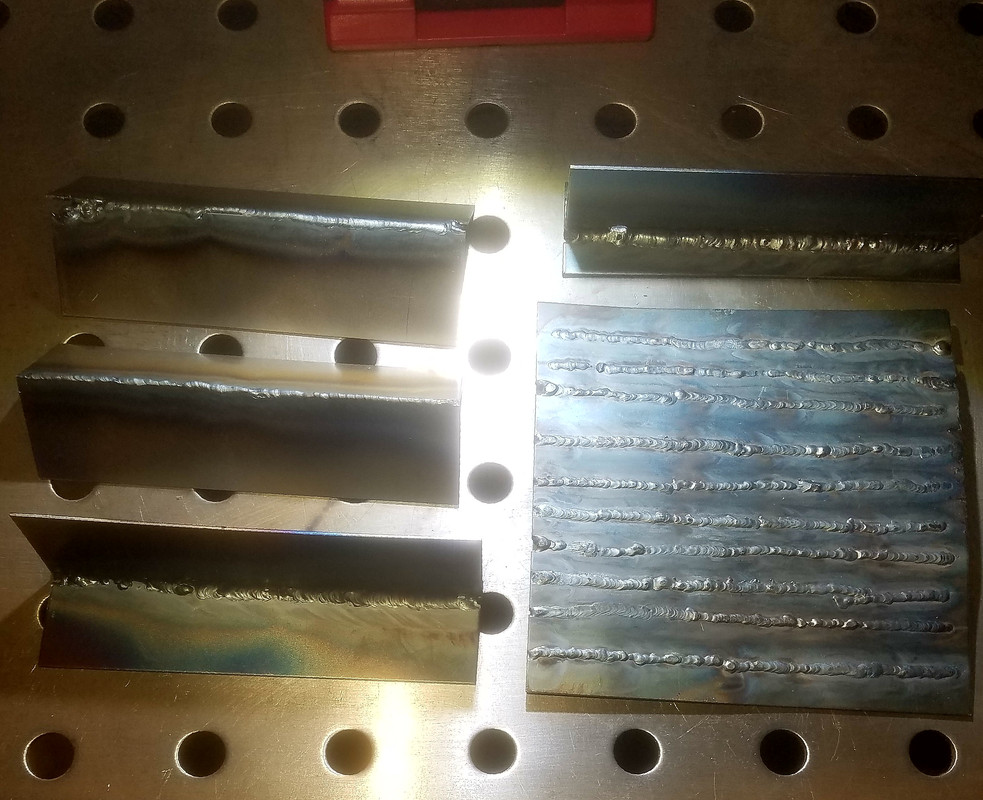
I'm doing okay in the O/A class. Last night, I couldn't do a fillet weld to save my life. Layed down some really nice dimestacks on flat sheet, though.
Tig welding tips, questions, equipment, applications, instructions, techniques, tig welding machines, troubleshooting tig welding process

Dynasty is very simple if you want it to be. (Ignore everything other than basic knobs)
Can also be really complex if you want it to be. (Submenus)
I run a dynasty 400 at work so just shoot if theres any questions.
Sent from my S60 using Tapatalk
Can also be really complex if you want it to be. (Submenus)
I run a dynasty 400 at work so just shoot if theres any questions.
Sent from my S60 using Tapatalk

Count yourself lucky to use a Dynasty 400. Among the VERY best TIG machines in planet earth. Not likely you’ll get to take advantage (or need to) of the advanced features, but geez, you’ll be spoiled in a hurry by it. And by the way, the Dynasty line is perhaps the best Stick welding machines you might ever use as well.
Thanks for the support!
Well, here we go. Still not progressing with my O/A welding projects. Laying down some decent passes on 16 gauge steel. That's about it.
Went to the instructor's office last night to ask about nothing, really. He said- "Are you bored with oxy-acetylene yet?" I said no, but sometimes I get frustrated. He said- "You wanna try TIG?" I didn't think. Just said "Yeah". (The next class is open welding lab which starts in less than 2 weeks. That's where I'll get to use the TIG)
Told me to bring my helmet tonight. Hell, yeah!!
Since the next class has no lecture, maybe he wants to give me an intro to the machine, and make sure I'm safe. He didn't say, and I didn't ask.
Watched this video and was going to follow his TIG advice for getting started:
https://m.youtube.com/watch?v=TgekhRZ_d2o&t=12s
I was going to do the puddle starting exercise, then the torch drill using no filler.
Tonight the instructor brought 16 gauge steel and said- "Do it like this." Then he ran a bead using filler. So, no intro stuff. Just start welding. He set up the Dynasty 400. All I had to do was push the foot pedal and go. Problem was he gave me the wrong filler rod (R-45). Didn't find out 'till half the class was over.
Figured out to back off the pedal (slightly!) after the puddle starts - or move really fast. Had the helmet on shade 11. Couldn't see anything but the arc. Couldn't see what I was welding, or where I was going.
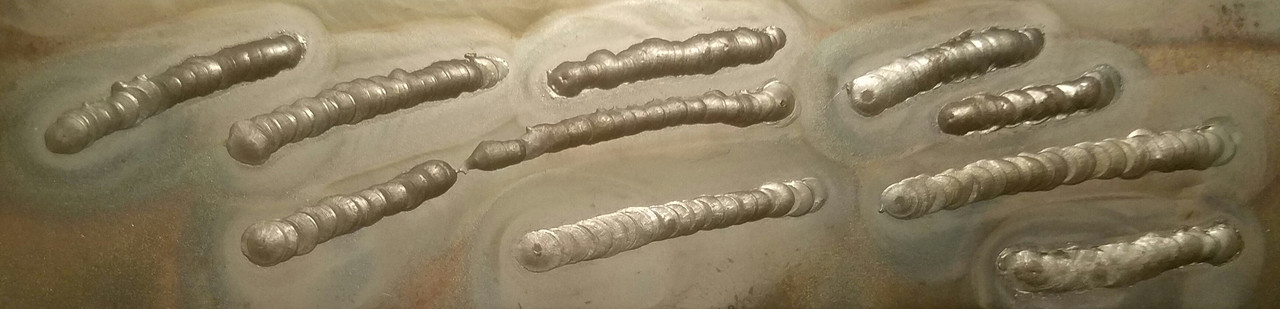
First timer TIG welds:

https://m.youtube.com/watch?v=TgekhRZ_d2o&t=12s
I was going to do the puddle starting exercise, then the torch drill using no filler.
Tonight the instructor brought 16 gauge steel and said- "Do it like this." Then he ran a bead using filler. So, no intro stuff. Just start welding. He set up the Dynasty 400. All I had to do was push the foot pedal and go. Problem was he gave me the wrong filler rod (R-45). Didn't find out 'till half the class was over.
Figured out to back off the pedal (slightly!) after the puddle starts - or move really fast. Had the helmet on shade 11. Couldn't see anything but the arc. Couldn't see what I was welding, or where I was going.
First timer TIG welds:
Instructor is funny as hell. Last night he was yelling at Level 11. "CLEAN UP NOW!!! YOU HAVE THREE MINUTES TO GET OUT OF HERE, OR I WILL FAIL YOU!!!" That was first call with 20 minutes to go. I'm sure he's put up with a lot of crap with the Community College students.
He's got a big heart, and he's treating me very well. Every night he's doing or showing me special stuff. Tonight, I was the only new student TIG welding. I was happy to see a Pirhana III tungsten sharpener. Then he took me to the locked area and showed me a brand new unused Pirhana III. Then, he showed me a brand new unused Miller Aerowave 350. (Holy shit!) Other night after class he brought out a one-off aerospace welding test precision purge block machined by a former student. Stunning piece of work.
He's got a big heart, and he's treating me very well. Every night he's doing or showing me special stuff. Tonight, I was the only new student TIG welding. I was happy to see a Pirhana III tungsten sharpener. Then he took me to the locked area and showed me a brand new unused Pirhana III. Then, he showed me a brand new unused Miller Aerowave 350. (Holy shit!) Other night after class he brought out a one-off aerospace welding test precision purge block machined by a former student. Stunning piece of work.
Hey Kodokan,
Great start!
It's great to know you have someone that's so willing to help you. Maybe the filler rod deal was a test? lol
I have been focusing on 16 ga, although several of the folks here think I should branch out. lol I guess I'm stubborn as hell, or just a slow learner. I've sure burned through a lot of 16 ga coupons. FWIW, yesterday something clicked. I've had it stuck in my head that my torch movement should be in small increments, and that reducing the heat input with the pedal was a way to compensate for slower movement. Maybe some welders can do that without any issues. For me, though, the welds aways looked hot and gray. By increasing the heat and lengthening the distance between dabs, it really improved the look of the weld.
Well... that was yesterday. We'll have to see what today brings. I tend to be good one day and suck the next.
I appreciate what you said the other day, too, about lap welds. I'm doing okay with running beads, and with butt welds. Lap welds are driving me crazy. It's more my eyes and not seeing the puddle. Something I need to keep working at.
You'll know that instructor has your best interest in mind when he starts loaning you the good stuff to take home. lol
Good luck.
Jeff
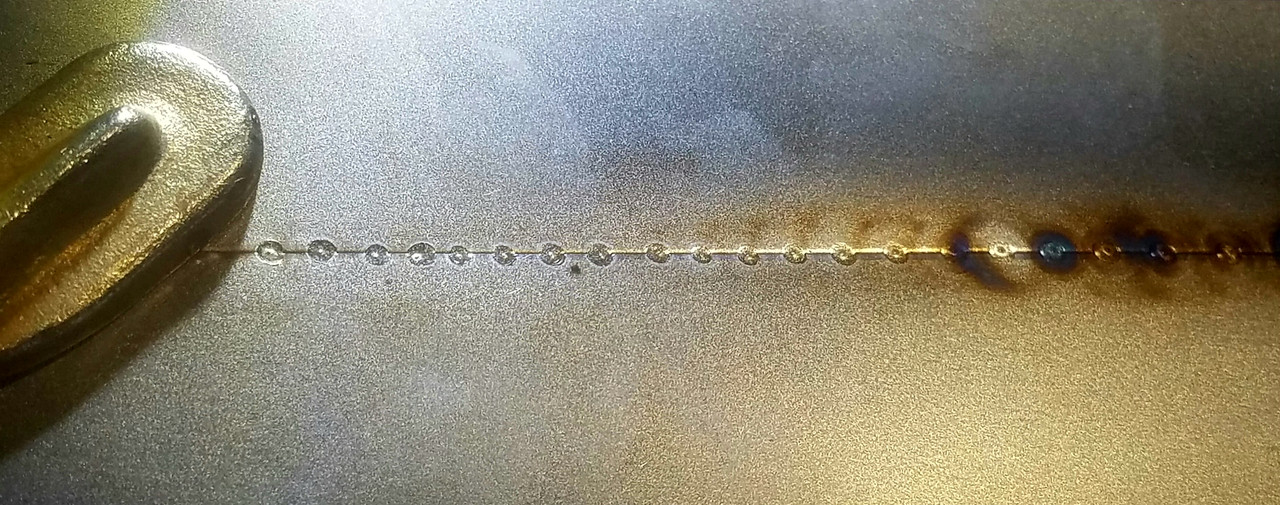
I'm guessing dime stacks appear naturally from the flowing molten metal. At first, I thought a dime was formed each time the filler rod was dipped.
My first beads look too tall. I think I was trying to make a lot of dimes, but was just building up the bead.
Will have a better plan for the next class.
My first beads look too tall. I think I was trying to make a lot of dimes, but was just building up the bead.
Will have a better plan for the next class.
Last night was quite shocking!
Never used a welding table, before this class. Minimal instruction and supervision in class has its advantages and disadvantages.
Been welding all my coupons on the table. Last night, I stuck the tungsten in the puddle. At first, I didn't know it was stuck. I lifted up on the torch and the 16ga steel coupon came off the table. Pedal was still on. Filler hand was still resting on the grounded table.
Yeah. Shocked the f*ck out of me. Just saw black and sounded to me like an explosion. Opened my eyes after a second, and I was sitting straight up and the torch, with the coupon stuck to it, was up against my shield. At least it blew my foot off the pedal.
So, my new policy is when using a welding table, clamp down the piece.
Way Outthere
- Way Outthere
-
New Member

-
Posts:
-
Joined:Thu Feb 17, 2022 1:16 am
Over 20 years at the bench in aerospace. Any grade can be welded with any other grade. For instance, you can weld Ti5 with Ti2, etc. However! It's best practice to match filler with parent. In aerospace it's primarily Ti5 (6AL4V) and Ti9 (3Al2.5V), and they are, as far as my experience, always welded with the same filler as the parent. Ti9 keeps a lot of the strength properties of Ti5, but is easier to bend, etc., so it's used in tubes and piping, where Ti5 is used in machined parts. Generally, Ti9 filler is only available through specialty houses that don't like dealing with hobbyists wanting a pound or soKodokan wrote: ↑Sat Feb 05, 2022 8:05 am What filler rod is the best for welding titanium grade 2, grade 5, and grade 9?
I read it's best to use a softer grade of filler wire than the parent metal. My initial plan was to use ErTi-2 for grade 2, ErTi-5 for grade 5, and ErTi-9 for grade 9.
Also read that ErTi-1 can be used for grades 2, 5, and 9. Is this true? My titanium welded projects won't be supporting weight, but will be subjected to vibration.
By the way, I couldn't find ErTi-9 anywhere.
To your question directly, a lot of the stuff done in automotive aftermarket can have higher crack resistance if the filler is a grade lower. Most automotive aftermarket tubing will be Ti2, as it's unalloyed, making it easier to work, less expensive, but is "stronger" than Ti1. Ti1 is more ductile than Ti2, so using it as a filler for a Ti2 parent works well in high vibration areas like exhaust systems. I weld a lot of the car stuff with Ti1 filler.
While they will weld, the alpha-beta alloys like Ti5 and Ti9 should not be used as filler for stuff like Ti2 tubing on an exhaust system. The alpha-betas suffer embrittlement when subjected to welding temperatures, and will be crack-prone in the weld.
Way Outtahere- Thanks much for the advice. Your experience is much respected.
Very excited to do some Ti welding. The ultimate goal is to fabricate unique Ti 2-stroke expansion chambers (x4) for a 2-stroke Yamaha RZV500 motorcycle.
Not sure I'll have enough time to get there, but it's great to have challenges, to keep my mind focused on positive things.
I'll post up my ideas for a home-made purge box soon.
Class starts in a few days. Repeating the Intro class with the "other" instructor.
Not sure what I'll be able to do. Would like to do some O/A brazing and heat coloring. Have a rosebud #2 tip on the way. Less heat than a propane torch.
Will be using the TIG on the other 2 days. Thinking about practicing technique on Friday and having fun on Saturday. Having fun trying TIG brazing, welding stainless, and titanium. Got to get my supplies together.
Can someone give me settings for the Dynasty 400?
TIG brazing 16 gauge steel. Have SilBr filler and AlBr filler. Would probably prefer to use SilBr.
Torch setup would help, too. I'm thinking, 1/16 tungsten, 3/8 in cup, 1/16 filler rod, 60 amps, 10 cfh flow. Standard welding settings. I would prefer .045 filler rod, but 1/16 is what I have.
Get a proper gas lens setup for the torch. A #6 cup is a bit smaller than I’d use for SilBr, I’d rather use a 10-12. Gas flow needs to be 2x cup size in CFH. You can go lower with a collet body. A 3/32 tungsten works fine; you don’t need a 1/16. Heat input is controllable regardless of tungsten size. And you don’t need a “needle point” grind on the tip. Just a good, clean, grind with cleaned filler wire.
Amperage will be lower too than the standard 1amp/0.001 formula. With brazing, you’re only “heating” the base metal enough to melt the filler not fuse them.
You could experiment with pulse after you get a handle on the amperage. Might be fun-
Amperage will be lower too than the standard 1amp/0.001 formula. With brazing, you’re only “heating” the base metal enough to melt the filler not fuse them.
You could experiment with pulse after you get a handle on the amperage. Might be fun-
Thanks for the advice. Pretty sure the school torch uses #20 size parts. My home torch is a 17, so I don't want to spend more than necessary. Got a Welding City gas lens kit for the 20 torch. Got a Fupa 12 cup, which I can also use with my torch.cj737 wrote: ↑Mon Feb 21, 2022 8:21 pm Get a proper gas lens setup for the torch. A #6 cup is a bit smaller than I’d use for SilBr, I’d rather use a 10-12. Gas flow needs to be 2x cup size in CFH. You can go lower with a collet body. A 3/32 tungsten works fine; you don’t need a 1/16. Heat input is controllable regardless of tungsten size. And you don’t need a “needle point” grind on the tip. Just a good, clean, grind with cleaned filler wire.
Amperage will be lower too than the standard 1amp/0.001 formula. With brazing, you’re only “heating” the base metal enough to melt the filler not fuse them.
You could experiment with pulse after you get a handle on the amperage. Might be fun-
Also got a couple of small F-clamps and a magnetic grasshopper to keep my stuff grounded to the table.
First welding lab class is tomorrow night. Plan is to practice welding 16g steel and ask for some aluminum coupons and filler rod to try out soon. Plan for Saturday's class is to try TIG brazing or aluminum welding for the first time.

Thanks, BeeGee.
Started welding tonight in the new Intro class (supposed to be O/A). Got right into the TIG booth. Might have to stick to TIG welding steel in this class, but that's okay.
Just getting back to it. Laid down a bunch of small beads, tacks, & fusion welds. Need practice after the 2 week lay off. Got a little better toward the end of the night. Nothing worth showing. Tried the new 1/16" gas lens and stubby cup. Didn't notice much difference vs. a standard collet body. Might try some TIG brazing tomorrow.
In my opinion if you want to get better at Tig quick you should go get yourself some 1/8"+ thick alum and run beads on that.
Things matter more with alu for your technique to give a good bead.
Also as a side note, I find it way easier to see than a steel weld but some people says it's too bright so idk you may not like it for practice, but for me it's my favourite warm up to run a few beads on a alu chunk to get my motion back if I havnt welded in a bit.
Good progress though with everything youve been getting up to so far!
PS...you want to be a welding god? Go get yourself some nasty dirty aluminium, if you can weld that my opinion is you can weld anything
Depending upon the size cup you were using with the gas lens and the size of the collet body, you won’t see much difference in the weld. A gas lens is unimportant with a cup size below a #6. There simply isn’t enough CFH to create the turbulence associated with a #7 or larger.
Many people swear by using a #5 collet body for any aluminum welding. The smaller cup helps limit the HAZ. A smaller tungsten is pointless, even on thin material. Tungsten shape and arc length matter more, especially on steel. I’ve welded 0.035 stainless tubing for days with a standard grind 3/32 and running 26 amps. And the tungsten taper is the same as I use on 1/2 steel.
Technique matters more than equipment fussing.
Not sure atm how much materials I'll be able to get from the school. For now, I'll bring my own.Toggatug wrote: ↑Fri Mar 04, 2022 7:57 am In my opinion if you want to get better at Tig quick you should go get yourself some 1/8"+ thick alum and run beads on that.
PS...you want to be a welding god? Go get yourself some nasty dirty aluminium, if you can weld that my opinion is you can weld anything
Tonight, I'm taking in a few 1/8" aluminum coupons and 1/16" 4340 filler rod.
Also taking in some .045" ER70. Been using 1/16" ER70 with 1/16" steel. I don't think the school has .045" filler. Also bringing in some SilBr and AlBr filler to try out.
Probably not destined to become a welding god. Can't imagine any reason I'd ever weld dirty metal. At least, I hope not. Doubt I'll be welding thicknesses beyond 1/8", either.
Was using a #7 cup with the collet body and a #7 cup with the gas lens. Thought it would be a good comparison. Not much difference there.cj737 wrote: ↑Fri Mar 04, 2022 8:27 am Depending upon the size cup you were using with the gas lens and the size of the collet body, you won’t see much difference in the weld. A gas lens is unimportant with a cup size below a #6. There simply isn’t enough CFH to create the turbulence associated with a #7 or larger.
Many people swear by using a #5 collet body for any aluminum welding. The smaller cup helps limit the HAZ. A smaller tungsten is pointless, even on thin material. Tungsten shape and arc length matter more, especially on steel. I’ve welded 0.035 stainless tubing for days with a standard grind 3/32 and running 26 amps. And the tungsten taper is the same as I use on 1/2 steel.
Technique matters more than equipment fussing.
With regard to the tungsten size, I'm just going by the chart that came with the TIG. I've also heard Jody say that a lot can be done with the 3/32" tungsten. Still, there must be some reason that a smaller tungsten is recommended for thinner metal. As a beginner, I'm looking for every advantage I can get.
I just started using .045 filler rod on 1/16" steel. Was using the 1/16" rod the instructor gave me. Seems harder to use initially, but hopefully will make my beads less lumpy.
Been using a 30 degree grind on all tungsten electrodes. When I get some consistency going, I can try some other grind angles.
I'm trying to work on technique. Don't want to make the same mistakes over and over.
Tried TIG brazing last night.
Was interesting. I like it because the whole puddle comes from the filler rod. So, it feels like good training for the rod hand.
First I tried SilBr filler. This is before cleaning with a brush:
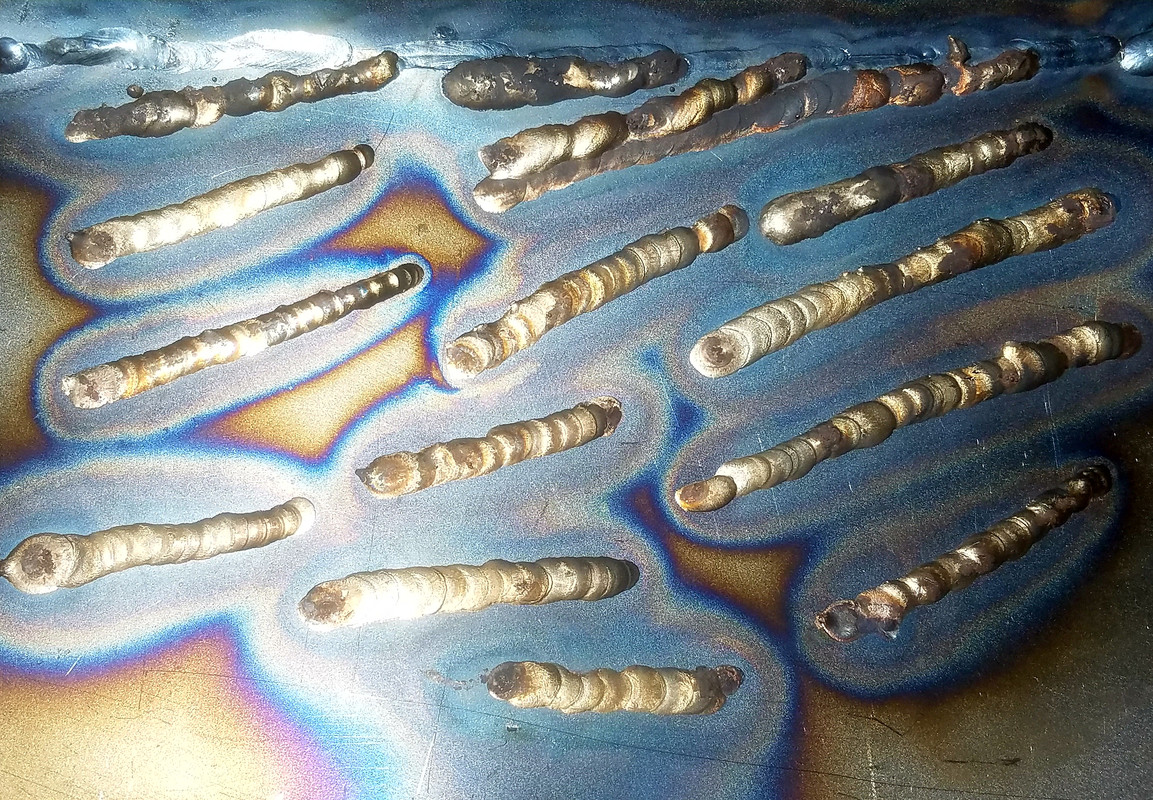
Then I tried some AlBr filler. Not as easy to use. Probably melts easier because of the Al. Nicer color than SilBr. More of a yellow gold, than an orange gold. Didn't get a good pic. AlBr is on the top half.
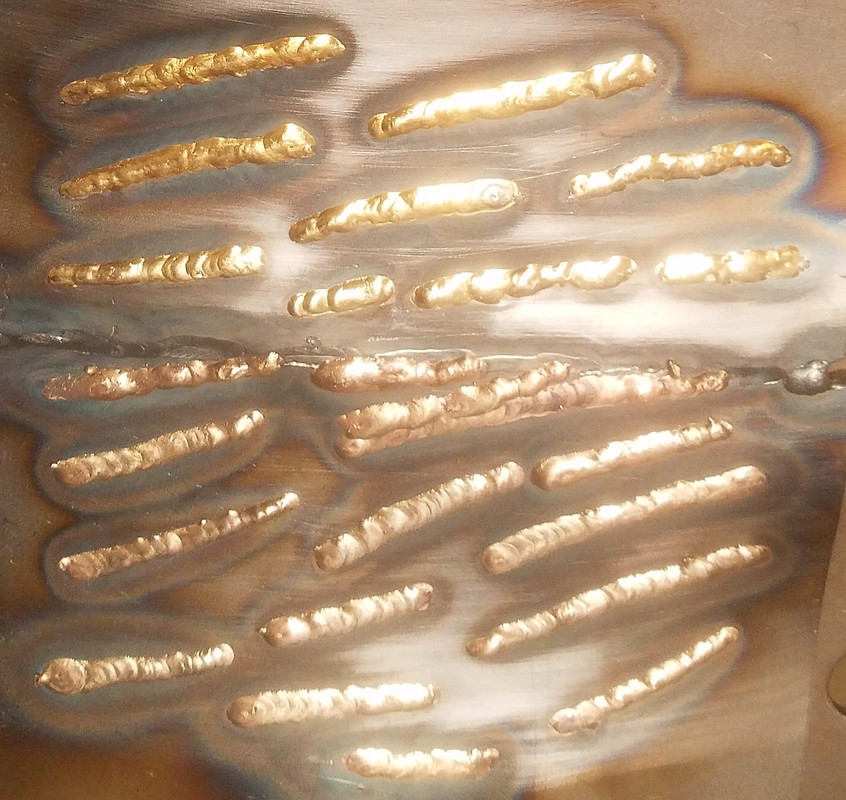
Definitely want to try more TIG brazing.
Was interesting. I like it because the whole puddle comes from the filler rod. So, it feels like good training for the rod hand.
First I tried SilBr filler. This is before cleaning with a brush:
Then I tried some AlBr filler. Not as easy to use. Probably melts easier because of the Al. Nicer color than SilBr. More of a yellow gold, than an orange gold. Didn't get a good pic. AlBr is on the top half.
Definitely want to try more TIG brazing.
The first time I tried welding aluminum, I was short on time and nothing good happened. Looked like this:

Tonight, I did the puddle-starting exercise (like in the video), then a few fusion welds. Then started messing around with filler rod. Using 4043. No idea what the school coupons are. Might have done a couple of coupons after the photos. It was a good night. Did it on my own. Instructor was busy with the other class.
Tonight, I did the puddle-starting exercise (like in the video), then a few fusion welds. Then started messing around with filler rod. Using 4043. No idea what the school coupons are. Might have done a couple of coupons after the photos. It was a good night. Did it on my own. Instructor was busy with the other class.
Haven't been posting much lately. Still at it. Need to order more coupons and filler rod ASAP.
Had a good session TIG brazing. Hard not to melt any of the parent metal using the usual welding settings. Tried using less amps, but 65 was fast and fun.
Set up the table and got the home TIG fired up. First beads weren't very inspiring.

Definitely different from the school TIG. Arc seems hotter. A lot more penetration. Just trying to get used to it.
I guess progress is slow because I'm trying different techniques and machines. Keeps it interesting, though.
Had a good session TIG brazing. Hard not to melt any of the parent metal using the usual welding settings. Tried using less amps, but 65 was fast and fun.
Set up the table and got the home TIG fired up. First beads weren't very inspiring.
Definitely different from the school TIG. Arc seems hotter. A lot more penetration. Just trying to get used to it.
I guess progress is slow because I'm trying different techniques and machines. Keeps it interesting, though.
Have to practice basics in Thursday class. All steel. Was able to get a fillet weld going. Not good, but way better than my first try.

Found out my new magnet clamps won't take much heat.
Friday class was aluminum practice. Should be better next time. Was making a mistake, trying to keep the puddle size small.
First bead was okay, then went downhill from there.
Found out my new magnet clamps won't take much heat.
Friday class was aluminum practice. Should be better next time. Was making a mistake, trying to keep the puddle size small.
First bead was okay, then went downhill from there.
Return to “Tig Welding - Tig Welding Aluminum - Tig Welding Techniques - Aluminum Tig Welding”
Jump to
- Introductions & How to Use the Forum
- ↳ Welcome!
- ↳ Member Introductions
- ↳ How to Use the Forum
- ↳ Moderator Applications
- Welding Discussion
- ↳ Metal Cutting
- ↳ Tig Welding - Tig Welding Aluminum - Tig Welding Techniques - Aluminum Tig Welding
- ↳ Mig and Flux Core - gas metal arc welding & flux cored arc welding
- ↳ Stick Welding/Arc Welding - Shielded Metal Arc Welding
- ↳ Welding Forum General Shop Talk
- ↳ Welding Certification - Stick/Arc Welding, Tig Welding, Mig Welding Certification tests - Welding Tests of all kinds
- ↳ Welding Projects - Welding project Ideas - Welding project plans
- ↳ Product Reviews
- ↳ Fuel Gas Heating
- Welding Tips & Tricks
- ↳ Video Discussion
- ↳ Wish List
- Announcements & Feedback
- ↳ Forum News
- ↳ Suggestions, Feedback and Support
- Welding Marketplace
- ↳ Welding Jobs - Industrial Welding Jobs - Pipe Welding Jobs - Tig Welding Jobs
- ↳ Classifieds - Buy, Sell, Trade Used Welding Equipment
- Welding Resources
- ↳ Tradeshows, Seminars and Events
- ↳ The Welding Library
- ↳ Education Opportunities