Tig welding tips, questions, equipment, applications, instructions, techniques, tig welding machines, troubleshooting tig welding process
Mikechallgren
- Mikechallgren
-
Active Member

-
Posts:
-
Joined:Thu Jul 17, 2014 10:25 pm
-
Location:Van Nuys, California
Before I get my equipment out, I want to find out if I can weld anodized aluminum. Might sound pretty basic, but I don't know and I know someone out there does. Will someone tell me? 
Mike the wire airplane guy http://www.wiresculptor.net
What machine do you have? Do you have a on/off remote?
You can weld through the coating using high amps and the so called "bump" method. Takes some practice to get right I've only tried this a few times... You'll need 53xx series filler. I've done this with a Syncro 350 but a inverter style machine like a Dynasty is better IMO.
You can weld through the coating using high amps and the so called "bump" method. Takes some practice to get right I've only tried this a few times... You'll need 53xx series filler. I've done this with a Syncro 350 but a inverter style machine like a Dynasty is better IMO.
I weld stainless, stainless and more stainless...Food Industry, sanitary process piping, vessels, whatever is needed, I like to make stuff.
ASME IX, AWS 17.1, D1.1
Instagram #RNHFAB
ASME IX, AWS 17.1, D1.1
Instagram #RNHFAB
- Braehill
-
Weldmonger

-
Posts:
-
Joined:Sat Jul 06, 2013 11:16 am
-
Location:Near Pittsburgh,Pennsylvania. Steel Buckle of the Rust Belt
Mike,
Hopefully TamJeff will chime in, for he is the Wizard when it comes to all things anodized (all things Aluminum for that matter) on this site.
Len
Hopefully TamJeff will chime in, for he is the Wizard when it comes to all things anodized (all things Aluminum for that matter) on this site.
Len
Now go melt something.
Instagram @lenny_gforce
Len
Instagram @lenny_gforce
Len
Mikechallgren
- Mikechallgren
-
Active Member
-
Posts:
-
Joined:Thu Jul 17, 2014 10:25 pm
-
Location:Van Nuys, California
I have a Miller Syncrowave 180 SD with only a pedal control. I do have a remote that fits on the handle of my #17 torch. I have 5356 filler rod. I'm not familiar with the "bump" method.Rick_H wrote:What machine do you have? Do you have a on/off remote?
You can weld through the coating using high amps and the so called "bump" method. Takes some practice to get right I've only tried this a few times... You'll need 53xx series filler. I've done this with a Syncro 350 but a inverter style machine like a Dynasty is better IMO.
Thank you for your answers, they will help me get better.
Mike the wire airplane guy http://www.wiresculptor.net
Mikechallgren
- Mikechallgren
-
Active Member
-
Posts:
-
Joined:Thu Jul 17, 2014 10:25 pm
-
Location:Van Nuys, California
Thank you, I will use any information that I can get.Braehill wrote:Mike,
Hopefully TamJeff will chime in, for he is the Wizard when it comes to all things anodized (all things Aluminum for that matter) on this site.
Len
Mike the wire airplane guy http://www.wiresculptor.net
noddybrian
- noddybrian
-
Weldmonger
-
Posts:
-
Joined:Thu Jan 24, 2013 12:13 pm
I'm fairly sure Jody did a video on this a while back - Wyatt did for sure - worth having a look on You Tube -( but it did'nt come out like TamJeff's for sure ! ) - depending on thickness 180ammps is on the low side as it needs fast " blasts " of high amps usually to weld.
Mikechallgren
- Mikechallgren
-
Active Member
-
Posts:
-
Joined:Thu Jul 17, 2014 10:25 pm
-
Location:Van Nuys, California
What do I do to get "fast blasts" of high amps? Sorry for my ignorance...noddybrian wrote:I'm fairly sure Jody did a video on this a while back - Wyatt did for sure - worth having a look on You Tube -( but it did'nt come out like TamJeff's for sure ! ) - depending on thickness 180ammps is on the low side as it needs fast " blasts " of high amps usually to weld.
Mike the wire airplane guy http://www.wiresculptor.net
noddybrian
- noddybrian
-
Weldmonger
-
Posts:
-
Joined:Thu Jan 24, 2013 12:13 pm
I would wait for Tamjeff's input as I hardly ever have anodized in my place to do - but essentially depending on the thickness & nature or the anodizing you require probably 50% > 100 % more amps than you would expect for the thickness - you then either use the pedal or torch switch to apply those amps instantly to blast through the coating - once through the aluminum would melt away / keyhole quickly so you add filler fast - I like to use a size bigger than for any other comparable joint - as soon as the puddle takes the filler let off the power & allow it to solidify - then repeat - it will leave a very "stacked" look when most of us do it - this is normal -( looking at TamJeff's welds will just make you feel inadequate / retarded ! don't worry this is normal ! ) - for want of a better description it's like doing a series of spot welds - if you keep trying to weld as normal the anodized layer will refuse to melt & the arc usually wanders all over the place until you heat soak the piece enough it slumps / melts through. - the 180 amps is your limiting factor unless you can add helium which makes more difference than I'd have believed till I recently tried it - you should watch Jody or Wyatt do it on video - it's easier to watch than explain in writing.
You can use a 180 amp machine for thin anodized but you will suffer for it in time and patience. A 250 amp is actually minimal for sched 40 pipe and 1/4" flat stock. The thing about anodized is, most welds are required of a certain aesthetic quality, so it's the starts and stops that become more apparent. Most welds will typically require that they are uni-directional, meaning, the dime pattern is continuous in one direction and the starts/stops hidden. A lot of times, you will have to weld it in reverse travel, which helps to blow the contaminant back out of the weld zone, instead of building up ahead of it. This keeps it more consistent, especially with regard to the edges of the weld, and not leaving any frost from the cleaning action.
This would be an average anodized weld in a production environment, where you don't really have time to stand back and admire your welds. One of possibly 40-100+ welds/day. Most of us can by now imitate anyone's welds in the business if we want to. This one is actually forward manual pulse with a finger (on/off) switch at the torch. which amounts to one weld puddle with the torch angled for forward travel, and a half step back to smooth out the heavy stack look. Similar to whip and pause stick welding motion, mixed with a little lay wire technique.

250 amps. Machine (Miller synchrowave) set for balance welding with the High Frequency set to about 70.
This would be an average anodized weld in a production environment, where you don't really have time to stand back and admire your welds. One of possibly 40-100+ welds/day. Most of us can by now imitate anyone's welds in the business if we want to. This one is actually forward manual pulse with a finger (on/off) switch at the torch. which amounts to one weld puddle with the torch angled for forward travel, and a half step back to smooth out the heavy stack look. Similar to whip and pause stick welding motion, mixed with a little lay wire technique.
250 amps. Machine (Miller synchrowave) set for balance welding with the High Frequency set to about 70.
Miller ABP 330, Syncrowave 250, Dynasty 300 DX.
Honorary member of the Fraternity of Faded Tee Shirts.
Honorary member of the Fraternity of Faded Tee Shirts.
You guys are too kind about my skills. Truth be told, I can teach anyone who can strike an AC TIG arc on aluminum decently, to weld like this in a day's time pretty much. Taught my son, who had never picked up a torch in his life, to put out beads like this in one week.
Miller ABP 330, Syncrowave 250, Dynasty 300 DX.
Honorary member of the Fraternity of Faded Tee Shirts.
Honorary member of the Fraternity of Faded Tee Shirts.
Welding square edges to curved surfaces are a bit more precarious. I really wish I had time to concentrate on my welding because if that's all I had to do, I could manicure things just so, but typically, it's a tedious design and build process and then after the hard part, you are at the point where it's like. . ."and now I have to weld all this up." Two, or three projects simultaneously at times. So, you just try to set a good average with more emphasis on production speed.
Miller ABP 330, Syncrowave 250, Dynasty 300 DX.
Honorary member of the Fraternity of Faded Tee Shirts.
Honorary member of the Fraternity of Faded Tee Shirts.

- Superiorwelding
-
Weldmonger
-
Posts:
-
Joined:Thu Jan 24, 2013 10:13 pm
-
Location:Eddy, TX
Sign me up, when do classes start?TamJeff wrote:You guys are too kind about my skills. Truth be told, I can teach anyone who can strike an AC TIG arc on aluminum decently, to weld like this in a day's time pretty much. Taught my son, who had never picked up a torch in his life, to put out beads like this in one week.
-Jonathan
Instagram- @superiorwelding/@learntotig
Twitter- @_JonathanLewis
https://www.learntotig.com
https://www.superiorweldandfab.com
https://www.youtube.com/+SuperiorWeldin ... ATHANLEWIS
Twitter- @_JonathanLewis
https://www.learntotig.com
https://www.superiorweldandfab.com
https://www.youtube.com/+SuperiorWeldin ... ATHANLEWIS
Anytime. I have had other welders from online and welding school show up for a try. One stayed, got on the clock for 3 months and helped build a few things. Said it was the most fun he ever had building 'and' welding. Heck, his wife was calling him at 7 pm asking if he was ever coming home.
Miller ABP 330, Syncrowave 250, Dynasty 300 DX.
Honorary member of the Fraternity of Faded Tee Shirts.
Honorary member of the Fraternity of Faded Tee Shirts.
Mikechallgren
- Mikechallgren
-
Active Member
-
Posts:
-
Joined:Thu Jul 17, 2014 10:25 pm
-
Location:Van Nuys, California
Thank you for all of your help and time.noddybrian wrote:I would wait for Tamjeff's input as I hardly ever have anodized in my place to do - but essentially depending on the thickness & nature or the anodizing you require probably 50% > 100 % more amps than you would expect for the thickness - you then either use the pedal or torch switch to apply those amps instantly to blast through the coating - once through the aluminum would melt away / keyhole quickly so you add filler fast - I like to use a size bigger than for any other comparable joint - as soon as the puddle takes the filler let off the power & allow it to solidify - then repeat - it will leave a very "stacked" look when most of us do it - this is normal -( looking at TamJeff's welds will just make you feel inadequate / retarded ! don't worry this is normal ! ) - for want of a better description it's like doing a series of spot welds - if you keep trying to weld as normal the anodized layer will refuse to melt & the arc usually wanders all over the place until you heat soak the piece enough it slumps / melts through. - the 180 amps is your limiting factor unless you can add helium which makes more difference than I'd have believed till I recently tried it - you should watch Jody or Wyatt do it on video - it's easier to watch than explain in writing.
Mike the wire airplane guy http://www.wiresculptor.net
Mikechallgren
- Mikechallgren
-
Active Member
-
Posts:
-
Joined:Thu Jul 17, 2014 10:25 pm
-
Location:Van Nuys, California
Thank you for giving me all of this information, I really appreciate your time...TamJeff wrote:You can use a 180 amp machine for thin anodized but you will suffer for it in time and patience. A 250 amp is actually minimal for sched 40 pipe and 1/4" flat stock. The thing about anodized is, most welds are required of a certain aesthetic quality, so it's the starts and stops that become more apparent. Most welds will typically require that they are uni-directional, meaning, the dime pattern is continuous in one direction and the starts/stops hidden. A lot of times, you will have to weld it in reverse travel, which helps to blow the contaminant back out of the weld zone, instead of building up ahead of it. This keeps it more consistent, especially with regard to the edges of the weld, and not leaving any frost from the cleaning action.
This would be an average anodized weld in a production environment, where you don't really have time to stand back and admire your welds. One of possibly 40-100+ welds/day. Most of us can by now imitate anyone's welds in the business if we want to. This one is actually forward manual pulse with a finger (on/off) switch at the torch. which amounts to one weld puddle with the torch angled for forward travel, and a half step back to smooth out the heavy stack look. Similar to whip and pause stick welding motion, mixed with a little lay wire technique.
250 amps. Machine (Miller synchrowave) set for balance welding with the High Frequency set to about 70.
Mike the wire airplane guy http://www.wiresculptor.net


So full disclosure I have no experience working on anodized aluminum (actually my tig machine won't even be delivered until tomorrow!).
That being said, my understanding of anodization is that it extends the oxide layer below the surface, so theoretically adding more DCEP ratio should help to weld it at the cost of tungsten life. Probably not as good of a solution as more power and an unlikely fit for a production environment, but certainly something I'd like to test out in case I have to work with the odd piece here or there.
That being said, my understanding of anodization is that it extends the oxide layer below the surface, so theoretically adding more DCEP ratio should help to weld it at the cost of tungsten life. Probably not as good of a solution as more power and an unlikely fit for a production environment, but certainly something I'd like to test out in case I have to work with the odd piece here or there.
I've been allover anodized for 25 years or more by now. Have tried different types of machines and techniques. The heat is for the assembly. Fast, fat, double and triple tacks and enough heat to blend the tacks in if you have to start your pass where a tack is, which happens more often than not.
Prototyping, design on the fly, and there is never enough time to dawdle around so heat is the answer. Everyone thinks they know what they want because they have been geeking pictures on the interwebs. None of what will even come close to working for their situation so, you try to hit as many of their requirements as possible. Finally you just have to say, "You can't have everything." Otherwise, I will be donating my time.
So, you just go with what you can and quickly.
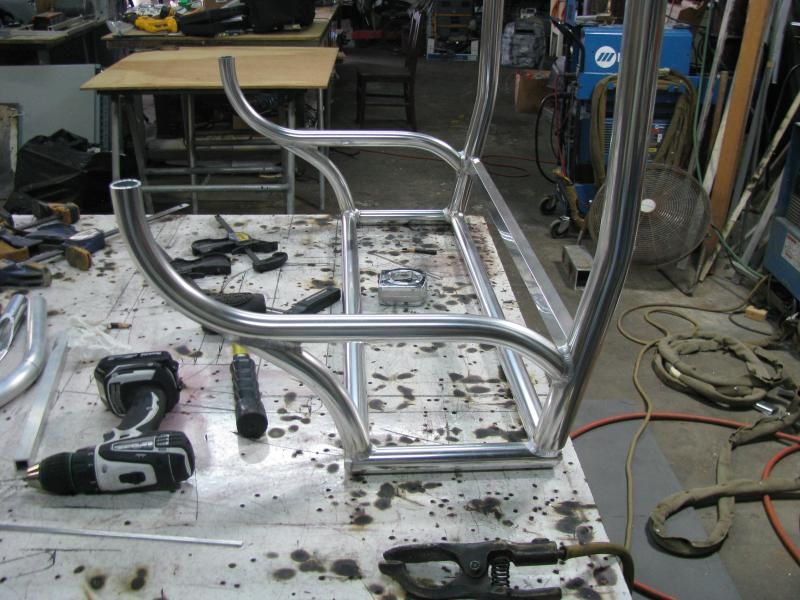
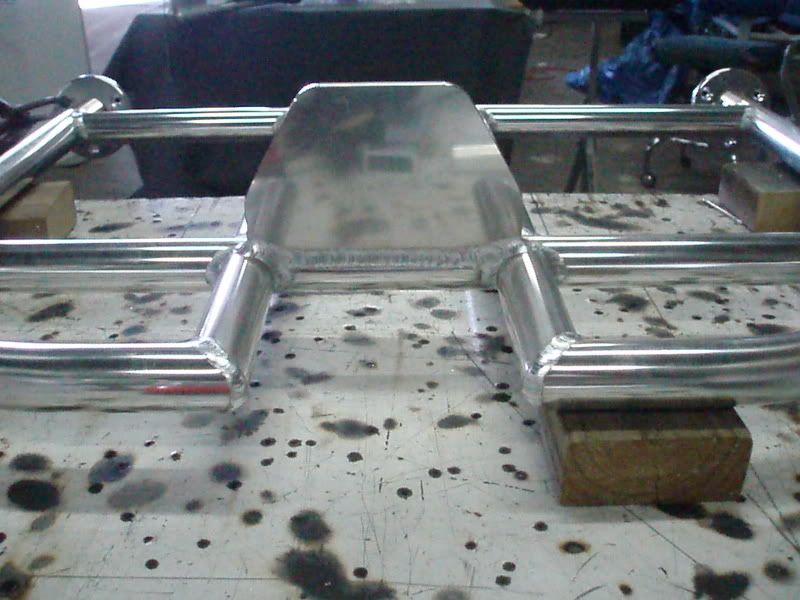
Oh and, it has to fold out of the way, which is what that little upturn in the side brace represents, so I can fit this fitting in there as high up as possible and still have room for a wrap around cushion. Big solid fitting welded to pipe, you need instant heat to sink a tack in all that.
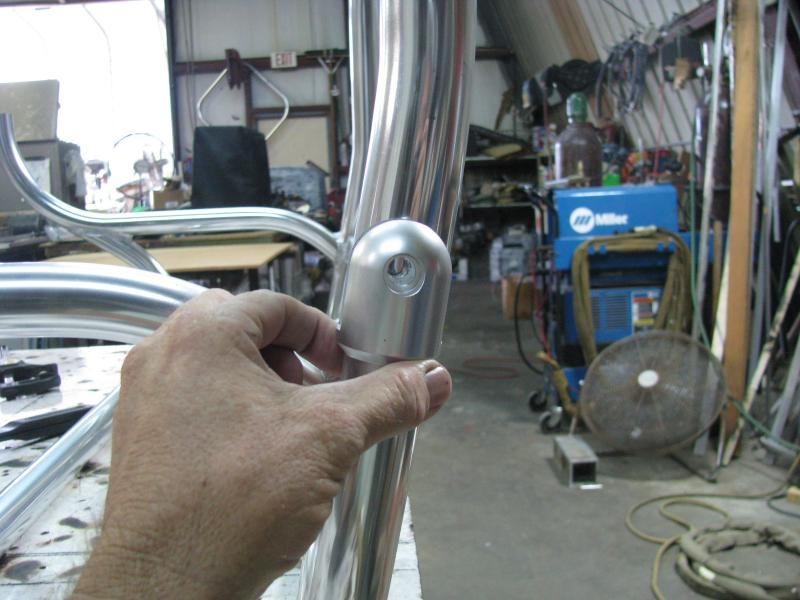
Here's where it has to fit. Around a stinking cushion and fold up onto the steering wheel pretty much. I have actually finished this chair pretty much and moved onto the next project. Everything works but I really wouldn't have had time to mess with the welding and I pretty much flew through that part of it. I build as much of it as I can and weld it before cutting the fittings in so it won't fubar the fittings after the fact.
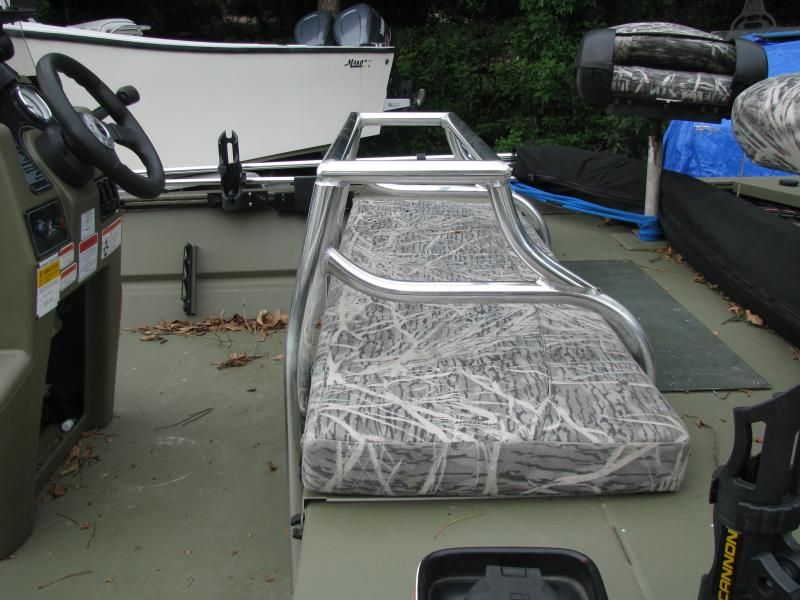
Another chair I did for a similar situation is what brought this job in, and another like it is waiting, with yet another set of requirements.
Prototyping, design on the fly, and there is never enough time to dawdle around so heat is the answer. Everyone thinks they know what they want because they have been geeking pictures on the interwebs. None of what will even come close to working for their situation so, you try to hit as many of their requirements as possible. Finally you just have to say, "You can't have everything." Otherwise, I will be donating my time.
So, you just go with what you can and quickly.
Oh and, it has to fold out of the way, which is what that little upturn in the side brace represents, so I can fit this fitting in there as high up as possible and still have room for a wrap around cushion. Big solid fitting welded to pipe, you need instant heat to sink a tack in all that.
Here's where it has to fit. Around a stinking cushion and fold up onto the steering wheel pretty much. I have actually finished this chair pretty much and moved onto the next project. Everything works but I really wouldn't have had time to mess with the welding and I pretty much flew through that part of it. I build as much of it as I can and weld it before cutting the fittings in so it won't fubar the fittings after the fact.
Another chair I did for a similar situation is what brought this job in, and another like it is waiting, with yet another set of requirements.
Miller ABP 330, Syncrowave 250, Dynasty 300 DX.
Honorary member of the Fraternity of Faded Tee Shirts.
Honorary member of the Fraternity of Faded Tee Shirts.

Thanks "TAMJEFF"
never had good luck with anodizeds, always tried to sneak up on weld or use a lot of ugly grinding. decided to get brave enough to try your method after looking at your beautiful results.
I call it "JAB"(lots of heat") and "STAB"(shove the rod deep in puddle"), take off like a sprinter and keep moving.
worked for me
Thanks again
Everlast 250EX
Miller 250 syncrowave
Sharp LMV Vertical Mill
Takisawa TSL-800-D Lathe
Coupla Bandsaws,Grinders,surface grinder,tool/cutter grinder
and more stuff than I deserve(Thanks Significant Other)
Miller 250 syncrowave
Sharp LMV Vertical Mill
Takisawa TSL-800-D Lathe
Coupla Bandsaws,Grinders,surface grinder,tool/cutter grinder
and more stuff than I deserve(Thanks Significant Other)

- Otto Nobedder
-
Weldmonger
-
Posts:
-
Joined:Thu Jan 06, 2011 11:40 pm
-
Location:Near New Orleans
Where the hell's that "LIKE" button, when you need it!rick9345 wrote:Thanks "TAMJEFF"
never had good luck with anodizeds, always tried to sneak up on weld or use a lot of ugly grinding. decided to get brave enough to try your method after looking at your beautiful results.
I call it "JAB"(lots of heat") and "STAB"(shove the rod deep in puddle"), take off like a sprinter and keep moving.
worked for me
Thanks again


Return to “Tig Welding - Tig Welding Aluminum - Tig Welding Techniques - Aluminum Tig Welding”
Jump to
- Introductions & How to Use the Forum
- ↳ Welcome!
- ↳ Member Introductions
- ↳ How to Use the Forum
- ↳ Moderator Applications
- Welding Discussion
- ↳ Metal Cutting
- ↳ Tig Welding - Tig Welding Aluminum - Tig Welding Techniques - Aluminum Tig Welding
- ↳ Mig and Flux Core - gas metal arc welding & flux cored arc welding
- ↳ Stick Welding/Arc Welding - Shielded Metal Arc Welding
- ↳ Welding Forum General Shop Talk
- ↳ Welding Certification - Stick/Arc Welding, Tig Welding, Mig Welding Certification tests - Welding Tests of all kinds
- ↳ Welding Projects - Welding project Ideas - Welding project plans
- ↳ Product Reviews
- ↳ Fuel Gas Heating
- Welding Tips & Tricks
- ↳ Video Discussion
- ↳ Wish List
- Announcements & Feedback
- ↳ Forum News
- ↳ Suggestions, Feedback and Support
- Welding Marketplace
- ↳ Welding Jobs - Industrial Welding Jobs - Pipe Welding Jobs - Tig Welding Jobs
- ↳ Classifieds - Buy, Sell, Trade Used Welding Equipment
- Welding Resources
- ↳ Tradeshows, Seminars and Events
- ↳ The Welding Library
- ↳ Education Opportunities