
Thanks again for all your help.
From the comments, I seem to be a bit out of my machines capabilities so I tried something different. (max amps 160)
The piece is 3/4 by 1/8
wiped with acetone
ground with a wheel that has only seen stainless
wiped with acetone
125 amps
3/32 2% lanthanide tungsten
20 cfh
#8 gas lens
no filler rod
15 sec post flow
Tig welding tips, questions, equipment, applications, instructions, techniques, tig welding machines, troubleshooting tig welding process

- big gear head
-
Ace

-
Posts:
-
Joined:Thu May 07, 2015 11:46 am
-
Location:KY.
Notice how the small part of your bead has some color to it and the fat part is gray. You are getting too hot. Try to do a smaller bead and move a little faster. Try to keep it the same width. You also broke your arc too quick which is why you have that crater at the end.
Last edited by big gear head on Mon May 02, 2016 11:53 am, edited 1 time in total.
Freddie
It isn't that your machine isn't capable, it is that you are shooting for the moon right out of the gate.
Buy this:
http://www.amazon.com/RMP-Ga-Stainless- ... =304+sheet
and this:
http://www.amazon.com/Aluminum-Rectangu ... 2470955011
Cut the SS into strips and clamp two together edge to edge onto the aluminum using some 1/8 stock to spread the load. Run DC at 60 amps with no ramp using the largest cup you have. It will melt almost immediately and you can fuse weld the seam at a pretty rapid pace. Try that out and then try running a bead with fill if you are happy with the fusing. Be sure the SS is cool to the touch before you light up on it a second time. If you can see it glowing at all, it will grey the instant it hits air. You need to hold post flow until it has at least stopped glowing and if you want colorless for a bit longer than that.
The core lesson is simple. If SS is hot and exposed to oxygen it will color. The faster you can pull heat from the weld, the less time it will need to be shielded. The aluminum backing will limit backside exposure while rapidly drawing heat from the SS.
Thicker SS will take a long damn time to cool adequately so even the 1/8" is going to be a second step when learning.
-Sandow
Red-hot iron, white-hot iron, cold-black iron; an iron taste, an iron smell, and a babel of iron sounds.
-Charles Dickens
-Charles Dickens
exnailpounder
- exnailpounder
-
Weldmonger

-
Posts:
-
Joined:Thu Dec 25, 2014 9:25 am
-
Location:near Chicago
That little dot that you show is exactly what you are looking for. Make a series of those and you have a bead. Hit the pedal...by the way,,,are you using a pedal? If not that explains a few things but you need to start a small dot/bead like you have, move an 1/8" and form another one...rinse and repeat. You also need to back off the pedal at the end of the weld and back up your torch and kind of smooth things out. You don't want a crater or a tit at the end of your bead. Remember to move along or you put in too much heat that can't disappate and your bead gets too wide and cooks the metal. Try just stringing 3 or 4 of those little dots in a row for starters and then add a few more as you get the hang of it. Also, 15 seconds of post flow is a waste. I set my machine at 6 seconds and have never changed it. Just use enough post flow to keep your tungsten shiny....any more is just wasting it but keep that post flow on the puddle when you stop the bead. It's also a big help to get in a good welding position so you can time your moves better. Keep us informed.
Ifyoucantellmewhatthissaysiwillbuyyouabeer.
On my air cooled torch I need a lot of post flow since the wire and torch head are heating the gas up before it blows onto the electrode. The water cooled torches I've used at my school don't need nearly as much post flow to keep the electrode from oxidizing. Would also help cooling the workpiece slightly I suppose.exnailpounder wrote: Also, 15 seconds of post flow is a waste. I set my machine at 6 seconds and have never changed it. Just use enough post flow to keep your tungsten shiny...
-Sandow
Red-hot iron, white-hot iron, cold-black iron; an iron taste, an iron smell, and a babel of iron sounds.
-Charles Dickens
-Charles Dickens
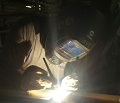
Tried again, same setting but with a 1/4 inch aluminum back up plate and moved fast.
Guess what, I got some color other than all grey, still not pretty but at least not all grey.
When I said I moved fast, I moved way faster than I ever thought to go.
I ordered the 16 gauge 304 stainless, i will give that a try when it comes in
Guess what, I got some color other than all grey, still not pretty but at least not all grey.
When I said I moved fast, I moved way faster than I ever thought to go.
I ordered the 16 gauge 304 stainless, i will give that a try when it comes in
- Attachments
-
- IMG_1137a.jpg (30.25 KiB) Viewed 1817 times
- DLewis0289
-
Ace
-
Posts:
-
Joined:Sun May 01, 2016 7:46 am
-
Location:Fort Myers Florida
You are on your way! Nothing left but practice now.
AWS D1.1 / ASME IX / CWB / API / EWI / RWMA / BSEE
Scientists have substituted mathematics for experiments, and they wander off through equation after equation, and eventually build a structure which has no relation to reality." Nikola Tesla
Scientists have substituted mathematics for experiments, and they wander off through equation after equation, and eventually build a structure which has no relation to reality." Nikola Tesla
exnailpounder
- exnailpounder
-
Weldmonger
-
Posts:
-
Joined:Thu Dec 25, 2014 9:25 am
-
Location:near Chicago
NOW you are getting the hang of it. Not bad. You kinda greyed it out by getting cerebral palsy a little ways into it but much better.  I hope you are taking this criticism in stride as we are all trying to help you. There is nothing new under the sun as far as welding goes so tried and true techniques always save the day. Filler metal cools your puddle so when you are ready to add filler, you have even more control of your heat input but save that for another day. Right now you should concentrate on moving your torch along in even increments and getting a good looking bead. It's all about seat time and proper technique so I bet in a few months you will be showing us weld porn. Good job! By the way, I hope you are watching Jody's videos. They are priceless in information and he doesn't leave out anything. His vids got me back in the Tig seat in weeks after a 15 year layoff. Don't get too caught up in making big long beads right now. The stainless guru's here will tell you to make shorter beads and get your base metal heat under control. As much as we all want to have that beautiful long stack o' dimes bead, stainless isn't your best choice for that because of it's poor conductive qualities. Get in and get out is the rule. One day you will want to move on to aluminum and a whole new can of worms will open up for you.
Ifyoucantellmewhatthissaysiwillbuyyouabeer.
- big gear head
-
Ace
-
Posts:
-
Joined:Thu May 07, 2015 11:46 am
-
Location:KY.
Adding filler to that will cool it more and help with the gray. See how you do with filler.
Freddie


Maybe start listening to it, we are trying to help. You are friggin cooking it.mpete53 wrote: I am getting the advice I asked for.
Ryan
Miller Dynasty 350 w/wireless pedal
Miller 350P with standard torch and XR-Aluma-Pro
Miller Multimatic 200 w/spool gun w/wireless pedal
Miller Spectrum 375 X-TREME
Smith torches
Optrel e684
Miller Digital Elite
Miller Weld-Mask
Miller Dynasty 350 w/wireless pedal
Miller 350P with standard torch and XR-Aluma-Pro
Miller Multimatic 200 w/spool gun w/wireless pedal
Miller Spectrum 375 X-TREME
Smith torches
Optrel e684
Miller Digital Elite
Miller Weld-Mask
Maybe I did not make myself clear
I am happy for all the advice I have been receiving.
I am trying to follow the advice.
I do not in any way mean any disrespect to those giving the advice.
I am sorry if I am a slow learner and am not progressing as fast as some may like (my self included)
I don't weld all day, I grab a hour here and there. I am not a welder by trade, but have done small jobs stick welding for many years. I always loved the look of a nicely done tig weld and now it could make such small, light gauge welds.
Why am I working with stainless? In a word BOATS. I have sailed all my life and there is always something to repair or a small bracket to make and I would like to use tig rather than stick welding.
Thanks again for your help
Mark

Hello Mark
Let me try to help you.
1. First try to get a perfectly silver puddle.
Clean the metal etc. as you did before. Flush the torch with argon, because moisture goes inside the hose/torch cable and it can take even minutes to clear it away.
After this, set couple of second to your preflow and then set postflow to maximum 15 or 25 sec or whatever it is in your machine. Then light an arc on clean metal, melt a puddle and end the arc and don't remove the cup until postflow is ended. Don't put too much amperes, because we are welding stainless and it won't need that much as carbon. I would just use 50 amps no matter how thick your plate is.
Also try to make quite small puddle a size of a water drop and don't use filler. Also don't keep as long tungsten as Jody. He is doing it for the video purposes.
If you manage to get silver "spot" weld... Congratulations you have no leaks!
I you have color on your weld...... You have a leak somewhere in your system. Perhaps in torch or inside the machine or even on regulator o-ring.... or your gas lense might be broken and creates vortex..... Or you might have even a bad bottle of argon. Sometimes there is bottles that contains moisture due to problems at filling station.
Here is a Jody's good example:
Did you made this far?
2. After getting a silver puddle it is time to focus on welding of stainless steels.
- Austenitics stainless (304,316 etc) steels needs less amperes than carbon steel, because they conducts heat poorly.
- Getting a perfect color of your weld is mainly "fashion" thing. Stainless weld can be gray and it's no problem at all.
- Keeping a filler rod inside the gas shield during welding is extremely important. Otherwise you oxidize the filler and those oxides gets in the weld, but won't melt completely.
- Try to get thinner beads. First practice withouth filler and then start adding filler when you feel comfortable. Try to use smaller rods first. This helps with the heat as you don't need to re-heat a junk of massive filler on the weld etc... Try different sizea and you will figure it out yourself.
-Markus-
PS:
Here is a orbital weld that shows a tiny bit of grey. Absolutely OK. People always tends to prefer silver and pink colors, because those are very nice looking. Truth is that in some cases it is impossible to get even pink color unless you don't want to waste argon and use trailing shield or something like that.
-Markus-
exnailpounder
- exnailpounder
-
Weldmonger
-
Posts:
-
Joined:Thu Dec 25, 2014 9:25 am
-
Location:near Chicago
You're doing fine. I didn't see anywhere in any of your posts that you disrespected anyone. You can practice on mild steel until you get better with your timing and adding filler. It welds almost the same but it disapates heat a little better but you can still cook it. It's cheaper and good to practice with. At least you didn't come here having never tig welded and want to master aluminum right away. You know how you get to Carnegie Hall right? Let us know how you are doing.mpete53 wrote:Maybe I did not make myself clear
I am happy for all the advice I have been receiving.
I am trying to follow the advice.
I do not in any way mean any disrespect to those giving the advice.
I am sorry if I am a slow learner and am not progressing as fast as some may like (my self included)
I don't weld all day, I grab a hour here and there. I am not a welder by trade, but have done small jobs stick welding for many years. I always loved the look of a nicely done tig weld and now it could make such small, light gauge welds.
Why am I working with stainless? In a word BOATS. I have sailed all my life and there is always something to repair or a small bracket to make and I would like to use tig rather than stick welding.
Thanks again for your help
Mark
Ifyoucantellmewhatthissaysiwillbuyyouabeer.


- Otto Nobedder
-
Weldmonger
-
Posts:
-
Joined:Thu Jan 06, 2011 11:40 pm
-
Location:Near New Orleans
Markus made a very important point..
"- Getting a perfect color of your weld is mainly "fashion" thing. Stainless weld can be gray and it's no problem at all. "
I have emphasized this many times. Hit the weld with a wire wheel. If it shines up, you're fine; It's just surface oxidation. If it stays grey, you've overheated it and affected the alloy.
His suggestion of the single point spot weld (no filler) is a great idea for determining that your gas coverage is leak-free and pure without doing an end-to-end leak test. I'm stunned this simple solution never occurred to me, and I'll be using it.
Steve S
All those pretty colors on Instagram and Weldporn spoil everyone..lol
Markus is spot on, while color CAN be a good indicator, it is not a tell all as Steve has pointed out. I weld sanitary and it sometimes will have a duller color too it, pickles and polished up mirror finish so it is just fine.
The 16g will challenge you, it can get heat soaked quickly.
Markus is spot on, while color CAN be a good indicator, it is not a tell all as Steve has pointed out. I weld sanitary and it sometimes will have a duller color too it, pickles and polished up mirror finish so it is just fine.
The 16g will challenge you, it can get heat soaked quickly.
I weld stainless, stainless and more stainless...Food Industry, sanitary process piping, vessels, whatever is needed, I like to make stuff.
ASME IX, AWS 17.1, D1.1
Instagram #RNHFAB
ASME IX, AWS 17.1, D1.1
Instagram #RNHFAB
Markus, I did your test looks like I have an equipment or gas problem.
The photo is done at
45 amp
25 sec post flow
#6 cup (I tried it with a #8 gas lens and got similar results)
I have tried to find leaks here is what I have done
first tank gauge still shows almost the same pressure half an hour after tank is turned off so I assume line to welder solenoid is tight
Second with a extra quick connect I have for the argon to the welder I made up a short hose and a gauge. Shut off tank, tripped solenoid so gauge showed output pressure. After 20 minutes the gauge had remained at same pressure so I am guessing all is tight to the quick connect on the machine.
Torches I have two changing them makes no difference. I have visually inspected them everything looks good as far as I can see. Is there any better way to check the torches?
Thanks again for all your help
Mark
PS grey welds clean up with small hand wire brush and shine when buffed so I guess they are usable.
- Attachments
-
- IMG_1138a.jpg (28.75 KiB) Viewed 1746 times
Yup you definitely have a gas leak somewhere.
So you tested the welder for leaks and it's OK. On both sides of the solenoid, if understood correctly.
If so then there is only two options. Your both torches leaks or you have a bad bottle of argon.
What you mean by checking visually? You need a tester or soap water to check system from leaks. Otherwise it is impossible to tell results.
Do these next:
1. Check the torch for leaks while argon is flowing in it. Take soap water and spray over all joints and connections and try to look if any bubbles appear... Torch end cap, insulator, torch connection to the welder are usually places where leaks can be found.
If you can't find any leak. Then perhaps there is a leak in the torch line itself, if so you need to repair it at the local shop. However before paying anything for repairs I recommend to try my second advise below.
2. Try another bottle of argon if possible. There is sometimes bottle that contains too much moisture, which causes color and bad welds.
PS
You are able to check the torch from leaks on a pressure tester bench. Welder repairs shop usually offers these kind of services. They simply hook the torch on the pressure bottle, just like you would to the welder and then they block the torch head with special block.
-Markus-
Threads on the torch head are either 5/16-24 or 3/8-24 depending on what you are using. Block it and hit the peddle. If there is a leak the ball will float.
Soap bubble test as mentioned works well, the only thing I'd add is that it helps to apply suds with a sponge rather than a spray bottle.
-Sandow
Soap bubble test as mentioned works well, the only thing I'd add is that it helps to apply suds with a sponge rather than a spray bottle.
-Sandow
Red-hot iron, white-hot iron, cold-black iron; an iron taste, an iron smell, and a babel of iron sounds.
-Charles Dickens
-Charles Dickens
I guess it the gas?
I took the torch apart, (end cap and all cup end fittings off) unplugged the lead from the welder (gas feed separate connection) plugged both sides of the torch head with my fingers. When I pressed the peddle the flow meter jumped up as it pressurized the lines then went to zero, so the quick connect , hose and head are gas tight.
I then reassembled and did the soapy water test. I got a few bubbles, the largest about the size of a pea after 10 seconds of gas flow. This would seem to be a very small percentage of the gas flow at 20 cfh. I then using good quality stretchy electrical tape, I taped the joint between the end cap and torch body and tried the spot test again no better.
Does this all sound like a good torch leak test? Can anyone add to what I should try?
Thanks
Mark
exnailpounder
- exnailpounder
-
Weldmonger
-
Posts:
-
Joined:Thu Dec 25, 2014 9:25 am
-
Location:near Chicago
exnailpounder
- exnailpounder
-
Weldmonger
-
Posts:
-
Joined:Thu Dec 25, 2014 9:25 am
-
Location:near Chicago
Nothing like giving a new welder a 40 page list of things to confuse him even more.
Ifyoucantellmewhatthissaysiwillbuyyouabeer.
Is it possible that you have a bad bottle of argon? Yes. Is it more likely that the problem is the tank vs something you are still doing wrong? Not really.
If you take the tank back to your supplier they'll probably swap it out for free if you tell them it is bad. If it isn't hard to do that, why not. At least you'll know one way or another.
Just to sanity check though... You are running pure argon not 75:25 right? Those salmon color spots were with an on time of like a second right? You aren't cranking the gas flow rate way up to shield better right?
-Sandow
If you take the tank back to your supplier they'll probably swap it out for free if you tell them it is bad. If it isn't hard to do that, why not. At least you'll know one way or another.
Something to be said about just getting torch time and worrying about perfection later... Get so torch time on mild steel where the material is cheaper and it matters less if you have some oxygen in your shielding gas.exnailpounder wrote:You should try welding
Just to sanity check though... You are running pure argon not 75:25 right? Those salmon color spots were with an on time of like a second right? You aren't cranking the gas flow rate way up to shield better right?
-Sandow
Red-hot iron, white-hot iron, cold-black iron; an iron taste, an iron smell, and a babel of iron sounds.
-Charles Dickens
-Charles Dickens
the tank is labeled Argon. No sparks or splatter.
The last test may be a little high on the flow 20 cfh and a #6 nozzle.
My steel welds don't look that nice either.
May have a chance to get access to another tank just to check if it is the gas
If I can't, It's only an 80 cf tank, and as you all say I need the torch time so I plan to run it out
Thanks
Mark
Return to “Tig Welding - Tig Welding Aluminum - Tig Welding Techniques - Aluminum Tig Welding”
Jump to
- Introductions & How to Use the Forum
- ↳ Welcome!
- ↳ Member Introductions
- ↳ How to Use the Forum
- ↳ Moderator Applications
- Welding Discussion
- ↳ Metal Cutting
- ↳ Tig Welding - Tig Welding Aluminum - Tig Welding Techniques - Aluminum Tig Welding
- ↳ Mig and Flux Core - gas metal arc welding & flux cored arc welding
- ↳ Stick Welding/Arc Welding - Shielded Metal Arc Welding
- ↳ Welding Forum General Shop Talk
- ↳ Welding Certification - Stick/Arc Welding, Tig Welding, Mig Welding Certification tests - Welding Tests of all kinds
- ↳ Welding Projects - Welding project Ideas - Welding project plans
- ↳ Product Reviews
- ↳ Fuel Gas Heating
- Welding Tips & Tricks
- ↳ Video Discussion
- ↳ Wish List
- Announcements & Feedback
- ↳ Forum News
- ↳ Suggestions, Feedback and Support
- Welding Marketplace
- ↳ Welding Jobs - Industrial Welding Jobs - Pipe Welding Jobs - Tig Welding Jobs
- ↳ Classifieds - Buy, Sell, Trade Used Welding Equipment
- Welding Resources
- ↳ Tradeshows, Seminars and Events
- ↳ The Welding Library
- ↳ Education Opportunities