mig and flux core tips and techniques, equipment, filler metal
corydangah
  • Posts:
  • Joined:
    Sat Mar 03, 2012 2:44 am

Hey everyone!

First post here. I have been welding for a while now and I have come to the conclusion that the quality of my welds have been in my opinion satisfactory but not to the level that I want them to be. I have been doing online research on the subject and trying different things so now I am looking to improve my consistence and quality of my welding.

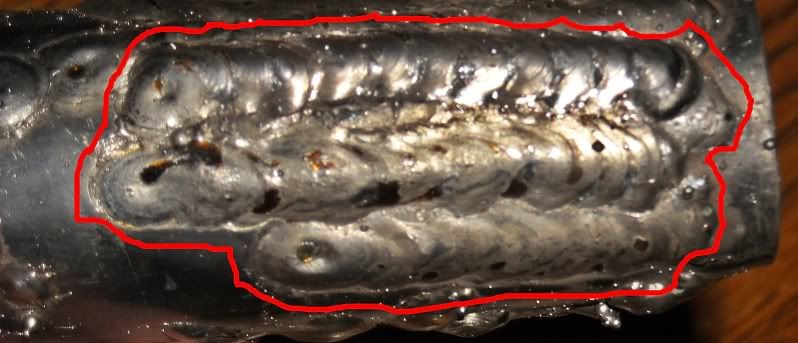
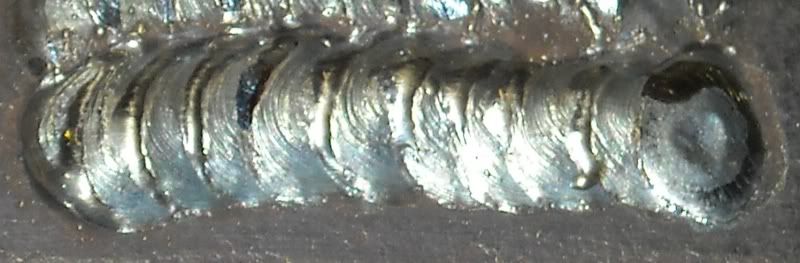
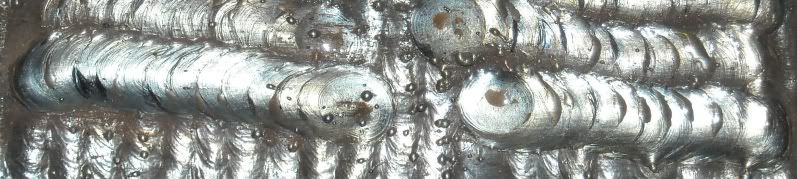
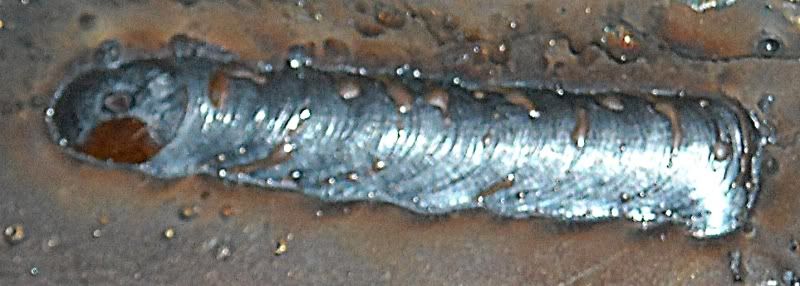
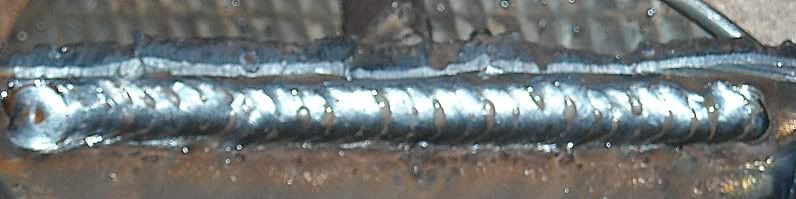
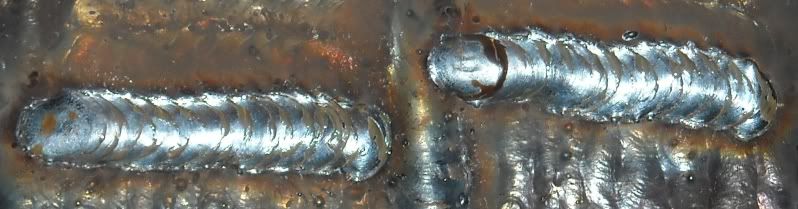
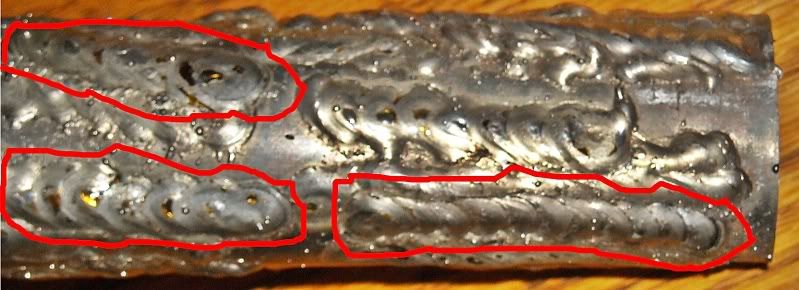
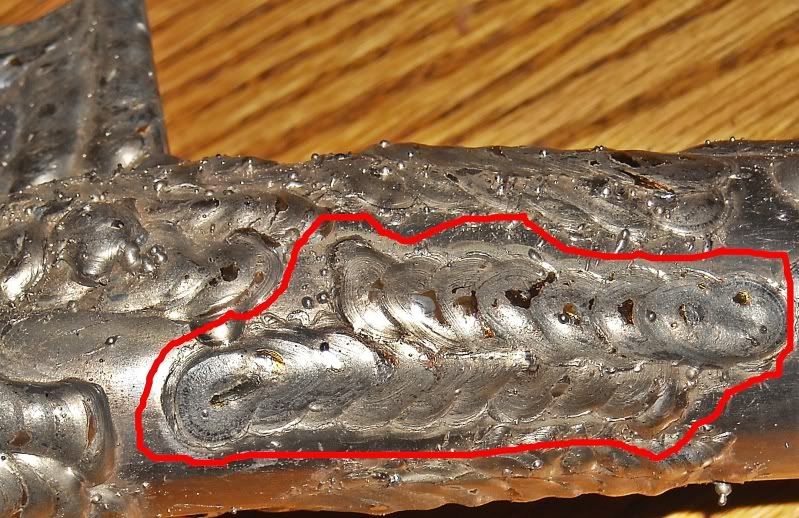
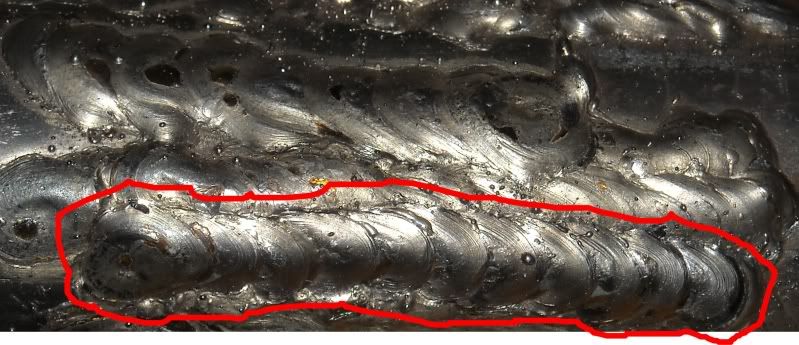
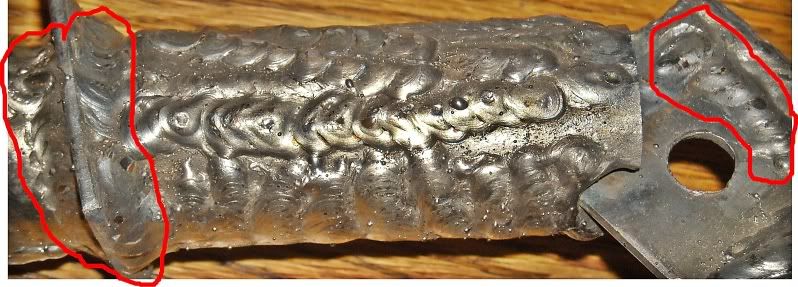
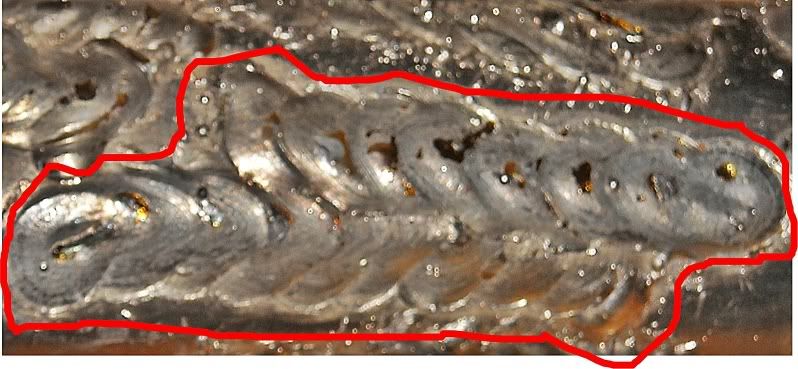
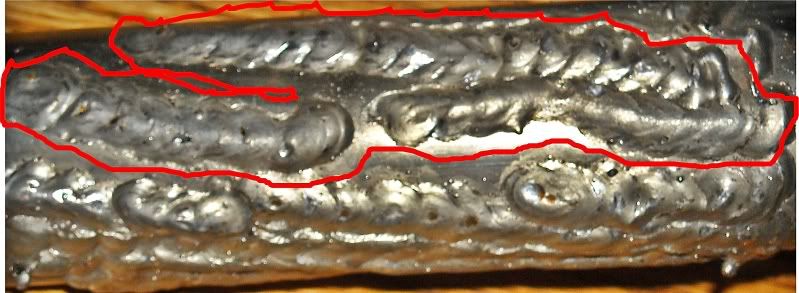
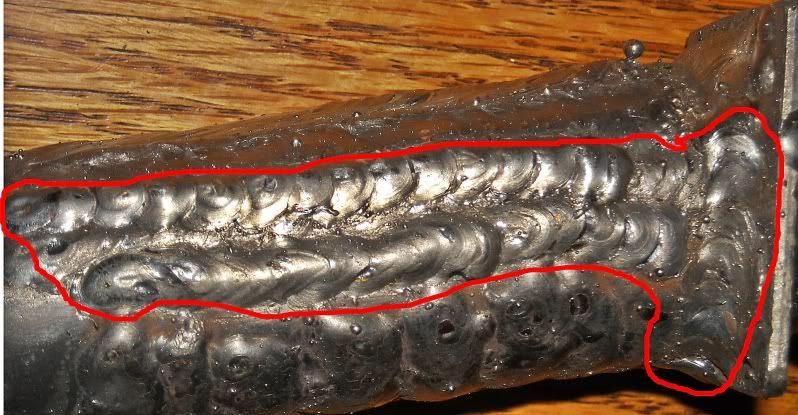
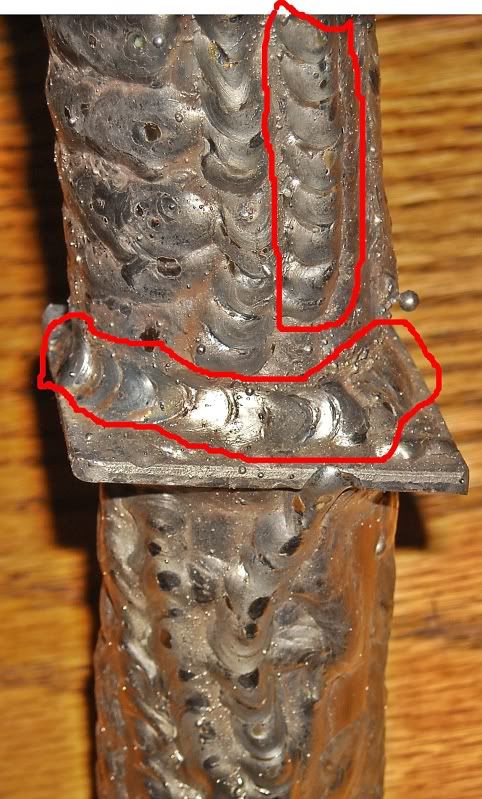
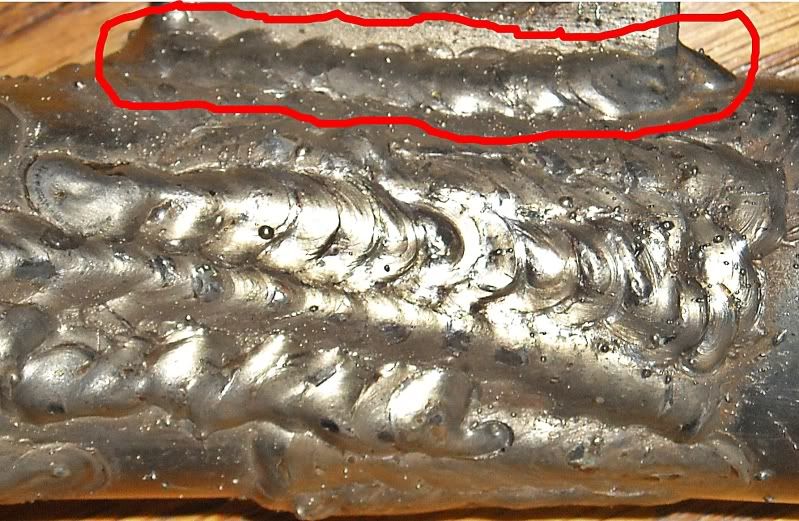
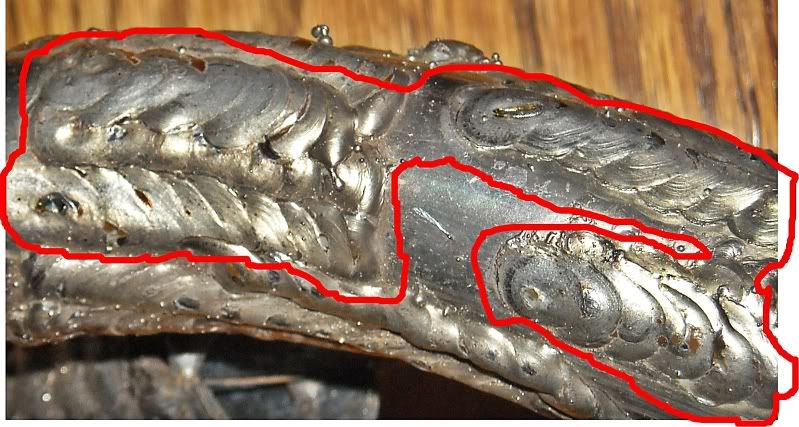
I have a bunch of pictures of some of my practice and I have circled some of them that look decent but I am open to any criticism on all of the welds even the ones that are not that good just to get me on the right path. Feel free to ask me any questions as well.

Thanks for the support!

Cory

1
Image
2
Image
3
Image
4
Image
5
Image
6
Image
7
Image
8
Image
9
Image
10
Image
11
Image
GWD
  • Posts:
  • Joined:
    Fri Feb 26, 2010 8:50 pm
  • Location:
    Northern CA

There are a lot of excellent welders on this forum and they can give you good advice.

My additional advice is to join and post the photos on WeldingWeb. They seem to have the most critical opinions anywhere and are not shy about expressing themselves. Go to the "Introduce Yourself" forum.

http://weldingweb.com/index.php

Not to denigrate this site. The guys here are great, just "too nice". :lol:
corydangah
  • Posts:
  • Joined:
    Sat Mar 03, 2012 2:44 am

Thanks for the input

I will take you up on your advice and i guess copy and paste this in the introduce section of that forum so i can get a more diverse set of information!
User avatar
  • Posts:
  • Joined:
    Fri Apr 01, 2011 10:59 pm
  • Location:
    Australia; Victoria

Hi there,

Dont worry about other forums. We're the best show in town. And we're all great guys and gals who tell it like it is.

Anyhow, to your welds. They look pretty good for a start. Good fusion. Travel speed pretty constant. No porosity. Not bad. The next step is to get a flat plate and practice some straight beads. mark a line with a pencil or something and practice getting nice consistant beads all the way. Fill the crater at the end by pausing for a second and then putting another spot on top without moving. When you have nailed that, move on to more buildup work like your photos but concentrating on keeping everthing nice and flat. This is a technique used for surfacing and also multipass butt welds. Put the wire exactly at the edge of the preceeding bead and lean the gun over towards it. The weld will flow over half of the other weld. The result is an even layer. This is a good way to learn about angles of the gun and travel speed. Then you can move on to joints.

Keep up the good work from Mick.
rahtreelimbs
  • Posts:
  • Joined:
    Mon Jun 14, 2010 10:39 pm

weldin mike 27 wrote:Hi there,

Dont worry about other forums. We're the best show in town. And we're all great guys and gals who tell it like it is.
Good advice !!! I stopped going over to the WeldingWeb simply because some are more interested in belittling and being condescending.
User avatar
  • Posts:
  • Joined:
    Fri Apr 01, 2011 10:59 pm
  • Location:
    Australia; Victoria

Hi there,

I had a look over there when I wrote that. I couldnt work out their system so Im happy here. Plus whats the point of making people feel bad for giving it their best shot. Thats not how I roll.

Mick
corydangah
  • Posts:
  • Joined:
    Sat Mar 03, 2012 2:44 am

Hey thanks for the reply and i appreciate the input.

I think that is a good idea to draw lines and try to get all my welds consistent with width i will definitely try that.

So the weld should take out a crater and then you fill it and the overall goal is to make it flat, i saw a photo on another forum and they looked flat maybe pertrude a slight bit so i guess i should try that

I think one of my flaws with the majority of these was i was going to fast the piece was super super hot from all the practice and today i did some welding on a bash bar for my car with similar settings and i got a completely different results.

Heres how those turned out i say it looks like improvement

Image
Image
Image
User avatar
  • Posts:
  • Joined:
    Fri Apr 01, 2011 10:59 pm
  • Location:
    Australia; Victoria

Hi there,

Sorry, I have not explained the term crater properly. The crater is at the end of the weld when you stop. It must be filled to at least the level of the weld by a very slight pause before you let go of the trigger. Then a single spot in the same spot to add a little extra weld. This is because the crater is where the weld shrinks and can cause a crack if not filled correctly. As for the different positions thats a matter a practice. General setting is lower for up hill. You can keep the settings hot for down hill but you must move fast to keep in front of the molten metal. Your welds look fine. Just keep practicing. And watch Jodies videos on this site. Where are you located?

Mick.
delraydella
  • Posts:
  • Joined:
    Mon Apr 25, 2011 7:35 pm
  • Location:
    Detroit, MI

The welds on the tube look pretty good. It's really easy on notched tube joints to get a pile of weld at the start point and yours look nice and even. Nice work!

Steve
WeldingSyncrowave 250,Millermatic 252,30a Spoolgun Cutting12" Hi-speed Cutoff Saw, 9x 12 Horizontal Bandsaw MillingGorton 8d Vertical Mill TurningMonarch EE Precision Lathe GrindingBrown & Sharpe #5 Surface Grinder
corydangah
  • Posts:
  • Joined:
    Sat Mar 03, 2012 2:44 am

Thanks everybody,

I have not had a lot of time to practice but i got a bit of welding in today trying to get the basics down.

I found out that the wire speed was fairly high at the setting i thought it was so i turned it down a slight bit and turned up the heat because i was welding on over quarter inch steel plate. I got some thin stuff i will practice on next.

anyway here are some of them:

Image

Image

Image

Image

This was welded uphill

Image

Image

For these i slowed my travel a lot and concentrated more on keeping the wire pointing directly into the metal and less at an angle into the puddle. I still pulled it but i reduced my angle some for these runs.

I think that they came out pretty good with the gun roughly on 230 ipm and around 120 amps (i dont know for sure but it was almost on full with 140 amp max.)
User avatar
  • Posts:
  • Joined:
    Fri Apr 01, 2011 10:59 pm
  • Location:
    Australia; Victoria

Hi,
Keep it up. It looks great.

Mick
GWD
  • Posts:
  • Joined:
    Fri Feb 26, 2010 8:50 pm
  • Location:
    Northern CA

Looks like you have a natural knack for it. Others may nit-pick but it is good progress and shows puddle control.

Out of position stuff can come next.
Standup2p
  • Posts:
  • Joined:
    Thu Apr 05, 2012 2:21 pm

Hello all 1st post here. I am primarily a woodworker. Running a Lincoln 140 HD. Last night practicing I notice some little floating blobs in the pool that seem to coincide with the kind of copper looking points in my friends first batch of photos. Pick at them with an awl and there seems to be some black slag inclusion.
Using Lincoln 25 wire and 90/10 Argon/CO2. Pls nnthanks.
Ultralow787
  • Posts:
  • Joined:
    Fri Apr 29, 2011 11:30 pm
  • Location:
    Ontario, Canada

I believe the little dark coloured dots you are referring to are called "silicon islands" and are the result of the deoxidizers and other alloying elements in the mig wire being left on the surface. There really is no flux slag in MIG welding.
Oh, and welcome to the forum!
Another thought, depending on the cleanliness of your metal to start with, there could be other impurities such as mill scale mixed in there too!
Perfection is impossible, but if you strive for perfection, excellence is obtainable!

1983 Canox "Sparkler" 225 AC Stick Welder
Hobart 210 MVP MIG Welder
Harris "Spitfire" Oxy-Acetylene Set
User avatar
  • Posts:
  • Joined:
    Thu Jan 06, 2011 11:40 pm
  • Location:
    Near New Orleans

Ultralow787 said what I was thinking. There seems to be a lot of dross on the welds. While a little is normal for the reason Ultralow mentioned, I'm leaning toward his second thought; Cleanliness. Are you grinding your metal clean before welding? Mill scale, dirt, rust, etc. will cause these little glassy deposits on the weld surface.

I agree with previous posts... If you are as inexperienced as you say, you are doing very well. You have a solid grasp of the basics, so improving will only require practice. Pay attention to the forum here, Jody's videos, and any opportunity to watch someone else weld (no two people do it exactly the same, so there's always something to learn).

I've been welding for a living for many years, and regularly do everything I just suggested.

Steve
CoreyMac
  • Posts:
  • Joined:
    Tue Apr 03, 2012 1:36 pm
  • Location:
    Edmonton AB Canada

Just curious, are you pulling the weld or pushing it? Also what direction are you traveling from start to finish? I will say that it seems you are making leaps and bounds of improvment each time you weld. The beads you are laying look very good, good speed and uniformity. I noticed there is a little extra spatter from the pictures but its not to bad, like everybody said keep things as clean as possible. Maybe modify your wire speed (probably a tad slower) and that will control the excess spatter, but having said that its impossible to get it spatter free strictly because it mig and you always get some.

Looks good to me. Keep practicing but the welds on the tubes look more than adequate.
TrinitySteve
  • Posts:
  • Joined:
    Fri Feb 15, 2013 12:32 am

I think your welds look good and I commend you for seeking advice. You have the basics down. I find that the best teacher is seat time! You are not afraid to experiment and try different techniques.
I find on any given project I may need to use different techniques and/or settings, depending on the situation. Experience is the key.
I have also learned alot watching Jody share his experience. Good work! Keep after it.
Follow da blue light
  • Posts:
  • Joined:
    Sat May 11, 2013 3:44 am
  • Location:
    Melbourne Australia

An old thread I know so please for give me for resurrecting it.
I dont get the stack of dimes or caterpillar look of welds, it must be a regional thing?
I much prefer the nice neat flat weld with no ripples.
Is there a strength difference between the two types?
User avatar
  • Posts:
  • Joined:
    Fri Apr 01, 2011 10:59 pm
  • Location:
    Australia; Victoria

Hey,

Me either . We just run straight. Only some times we do a little flick, but mainly straight and flat. Unless its stop start, on gaps or thin stuff.

Mick
semihemi
  • Posts:
  • Joined:
    Fri Jun 22, 2012 5:45 pm
  • Location:
    Noth East Georgia

the only "stack-o-dimes" i have ever been able to get is from using GTAW ... didnt jody do a piece about "stacking dimes with GMAW" recently?
Life is not a journey to the grave with the intention of arriving safely in
a pretty and well preserved body, but rather to skid in broadside,
thoroughly used up, totally worn out, and loudly proclaiming
- WOW- What a Ride
Alexa
  • Posts:
  • Joined:
    Mon Dec 31, 2012 10:07 am

Follow da blue light wrote:An old thread I know so please for give me for resurrecting it.
I dont get the stack of dimes or caterpillar look of welds, it must be a regional thing?
I much prefer the nice neat flat weld with no ripples.
Is there a strength difference between the two types?
=====

From a mechanical properties and corrosion resistant point of views, the smoother the cover pass the better. For example, tigging stainless for a sanitary (kitchen or hospital) end uses, would want as smooth a cover pass as possible.

For other welds, depending upon the end uses, it makes no difference.

For some welds, depending upon the limits of the welding machine, and the expertise of the welder, the series of cold/hot puddles (dimes) are convenient.

Good point about the dimes ... tanks for the comment.

Alexa
Post Reply