I have been lurking around for quite some time, so I am not really new to the site and have been a subscriber to weldingtipsandtricks youtube. I am new at tig welding, but had spent quite some time (years) going through threads and watching Jody's vids on youtube. I am pretty comfortable with the process, even the first beads i laid, but I believe this is attributed toward watching the vids and a ton of great members on this forum.
Around Christmas time a friend surprised me with a tig welder, after hearing me say I had been looking for quite some time. He knew I was saving up for a miller, but i had wanted to try the AHP AlphaTig200 (V3)... one showed up at my door a short while later. I set it up and got right to it. I have gotten much better since then also. My very first attempts at tig welding here:
https://www.youtube.com/watch?v=-6p3d_EZeKI
https://www.youtube.com/watch?v=oqTMmRxcpy8
I would like to weld quite a bit of aluminum so I want to build a tig torch cooler. I had been researching tig torch coolers for a while and settled on the DIY method. There are a few threads on it, but I thought I would post another thread, with what I am doing, which will include a little more info, the prices i paid, fittings etc... I need a first post anyway. It is very simple to me now, but I was intimidated by it, prior to doing the research and getting the parts... Feel free to post what you would change etc. or any advice for anyone else that may find this thread helpful to them (on top of any of the other threads on this topic). I have everything I need for what I am doing, except two quick disconnect fittings (bulkhead style), which I ordered and am waiting on..
-Gerald
What welding projects are you working on? Are you proud of something you built?
How about posting some pics so other welders can get some ideas?
How about posting some pics so other welders can get some ideas?
LS Customs
- LS Customs
-
Ace

-
Posts:
-
Joined:Tue Feb 23, 2016 11:56 pm
LS Customs
- LS Customs
-
Ace
-
Posts:
-
Joined:Tue Feb 23, 2016 11:56 pm
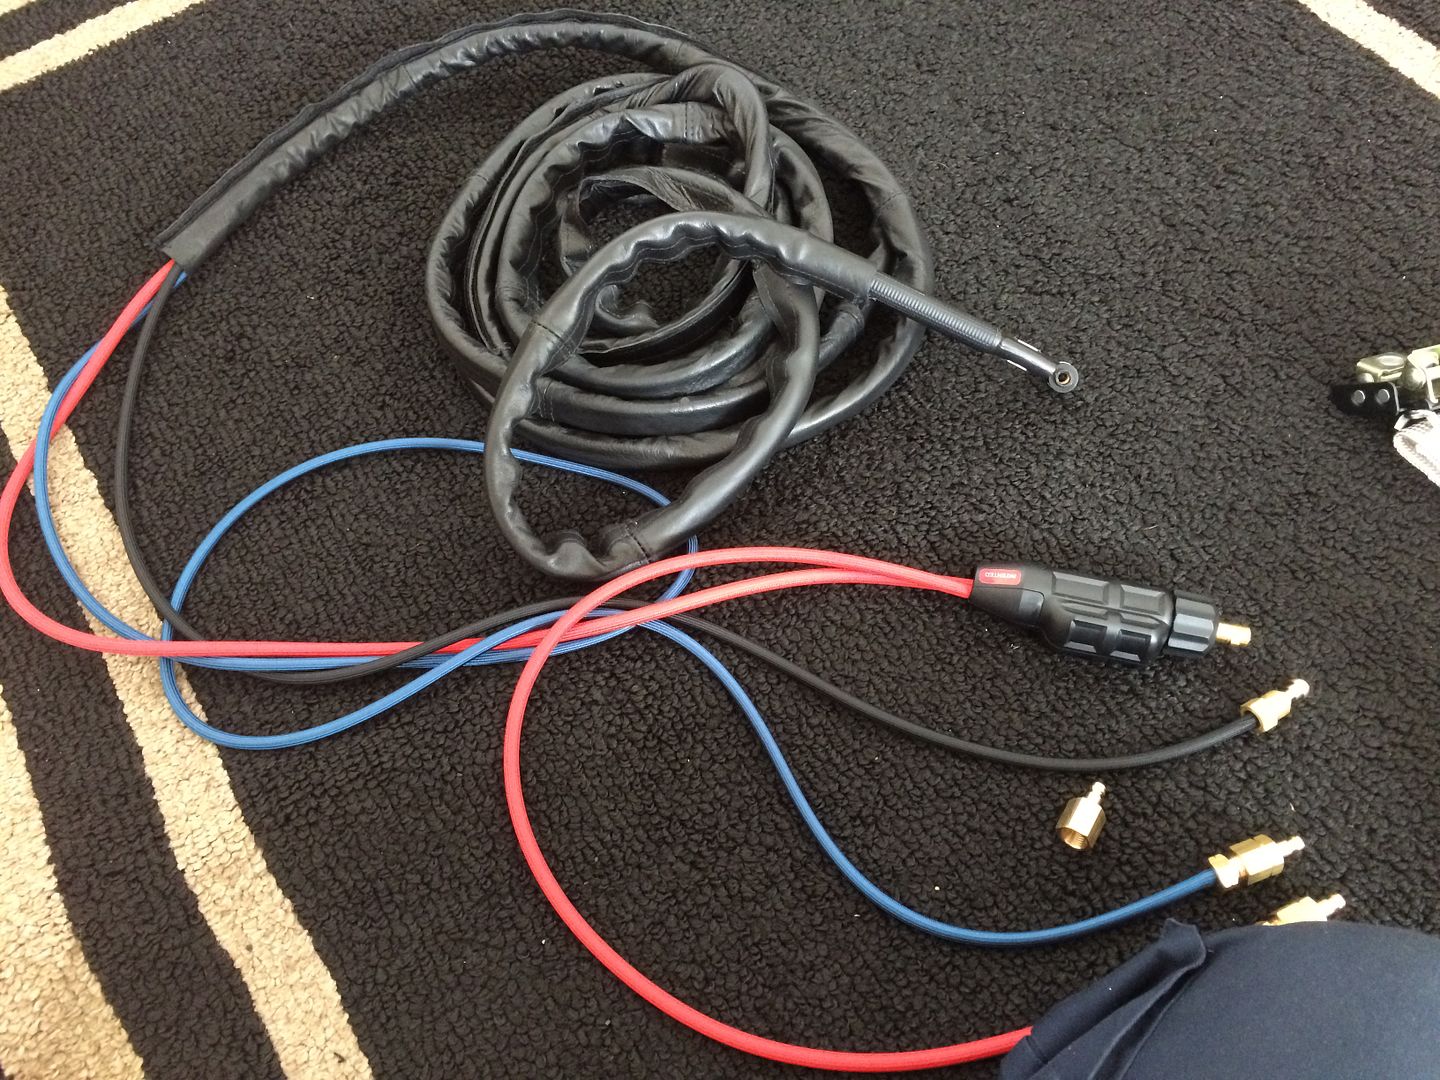
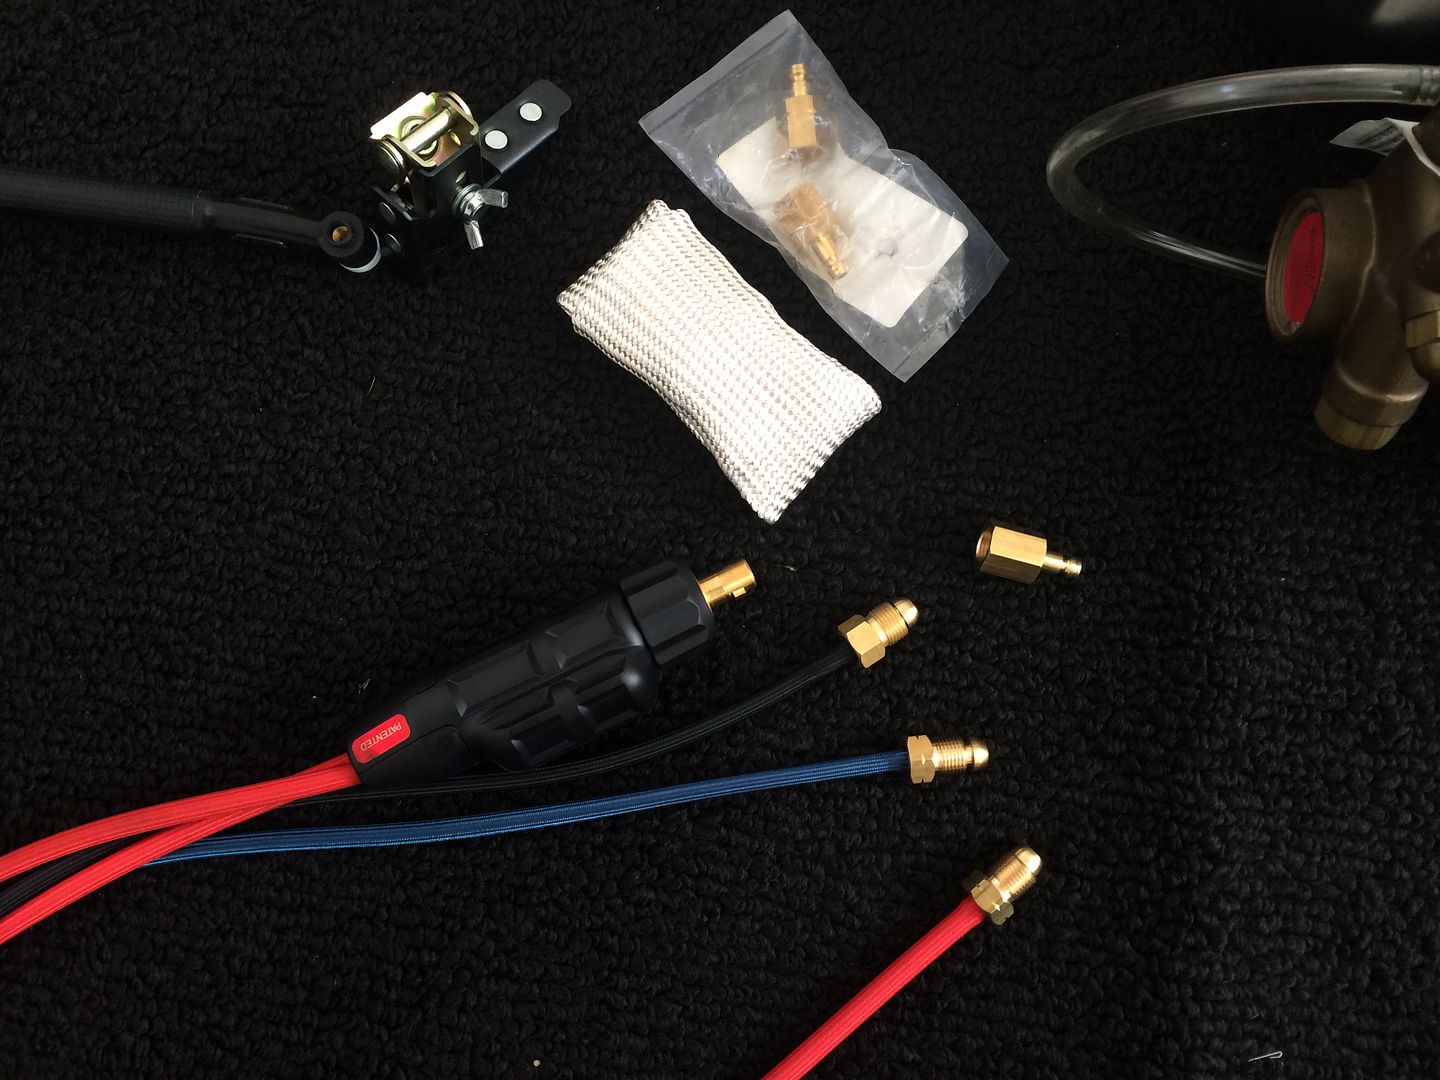
I started off by picking a torch. I went to Jody's online store (weldmongerstore.com) to purchase the complete setup and a tig finger (to show some support and appreciation), he does not offer torches at this time. I bought a strong hand magnet tool and a tig finger. I bought a CK 20 flex head from weld usa.
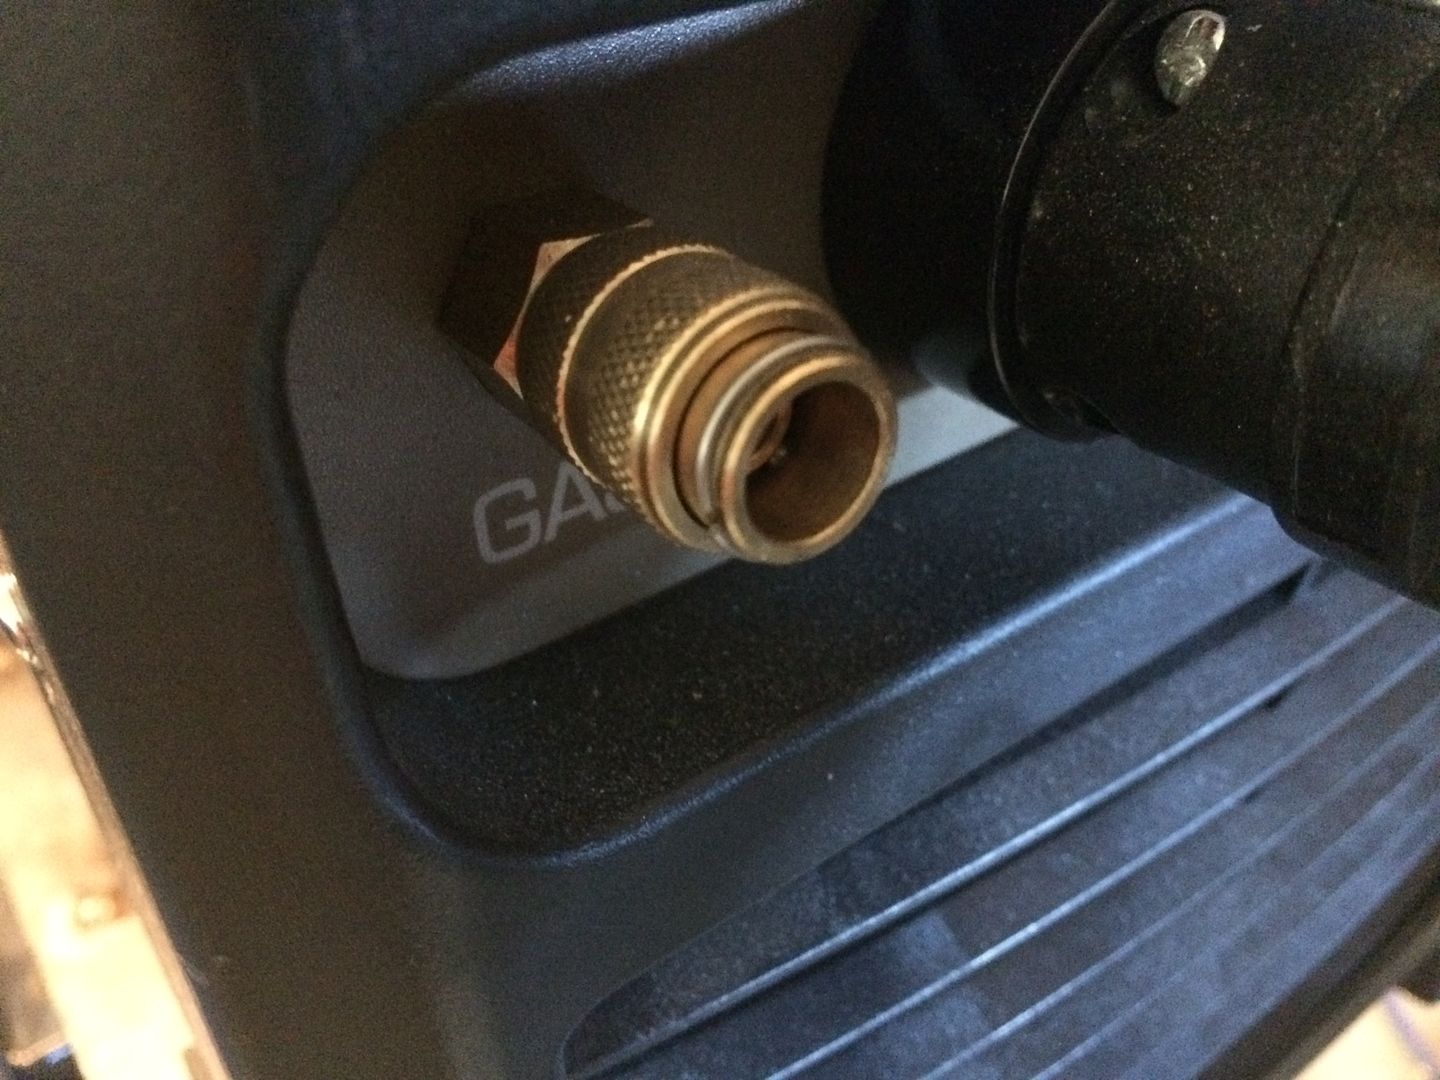
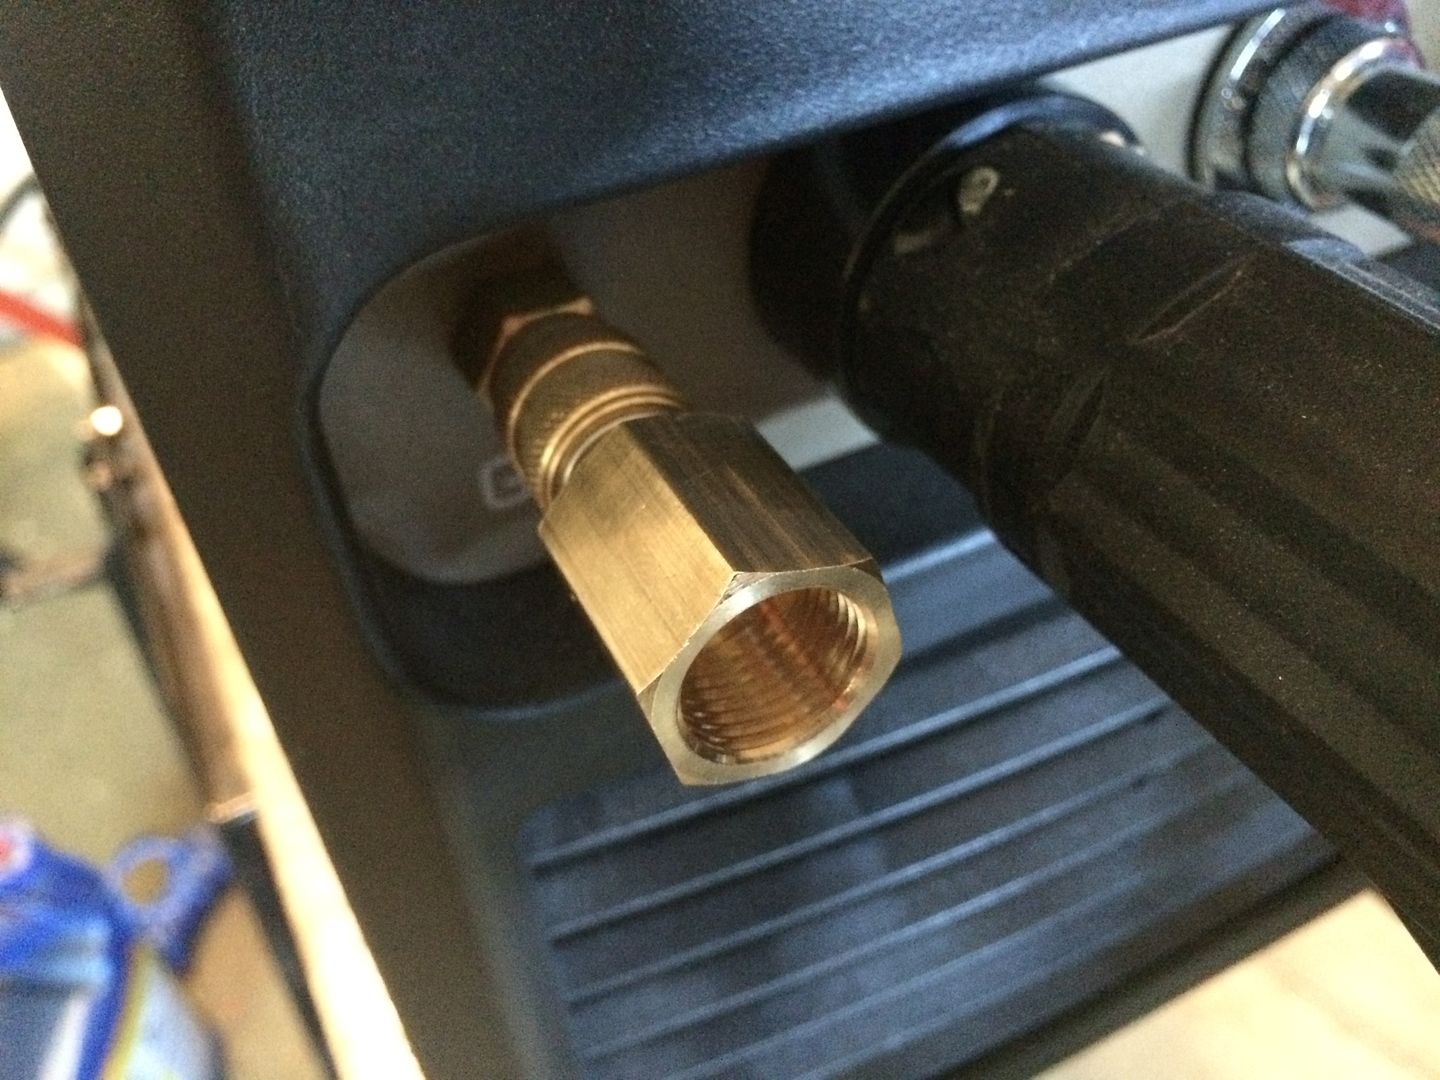
I also picked up quick connect fittings to connect into the factory gas outlet on the welder and to adapt the torch ends to quick connect fittings for the water also.

I also picked up quick connect fittings to connect into the factory gas outlet on the welder and to adapt the torch ends to quick connect fittings for the water also.
LS Customs
- LS Customs
-
Ace
-
Posts:
-
Joined:Tue Feb 23, 2016 11:56 pm
i verified that the fitting i bought for female quick connect on the AHP fit properly. I will do a parts/price list after I get it all set up (on anything I dont list as I go along)... the male ends on the quick connect are the same... however, the difference between the gas fitting and the water, are the threads... the water fittings are reverse thread...
LS Customs
- LS Customs
-
Ace
-
Posts:
-
Joined:Tue Feb 23, 2016 11:56 pm
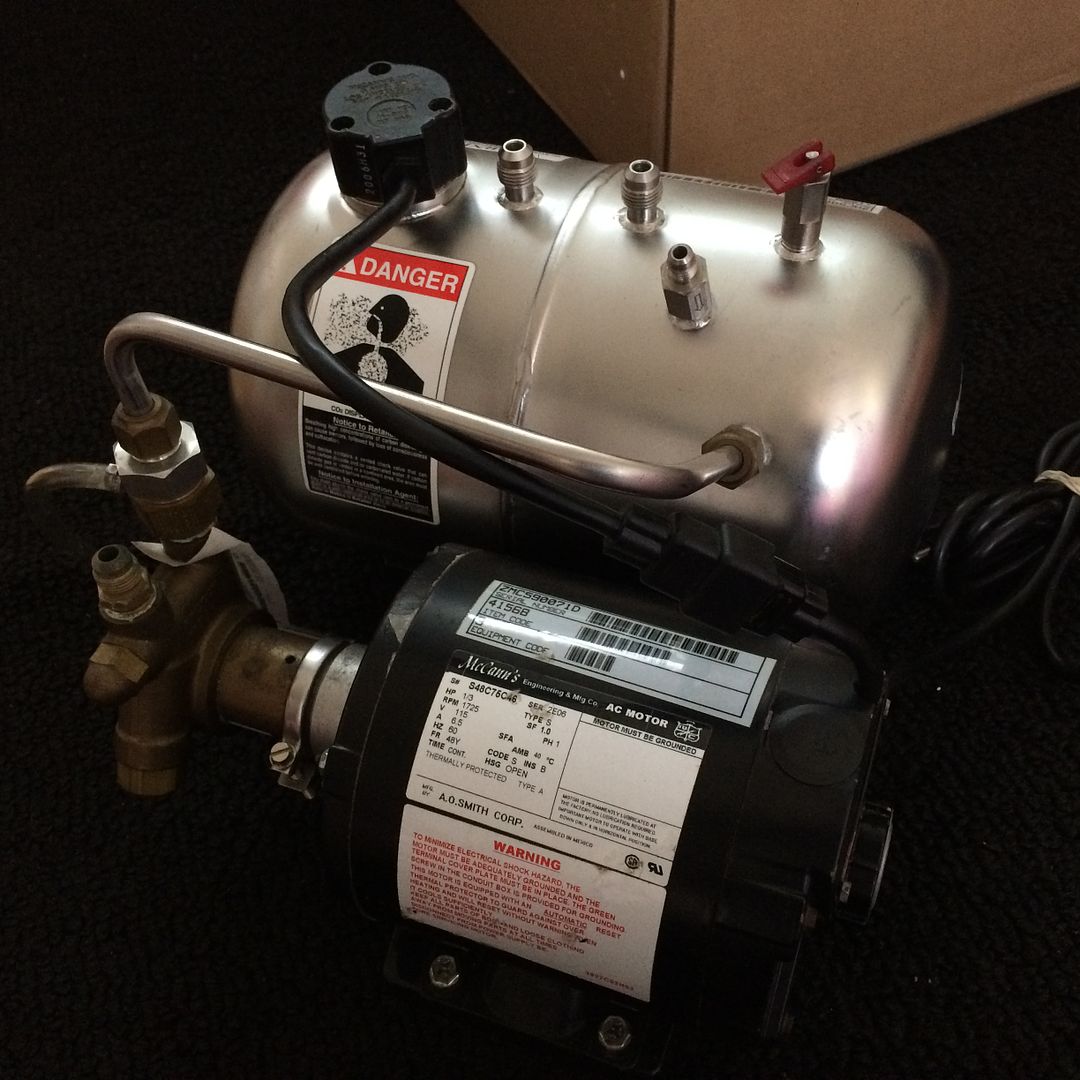
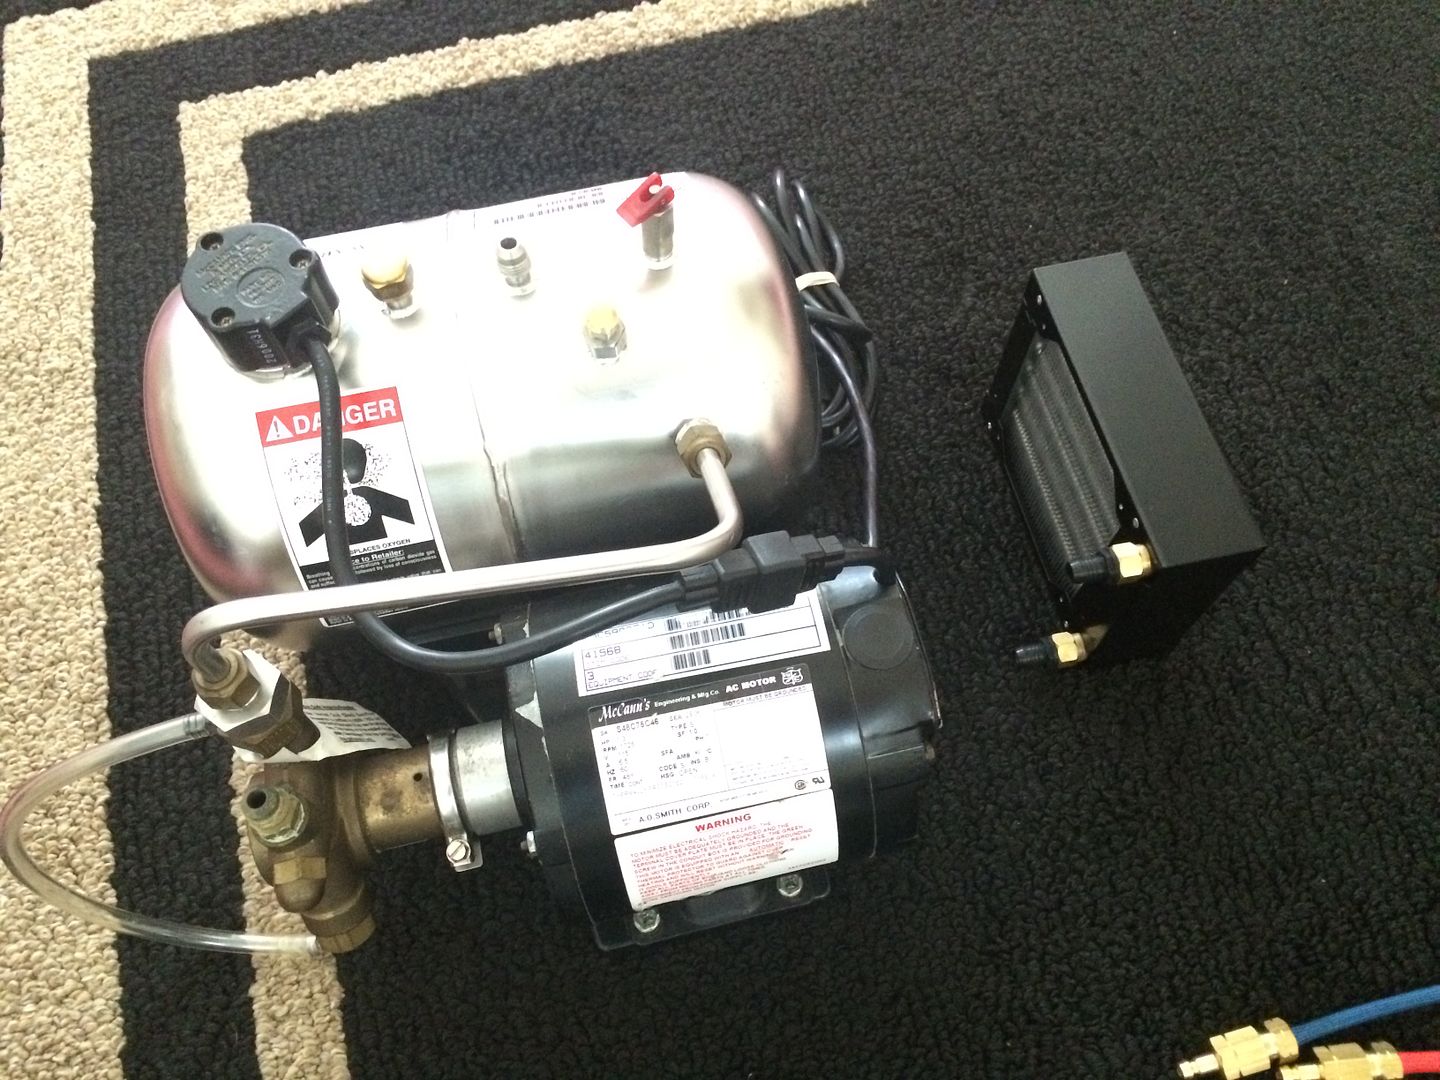
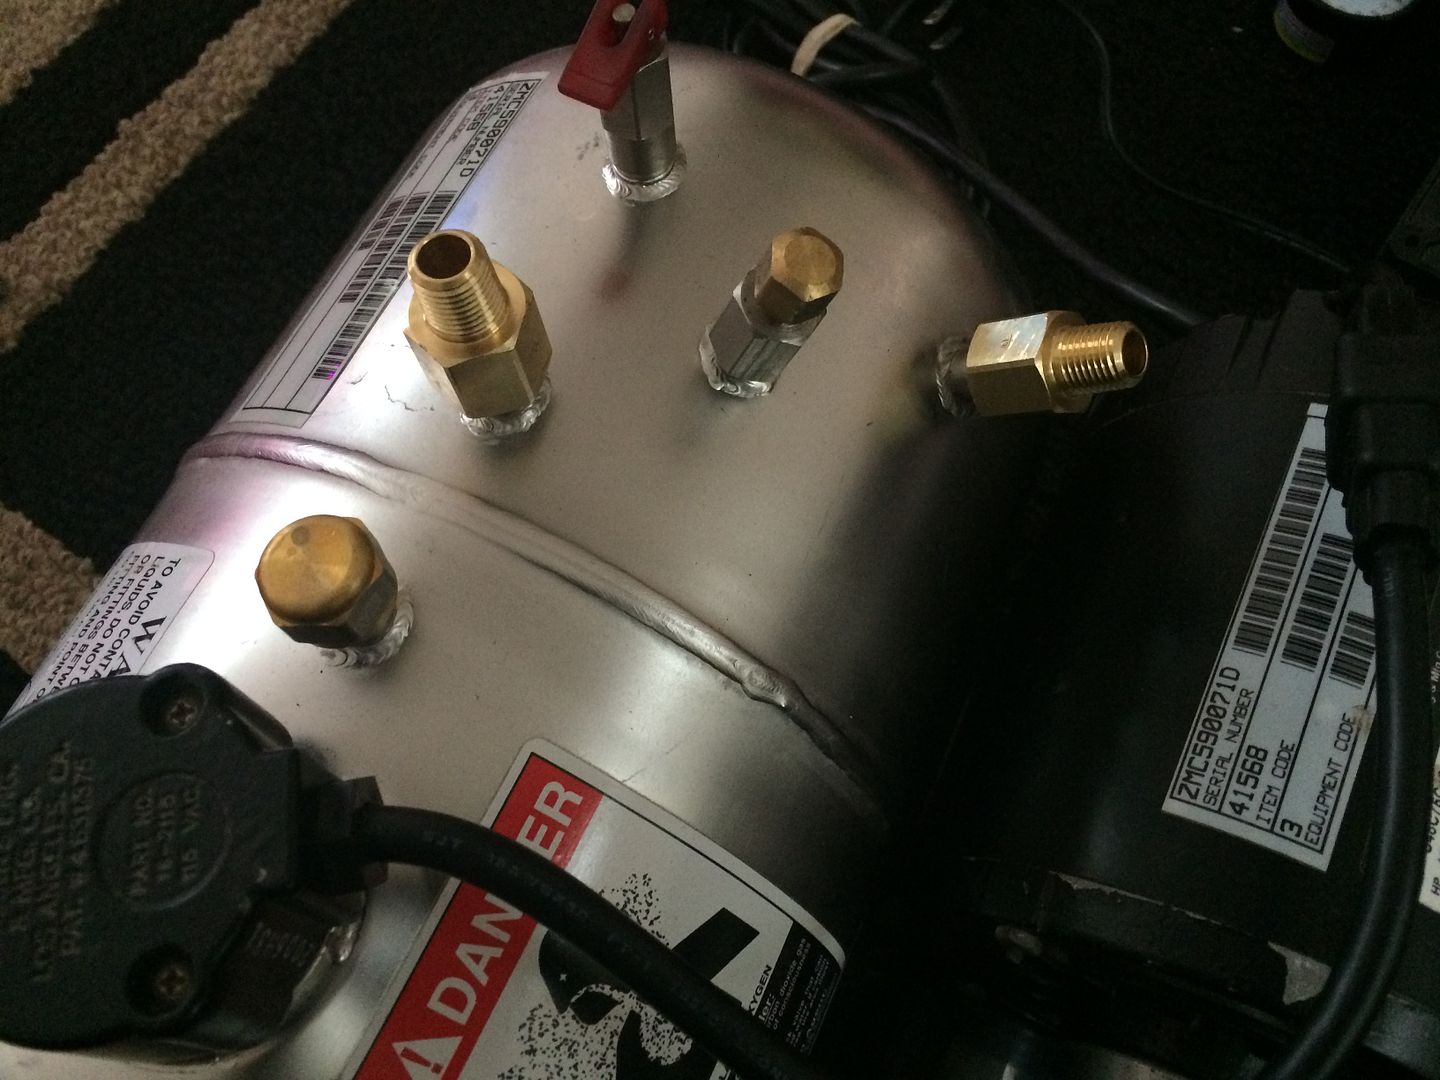
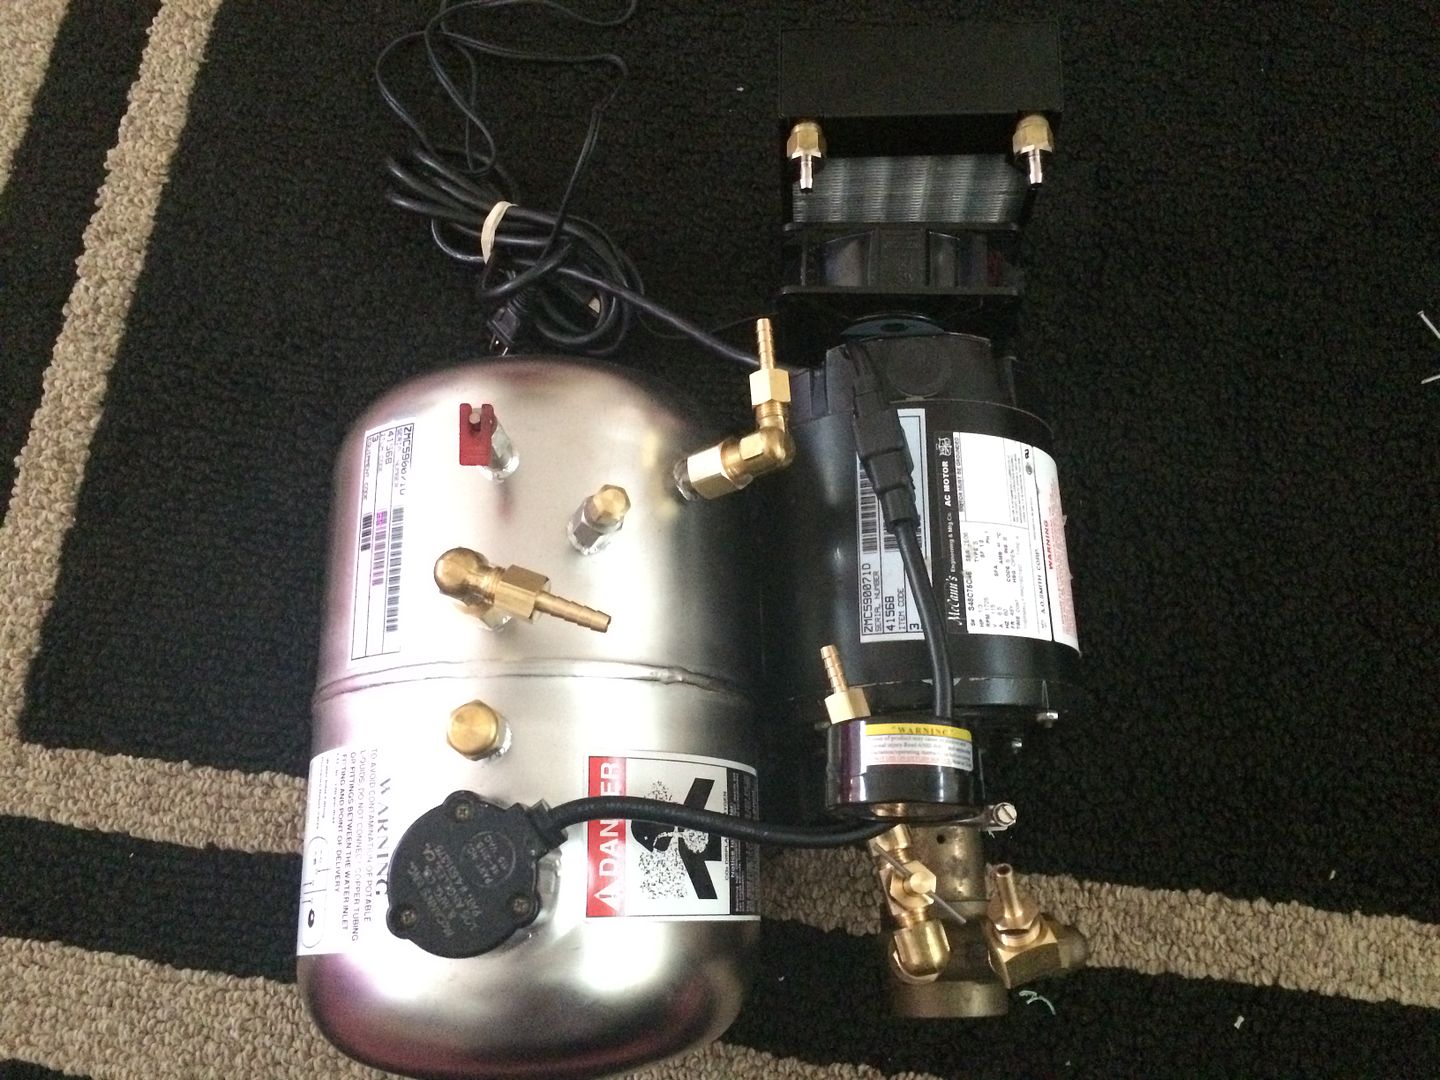
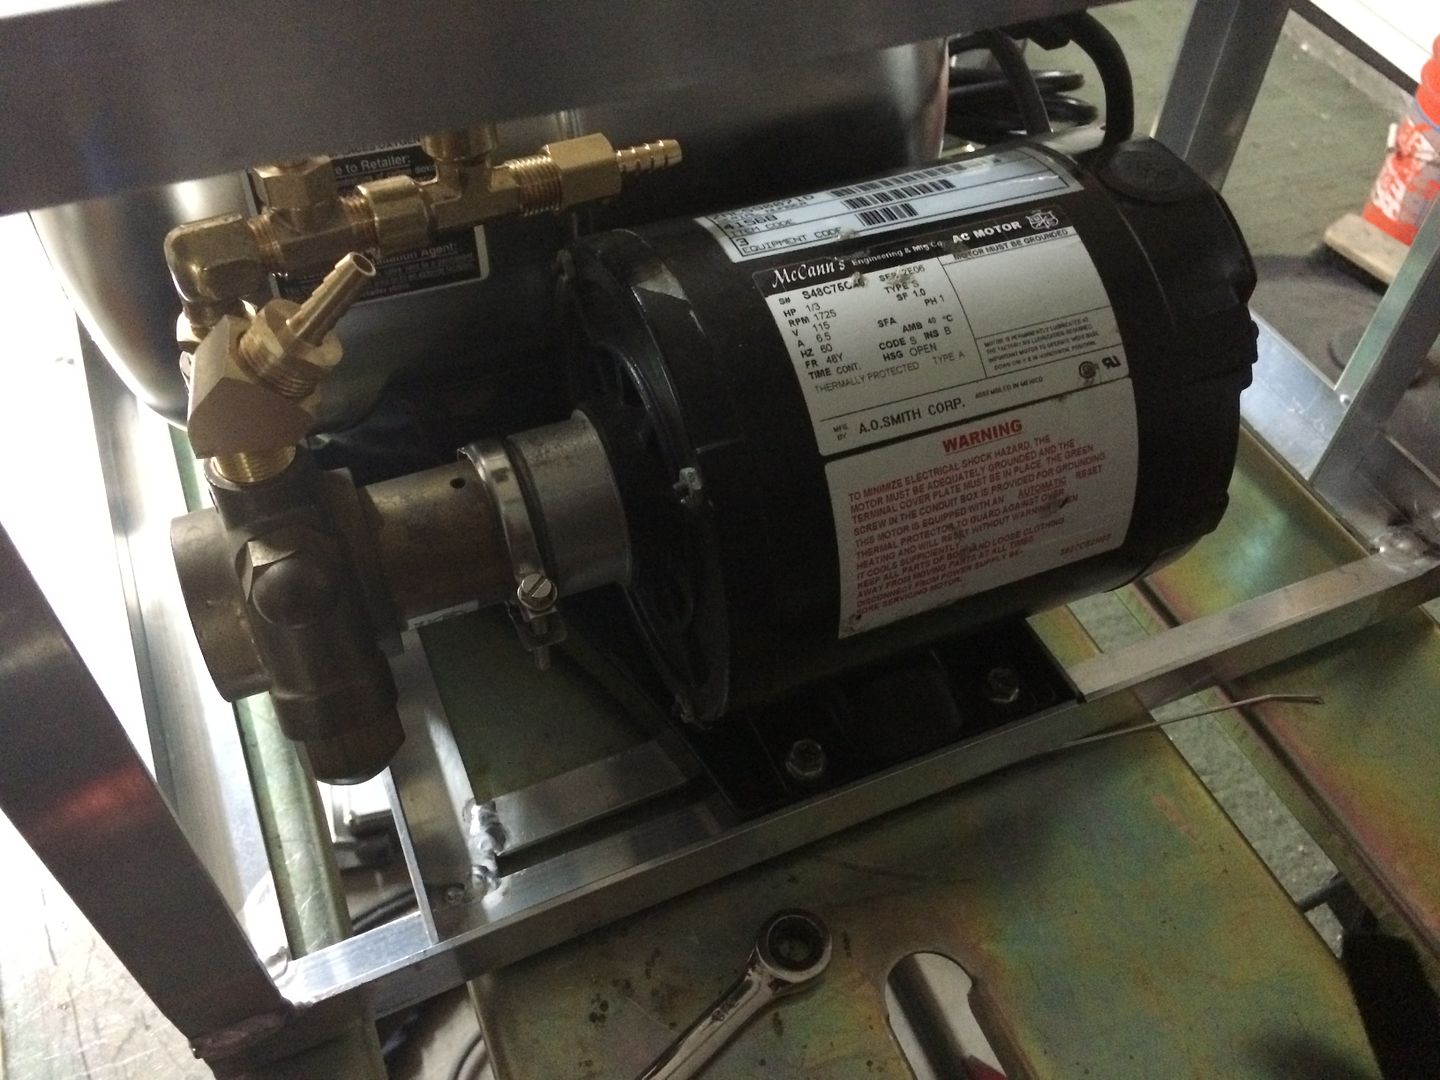
I went on ebay and made an offer on a BigMac Carbonator setup. It as a 2 gallon stainless steel tank. 110 volt motor and procon pump. If I would have been a little more patient I would have saved a little money, but I didnt mind paying the $130 shipped to get it. After my offer was accepted, I all of a sudden could find them for $70. Im not really into money all that much, so it didnt bother me a bit. Just letting you know, you can save a few dollars on how I am doing my setup.
LS Customs
- LS Customs
-
Ace
-
Posts:
-
Joined:Tue Feb 23, 2016 11:56 pm
on the tank there are four hose end fittings... (3) 3/8 male flare (45 degree) and one check valve with a 1/4 male flare... the pump has a 3/8 NPT female inlet and outlet.

LS Customs
- LS Customs
-
Ace
-
Posts:
-
Joined:Tue Feb 23, 2016 11:56 pm
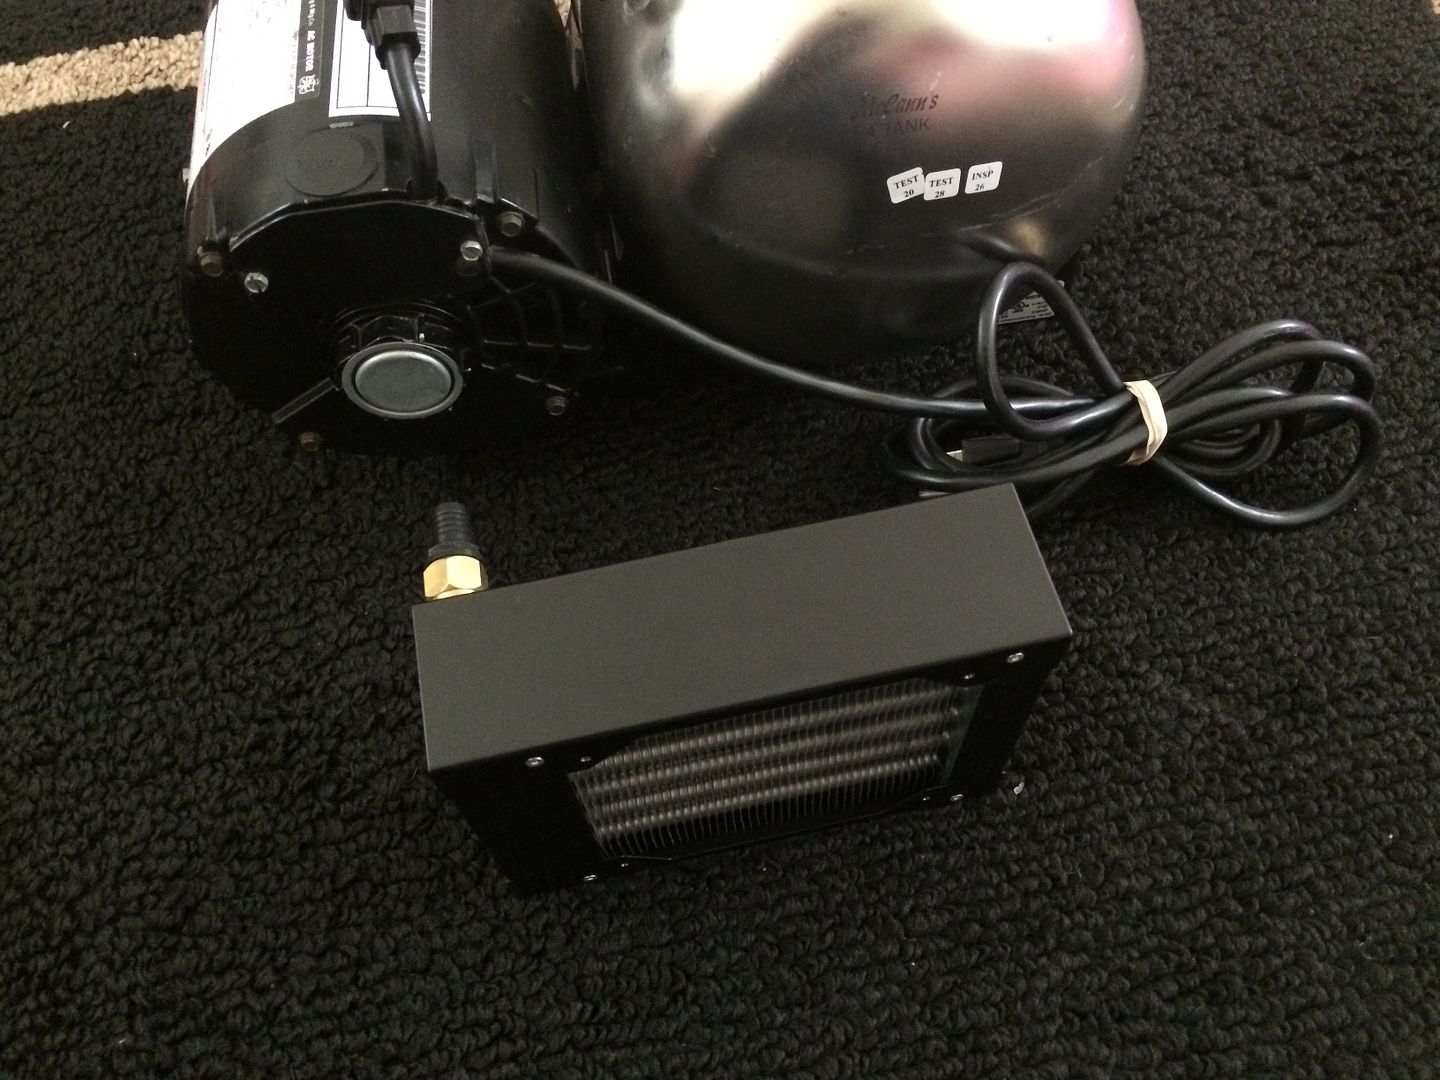
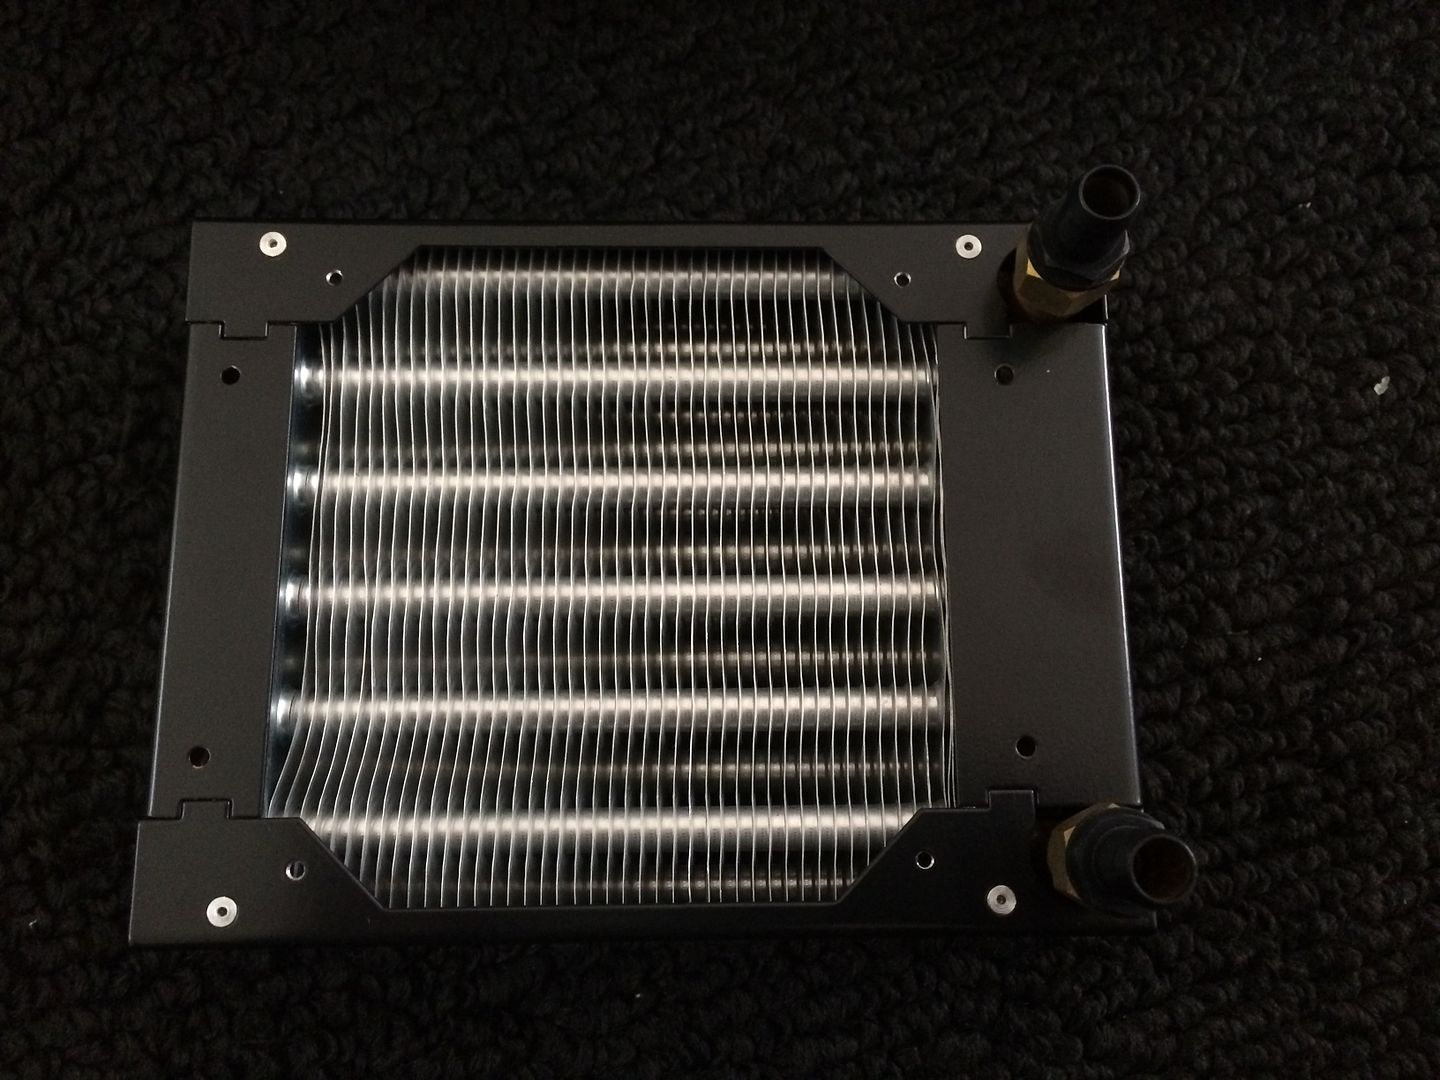
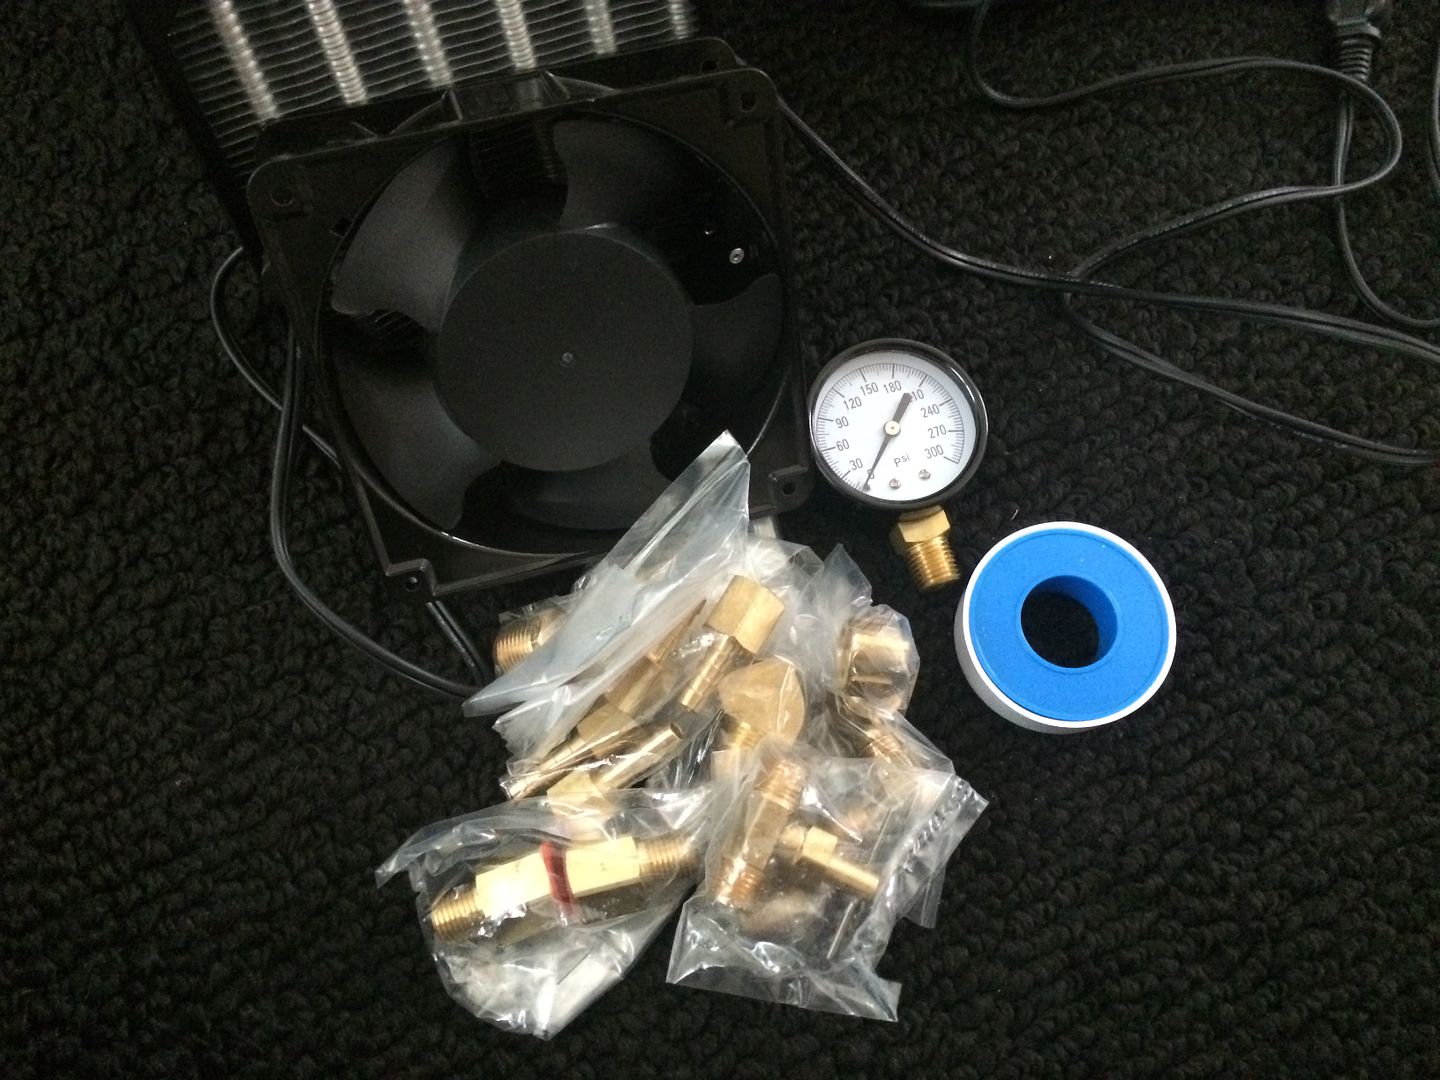
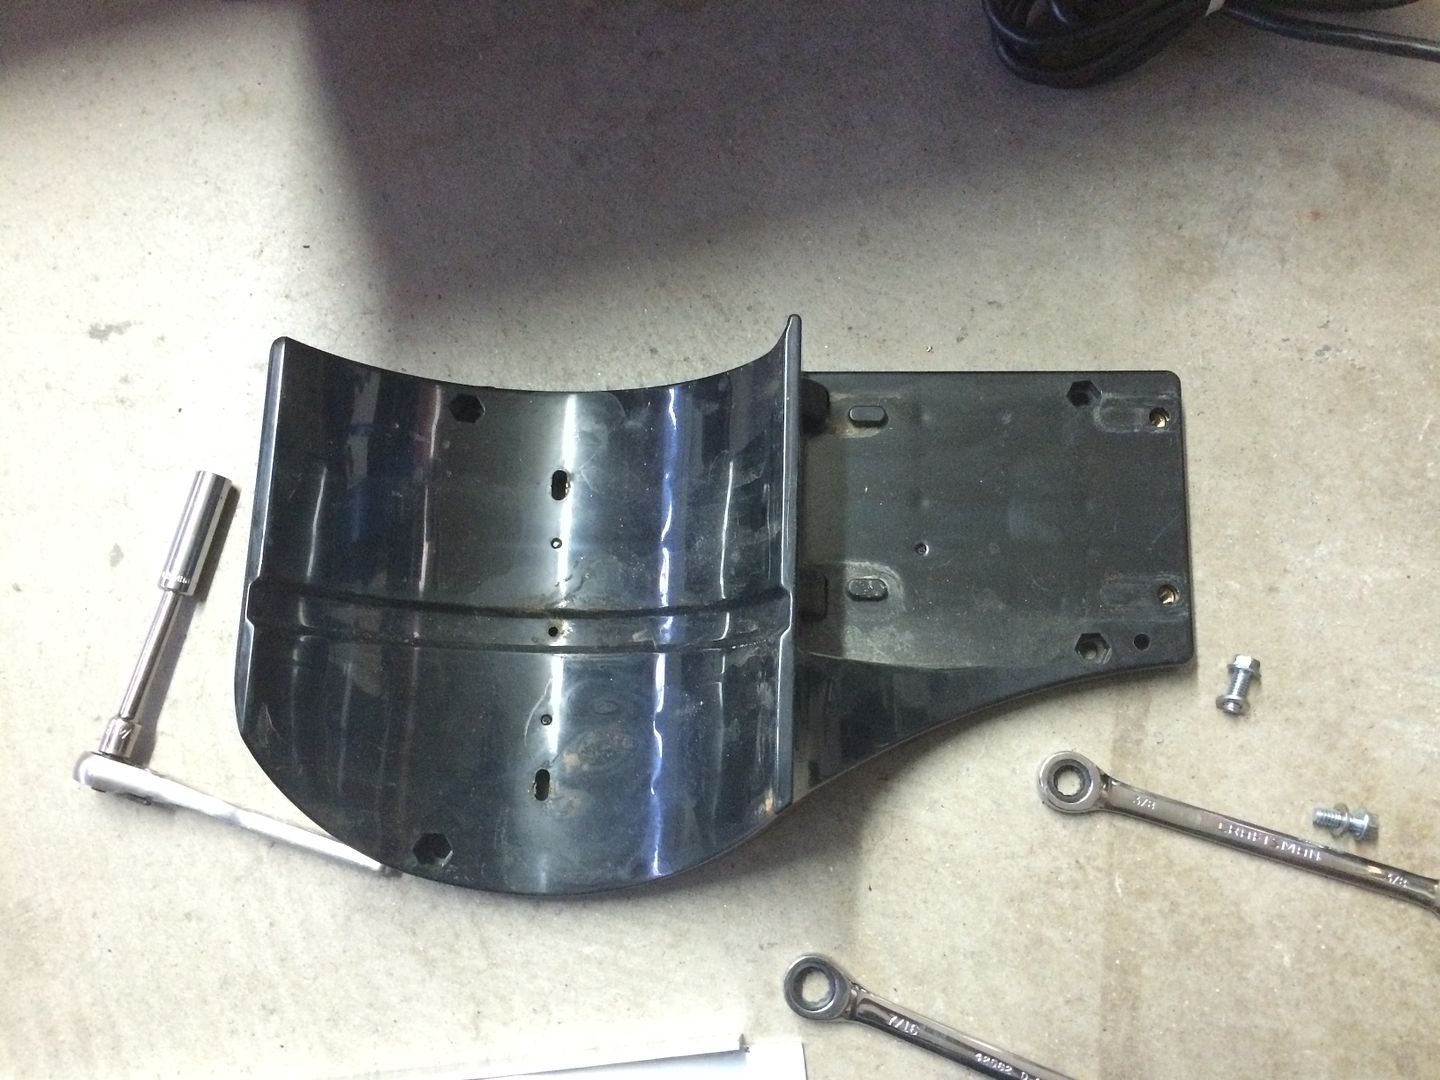
I looked for a brass heater core for a few days, and couldnt find one for under $50, where i wouldnt have to adapt the fittings or re solder something, etc. I decided to spend a little bit more and grab a high pressure radiator, which is normally used on water cooled computer setups. Most of these radiators are designed for very low pressure (around 29 psi or less), so I bought one rated for 73 psi (Phobya G-Changer 120 HPC), as I intend to set the pressure of the system to around 50 psi. I paid $60 for the radiator. Im not even sure if it needed a radiator, but i wanted one. You may be able to save in this area also. this radiator has a copper water passageway... they also make one twice as long, but i thought this one would be perfect for the setup...
Last edited by LS Customs on Fri Feb 26, 2016 2:55 am, edited 1 time in total.
LS Customs
- LS Customs
-
Ace
-
Posts:
-
Joined:Tue Feb 23, 2016 11:56 pm
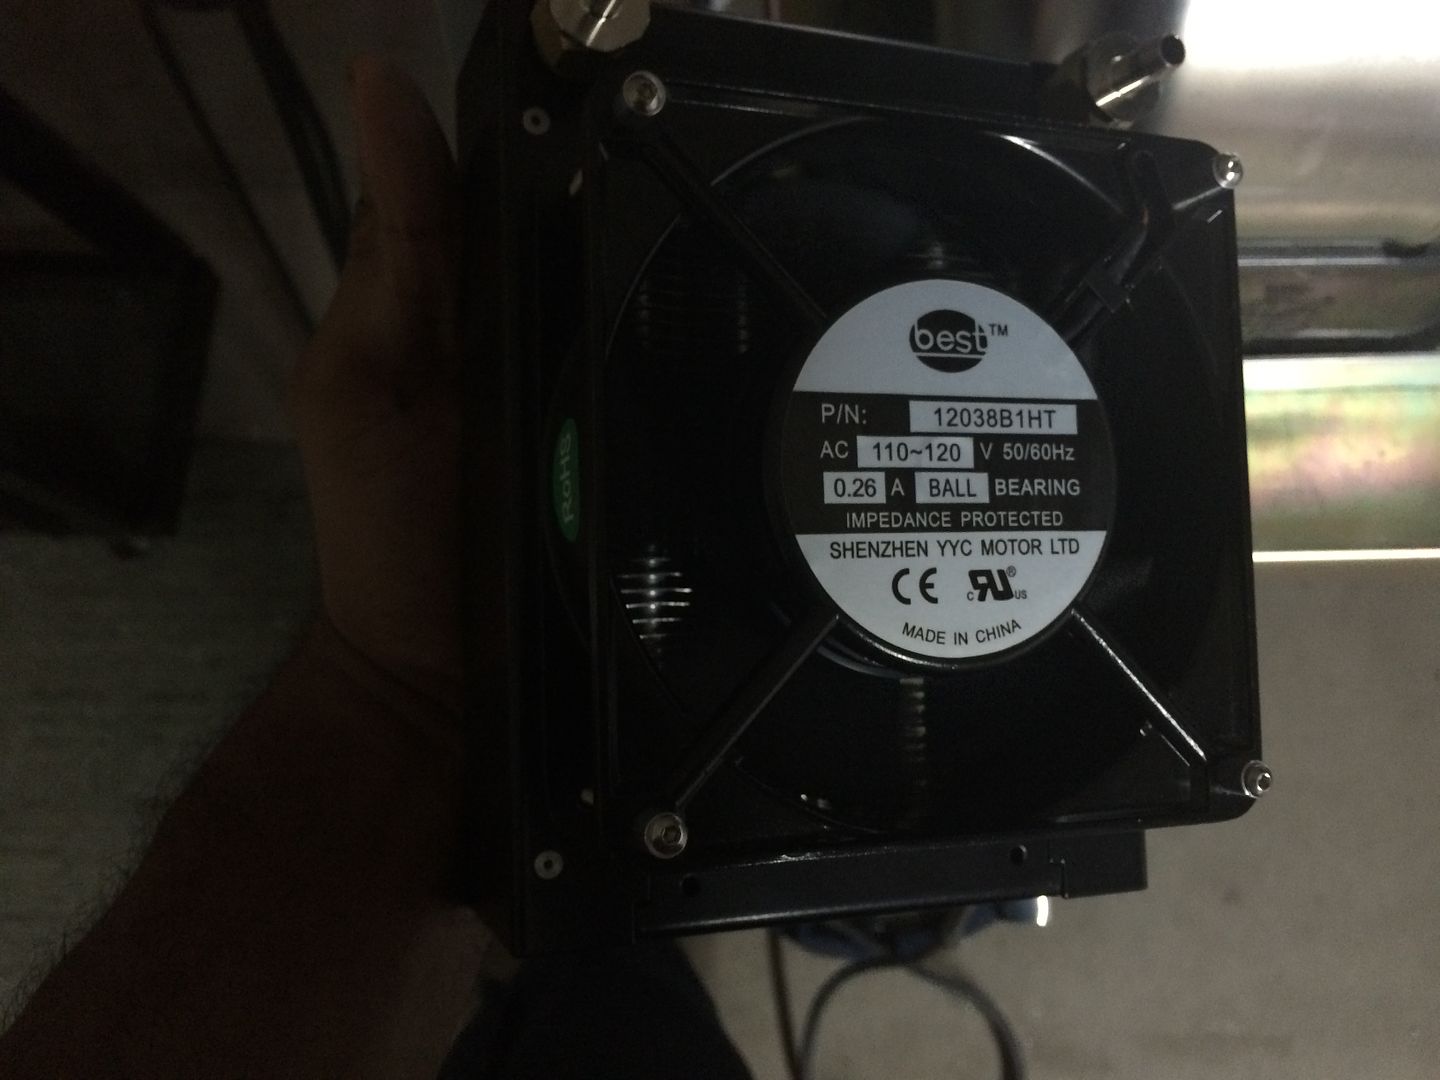
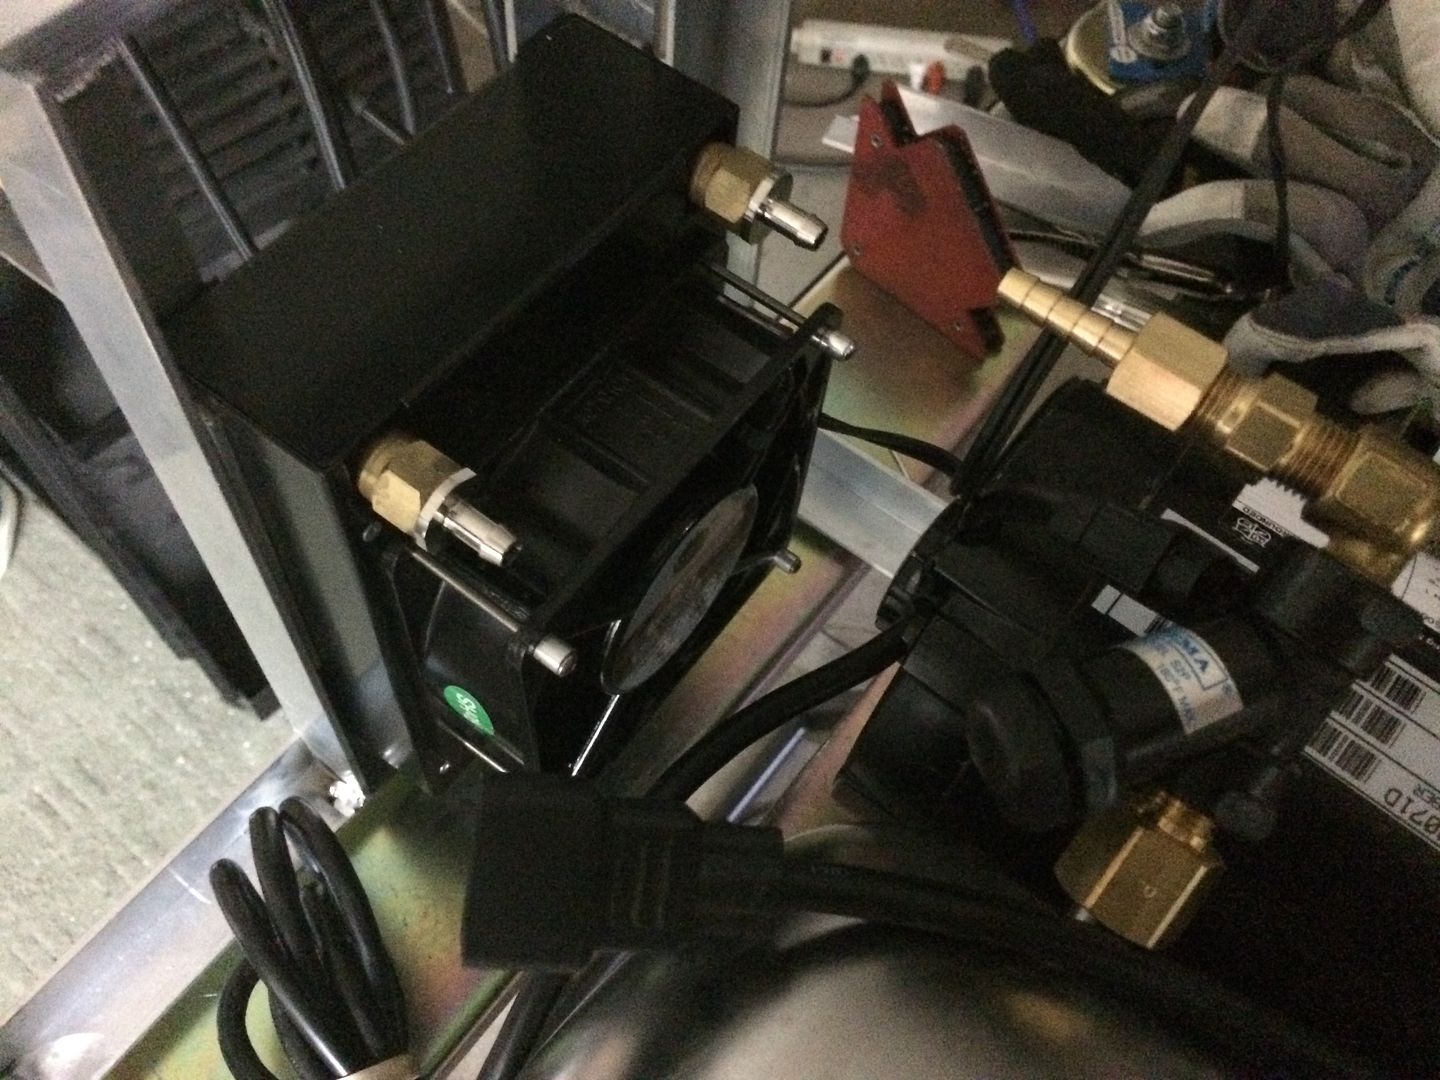
after planning out the plumbing, I ordered a 110 volt fan and cord. I also ordered some brass fittings. The fan cost me around $15, is 120mm x 38mm, dual ball bearing, 2450 rpm, 78 cfm. I may make an enclosure, so i want to put the fan in between the radiator and the back of the pump, to help keep that cool also... this fan is thicker than the typical computer fan and moves plenty of air... its spins pretty effortlessly by hand.... it can be bolted to either side of the radiator, as the radiator has threaded holes in the case for that very purpose
LS Customs
- LS Customs
-
Ace
-
Posts:
-
Joined:Tue Feb 23, 2016 11:56 pm
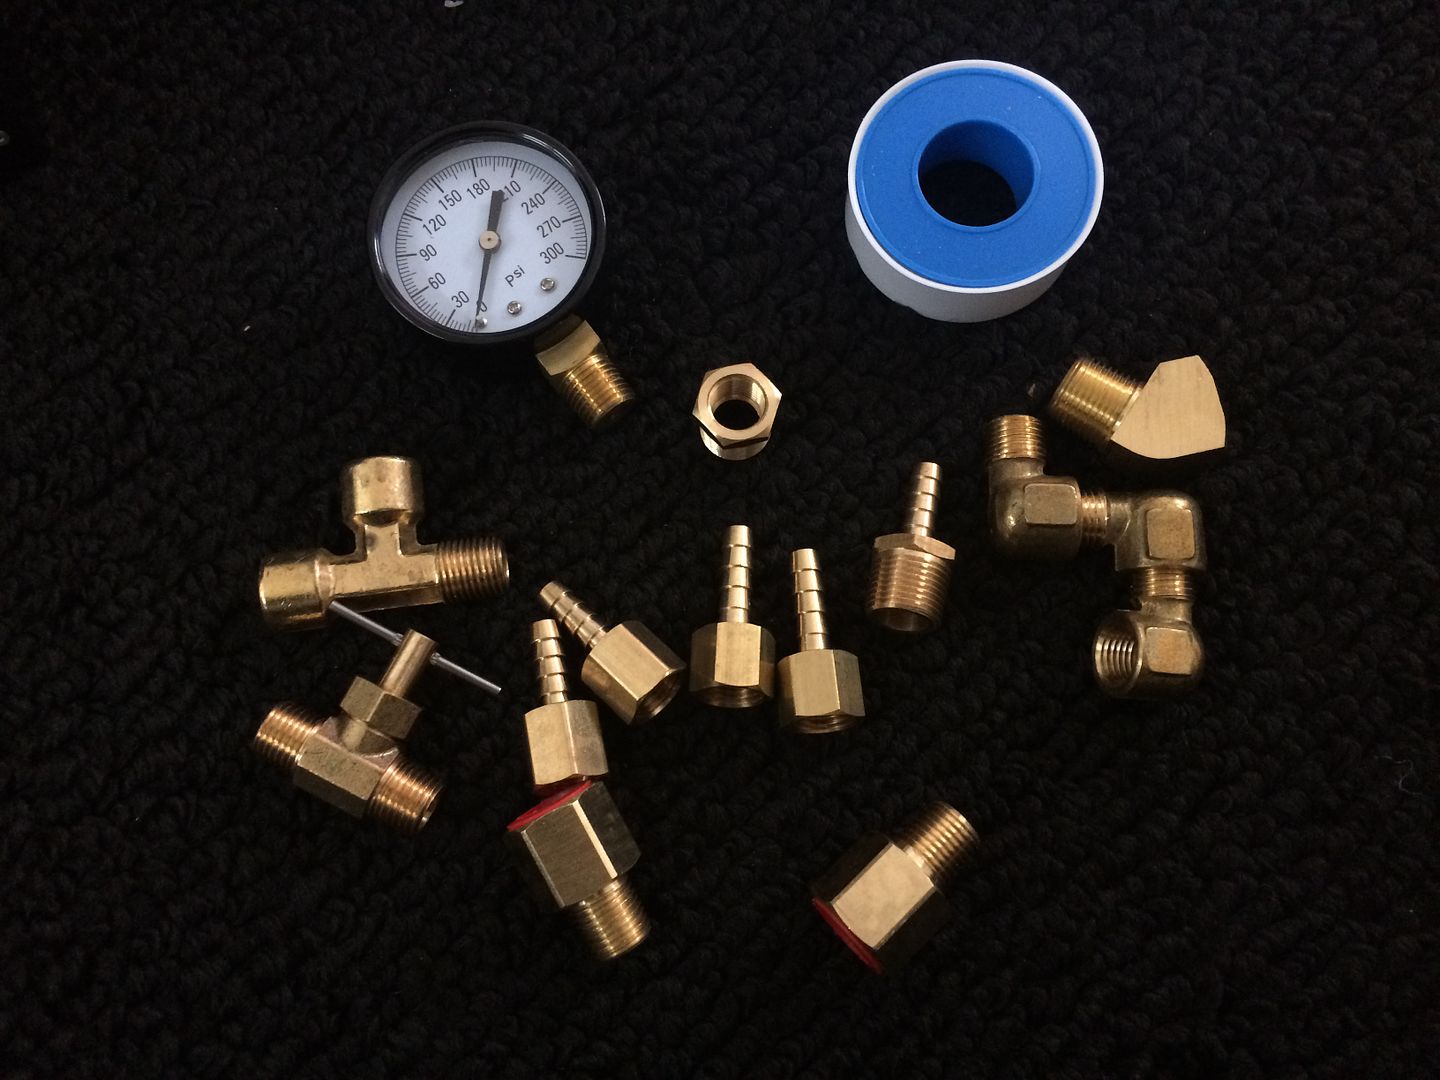
I paid 48.06 shipped for all the brass fittings, including a couple of extra, the gauge, needle valve and the tape... the best place I could find for these fittings was IPS (Installation Parts Supply, they were local, I could have saved $8 by driving the 45 minutes away, but it was worth it for me to pay the shipping).. they seem to specialized in fittings and parts for these carbonator setups... they have great customer service in my experience with them...
LS Customs
- LS Customs
-
Ace
-
Posts:
-
Joined:Tue Feb 23, 2016 11:56 pm
I only need two lines (one going to and one from the tank), so i will be capping the other two... i used adapter fittings to go from male 3/8 flare to male 1/4 npt... one will go to the input of the pump (to the tank), the other will come from the output of the radiator (to the tank)...
LS Customs
- LS Customs
-
Ace
-
Posts:
-
Joined:Tue Feb 23, 2016 11:56 pm
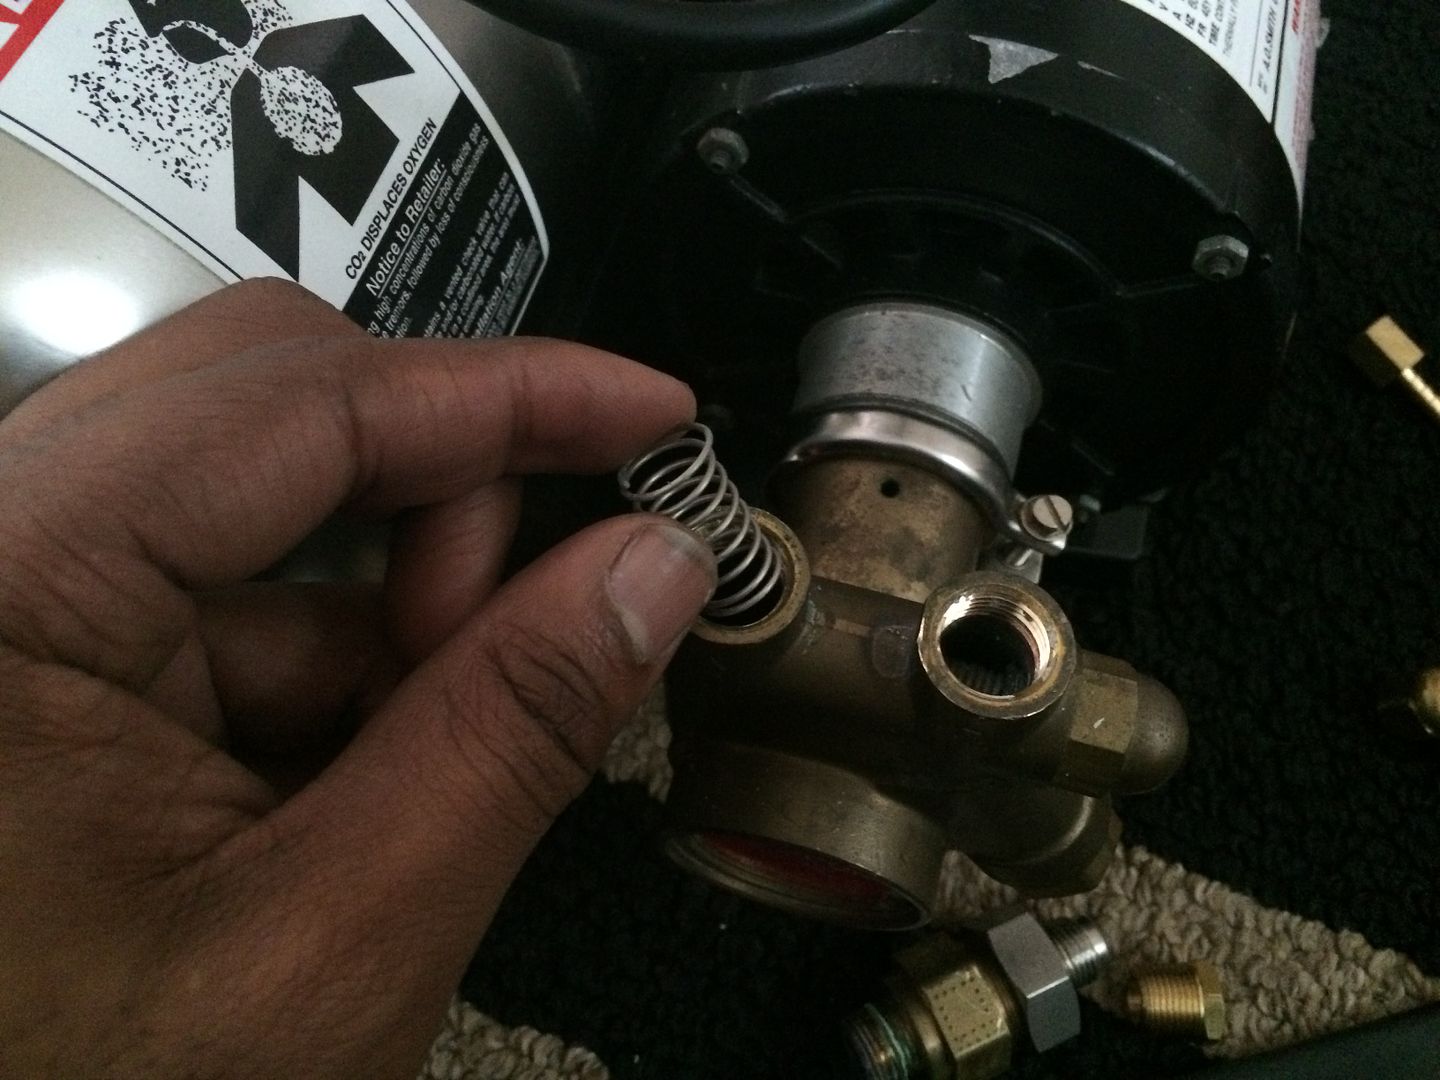
the pump can be adjusted down to a certain point, and I believe there is a spring somewhere in the pump that can easily be changed to drop the pressure down to exactly where you want it, but I am going to use a valve to help regulate the pressure also (so i dont have to play with changing springs etc, at this time). I may do this anyway, it may be something very easy to do... i think the spring may be on the adjustment side and not this one in the pic, but i could be wrong... there is supposed to be an internal filter on this pump too, but i will be using a water filter on the return from the torch before routing into the radiator

LS Customs
- LS Customs
-
Ace
-
Posts:
-
Joined:Tue Feb 23, 2016 11:56 pm
the setup will pretty much be like this... there are many ways to do this, this was the easiest way in my mind... and using the fittings that were available, without having to cut or change fittings on the tank, etc... i intend to make an aluminum enclosure. from the outside, you would see the fins of the radiator (filtered) and to the right of the radiator, the quick connects for the torch and maybe a flow meter... along with a switch to turn the setup on and off...
LS Customs
- LS Customs
-
Ace
-
Posts:
-
Joined:Tue Feb 23, 2016 11:56 pm
the fan does bolt to either side of the radiator... it will be pulling air through the radiator and blowing at the back of the motor for the pump...
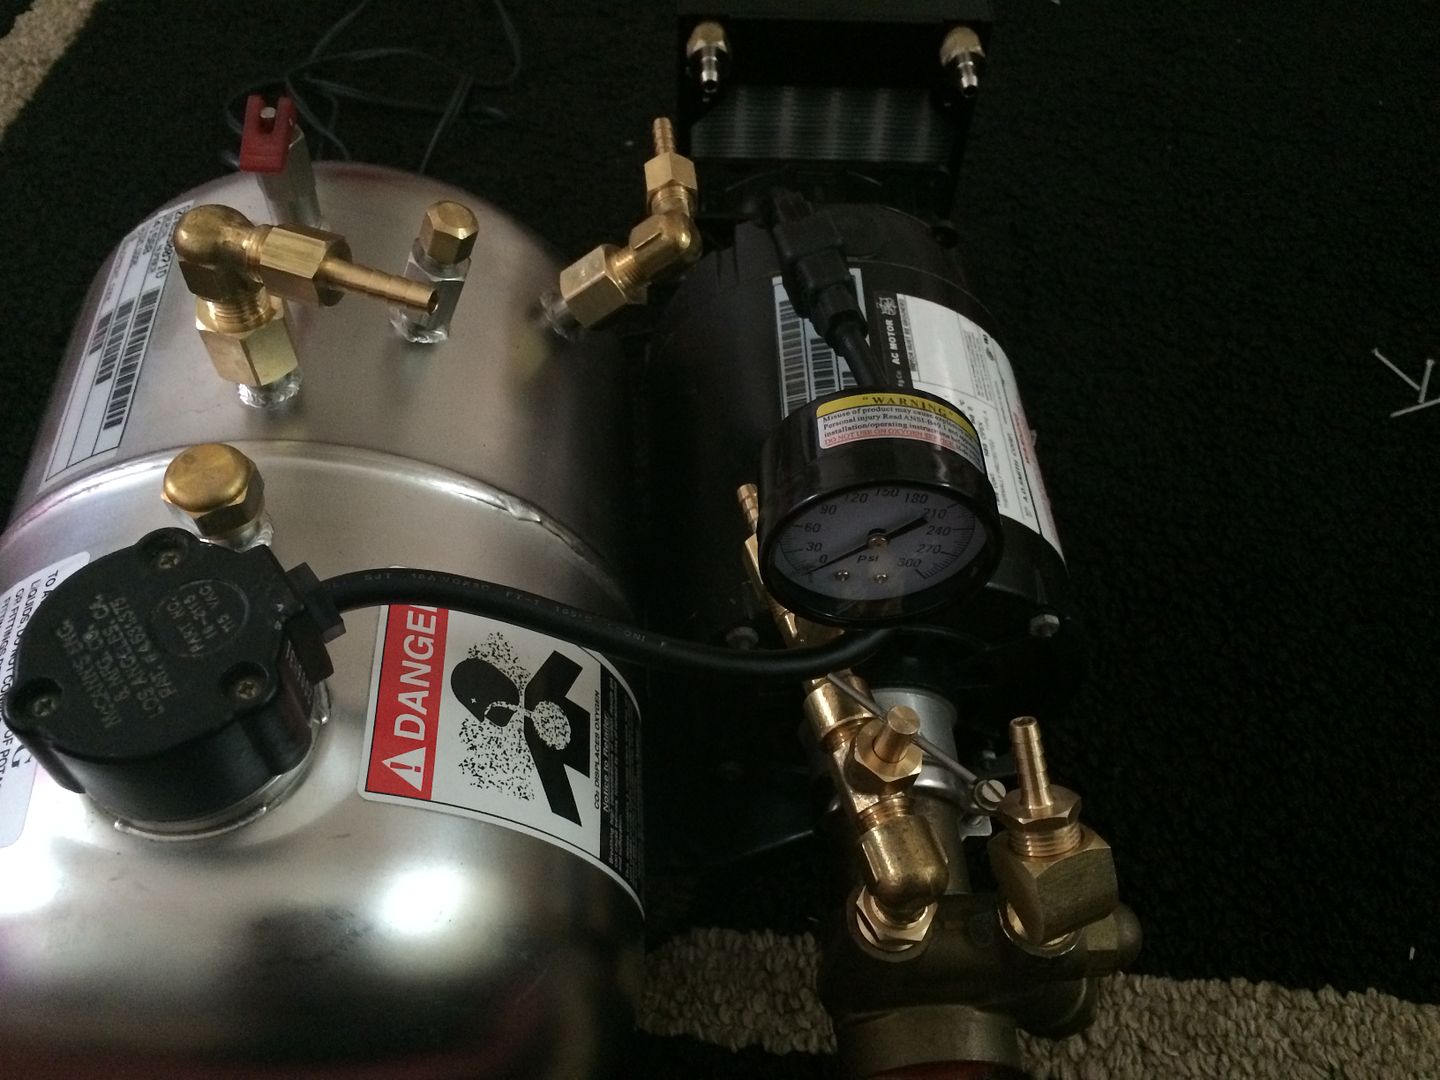
I could definitely eliminate three of the fittings im using, but they were so inexpensive, i just got all the ones I thought i may use to run the lines... you wouldnt need any of the angled fittings... the two 90s on the tank and the 45 i put on the input to the pump... the hose shouldnt need to be bent so far that it kinks without those fittings, but i wanted the hose to be as low as possible, so that it would look cleaner and i could make the enclosure low also, without kinking the line. im waiting on the quick connects and can finish the setup and try it out
I could definitely eliminate three of the fittings im using, but they were so inexpensive, i just got all the ones I thought i may use to run the lines... you wouldnt need any of the angled fittings... the two 90s on the tank and the 45 i put on the input to the pump... the hose shouldnt need to be bent so far that it kinks without those fittings, but i wanted the hose to be as low as possible, so that it would look cleaner and i could make the enclosure low also, without kinking the line. im waiting on the quick connects and can finish the setup and try it out

LS Customs
- LS Customs
-
Ace
-
Posts:
-
Joined:Tue Feb 23, 2016 11:56 pm
thanks.. i cant wait to get the setup up and running... im hoping it works very well... i will be making an enclosure for the setup and a welding cart that this will fit on the bottom shelf of, also...Poland308 wrote:Nice break down on the how to on converting a carbinator. I do some work at a local Coke distributor and they have a stack of old ones laying around.
LS Customs
- LS Customs
-
Ace
-
Posts:
-
Joined:Tue Feb 23, 2016 11:56 pm
I am also working on a DIY rotary welding table... and if that goes well, i will post detailed info on that too, I hope both of these projects end up working very well...
http://forum.weldingtipsandtricks.com/v ... f=9&t=9065
http://forum.weldingtipsandtricks.com/v ... f=9&t=9065
LS Customs
- LS Customs
-
Ace
-
Posts:
-
Joined:Tue Feb 23, 2016 11:56 pm
figured it was time to get this thing going, so i can start using the new torch, pedal, and welding positioner project...
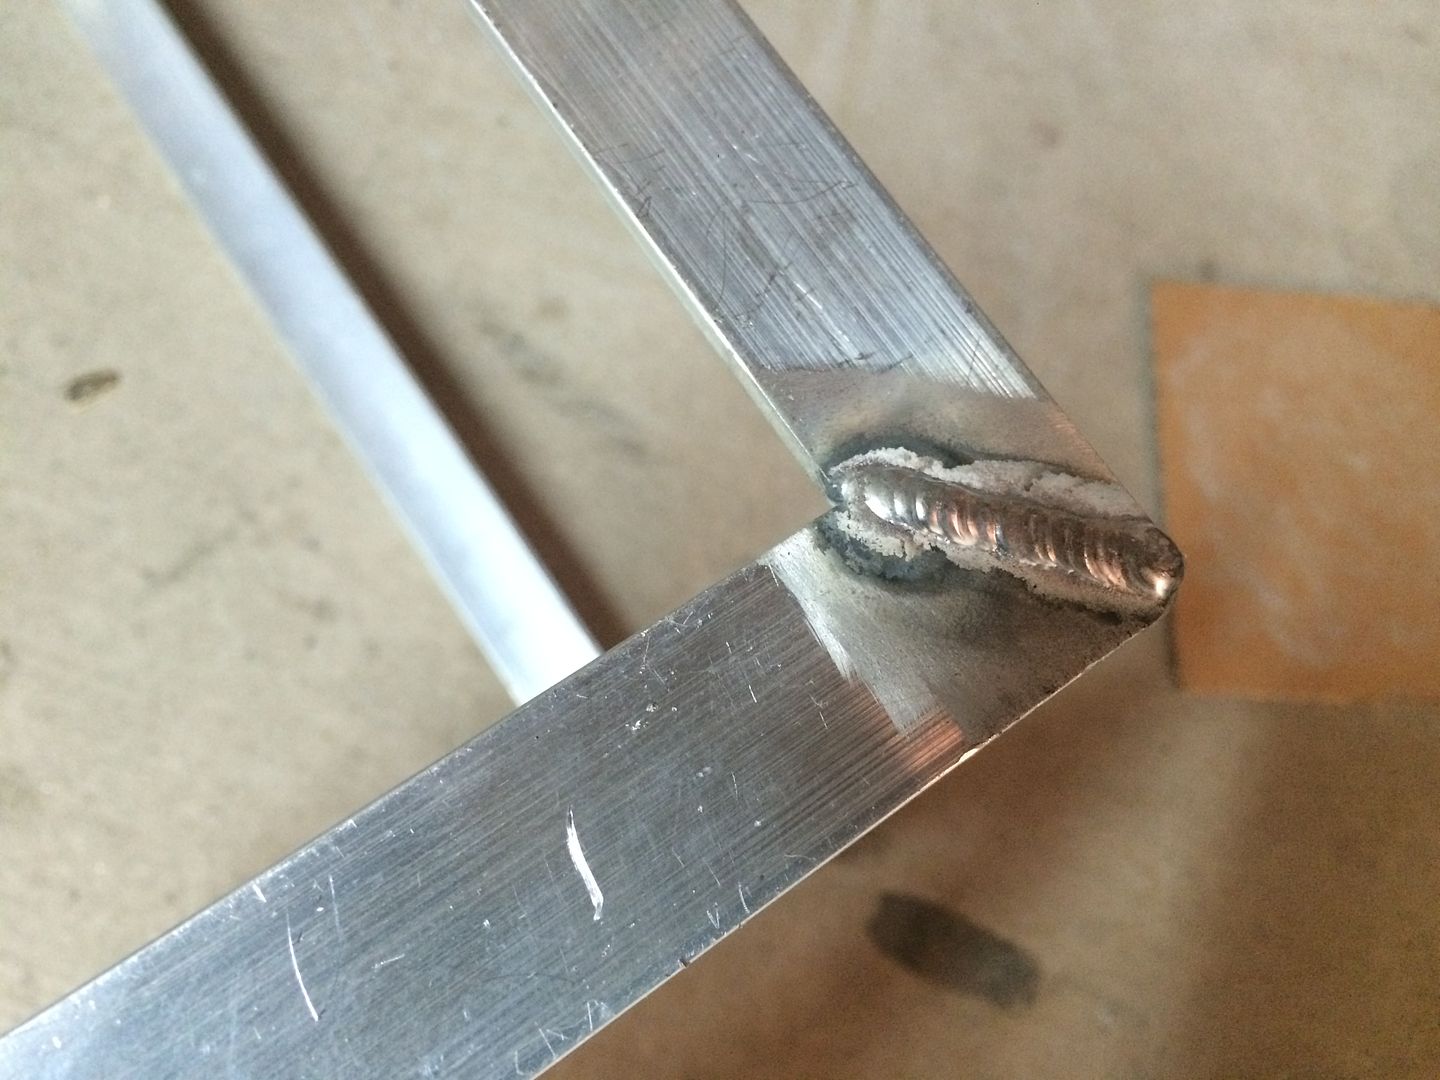
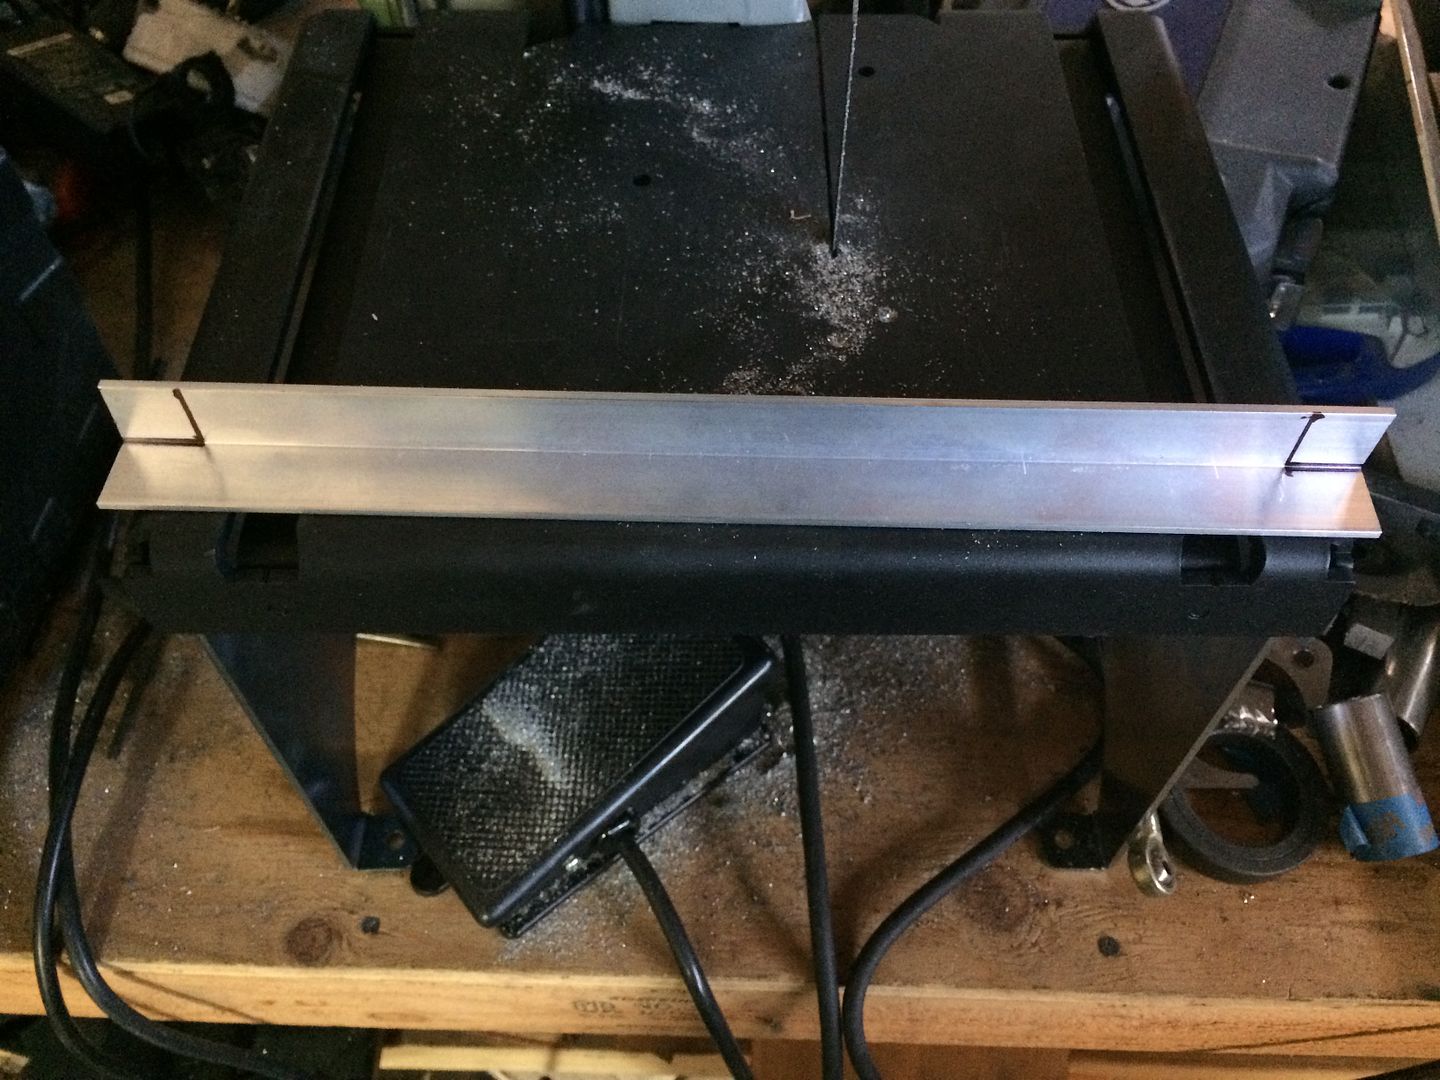
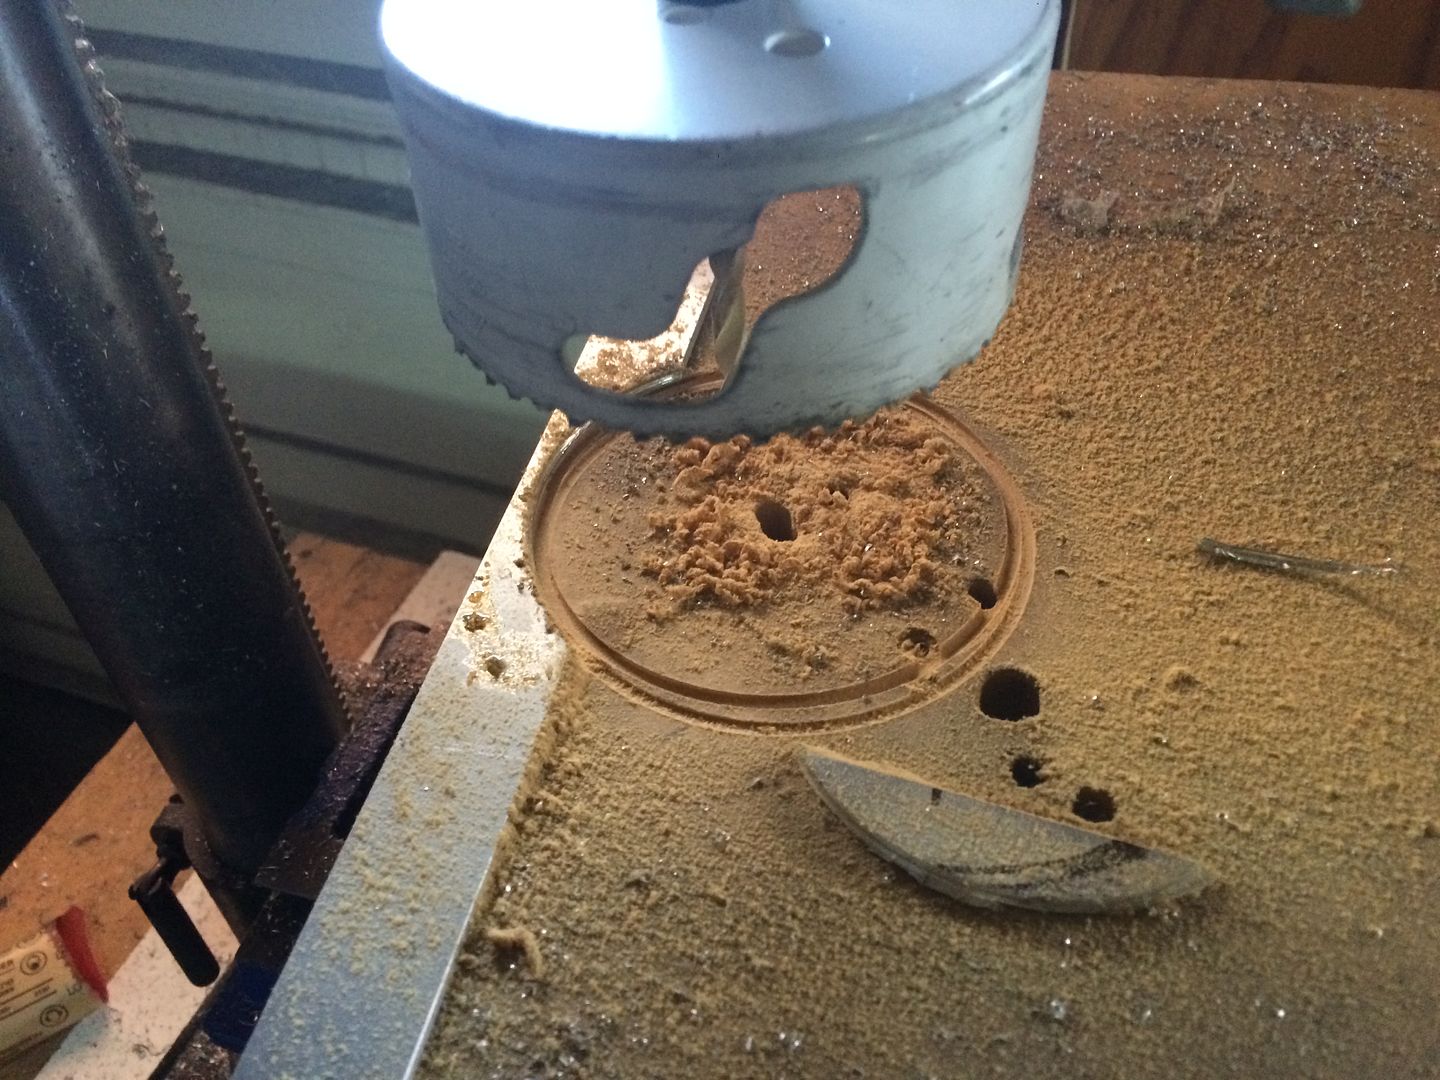
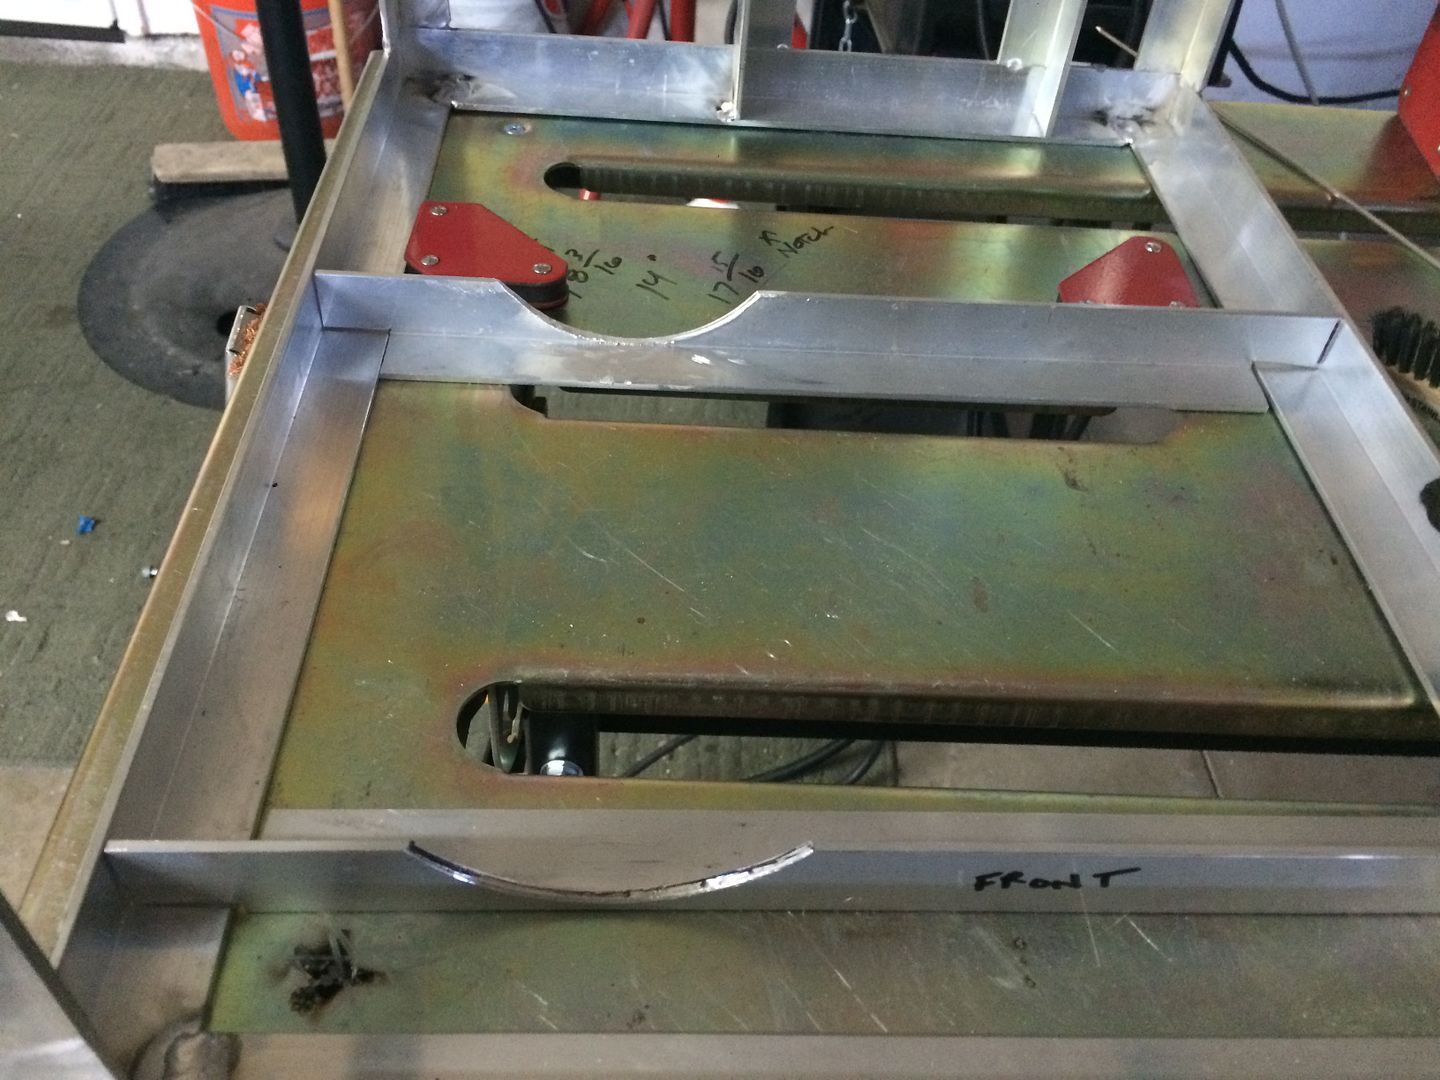
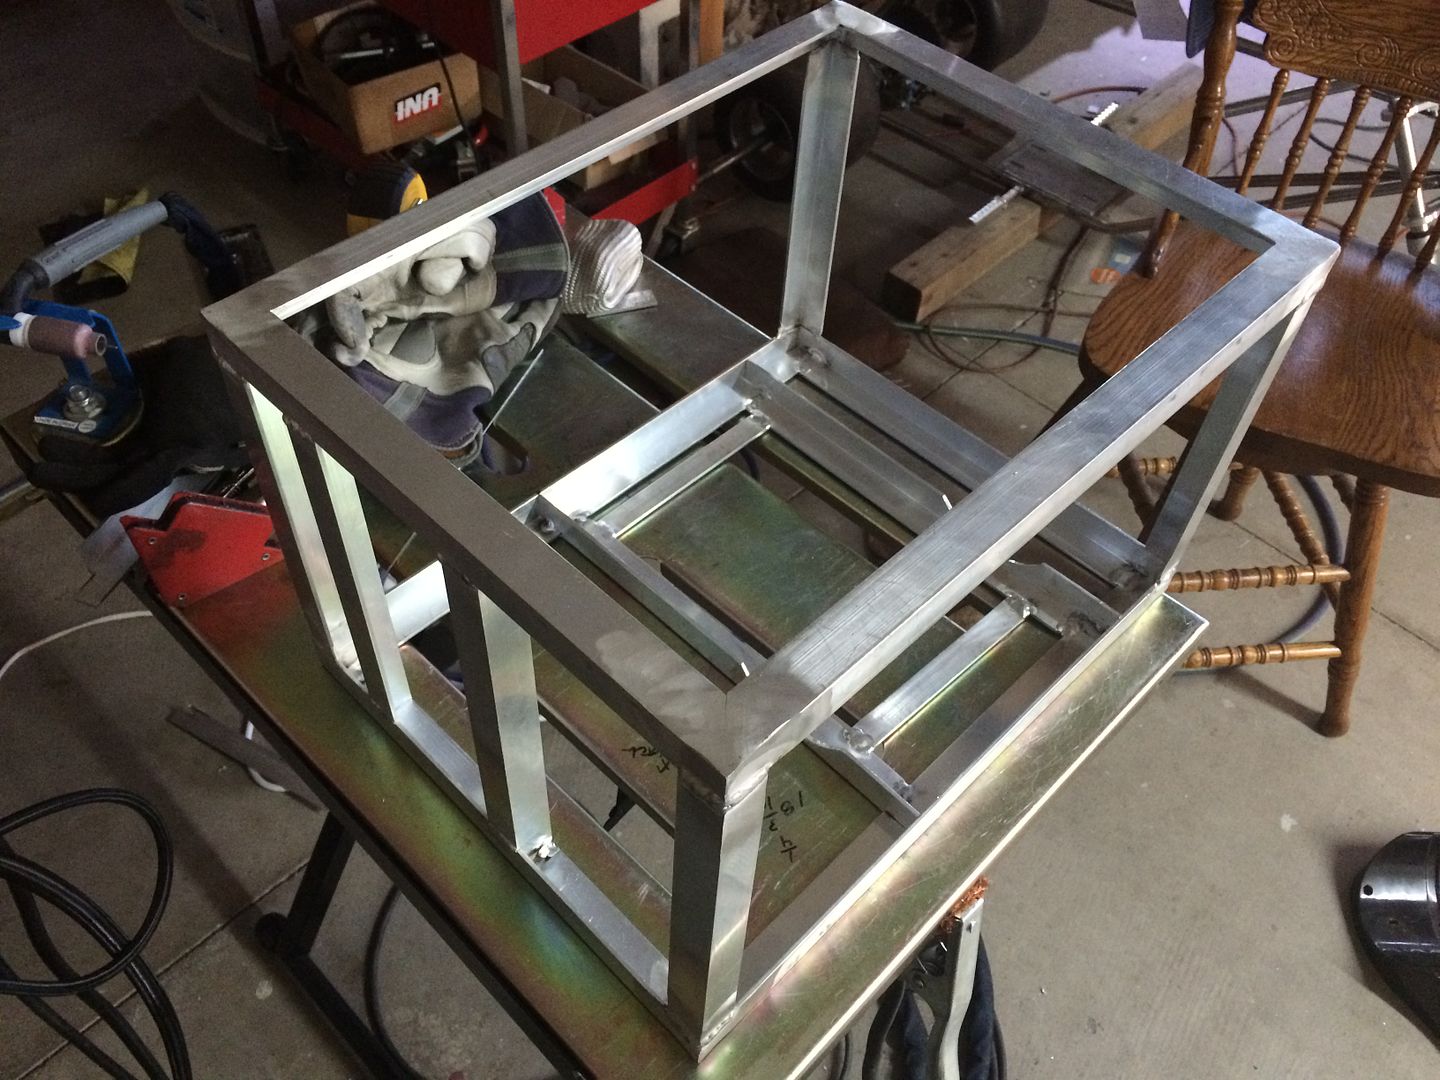
used some aluminum angle iron for the main framing. wanted to used the entire setup i picked up off ebay and make the enclosure fit, along with all the components to complete this to the best of my ability... im having to fight a ton of pain to do all this... so did the best i could with welding it up, etc... wanted the welds to be as flat as possible, as i initially ground the welds smooth, but i thought it may crack eventually, so went back and welded it all back up.. leaving the welds alone...
just left the outside, top, ground flat, and i intend to build a welding cart, to fit this setup under the tig welder...

set the fittings, etc on the pump and tank to see how i want to set it all up in the enclosure
then got to work
used some aluminum angle iron for the main framing. wanted to used the entire setup i picked up off ebay and make the enclosure fit, along with all the components to complete this to the best of my ability... im having to fight a ton of pain to do all this... so did the best i could with welding it up, etc... wanted the welds to be as flat as possible, as i initially ground the welds smooth, but i thought it may crack eventually, so went back and welded it all back up.. leaving the welds alone...
just left the outside, top, ground flat, and i intend to build a welding cart, to fit this setup under the tig welder...
set the fittings, etc on the pump and tank to see how i want to set it all up in the enclosure
then got to work
LS Customs
- LS Customs
-
Ace
-
Posts:
-
Joined:Tue Feb 23, 2016 11:56 pm
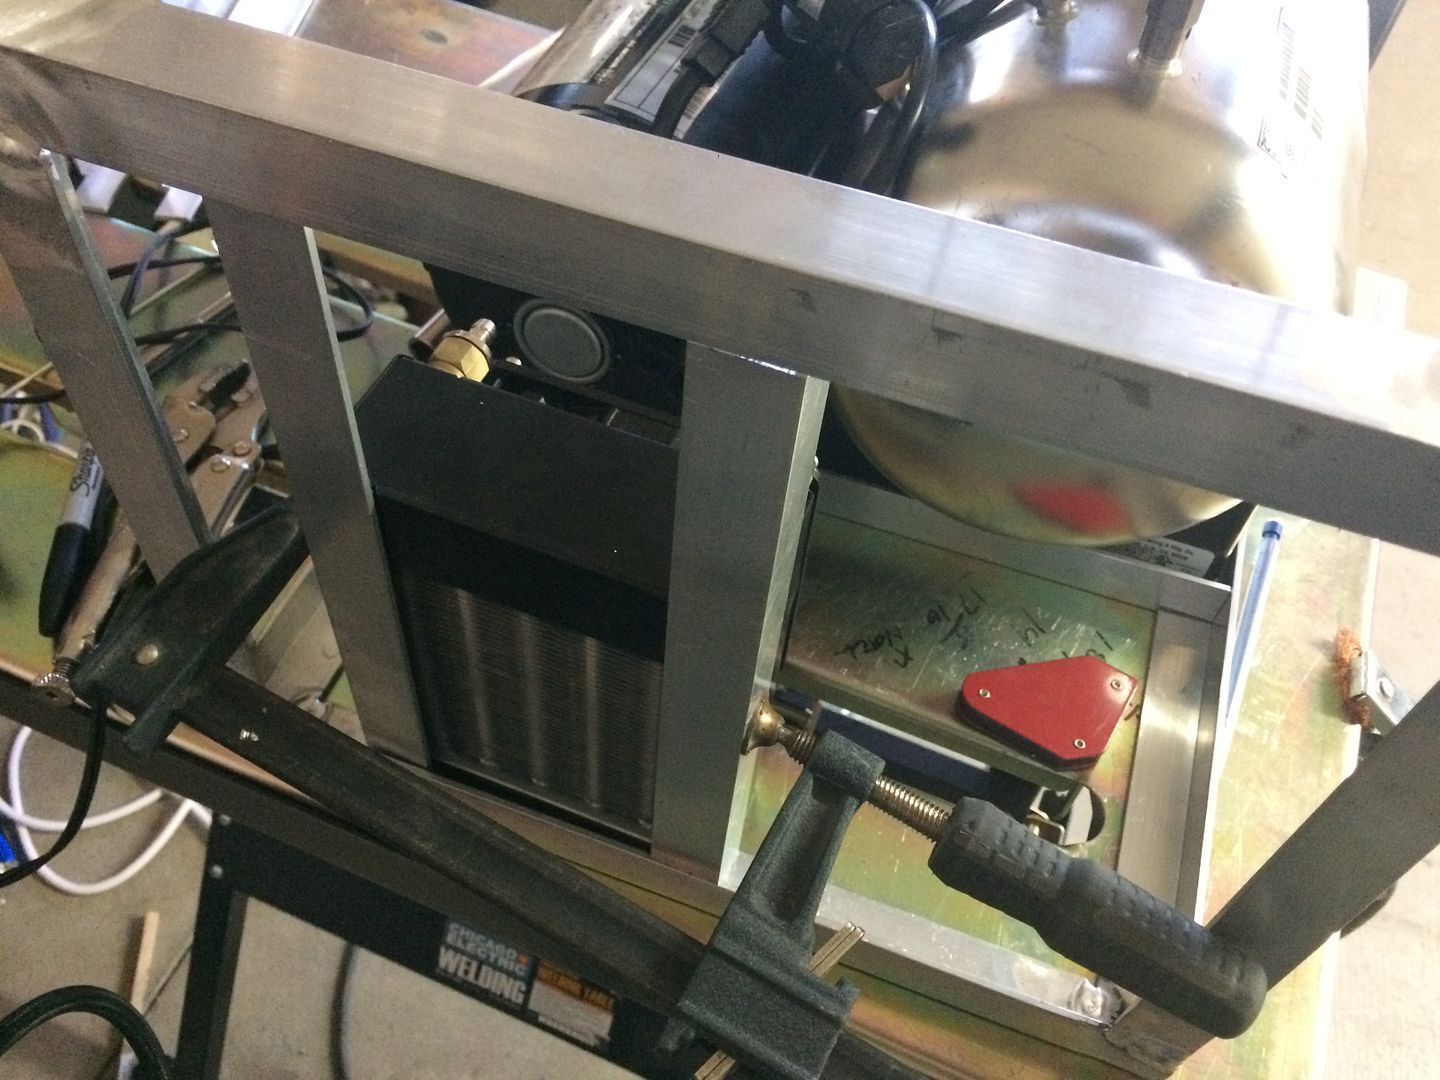
got the main frame work and set everything back in it to mock up and mount...
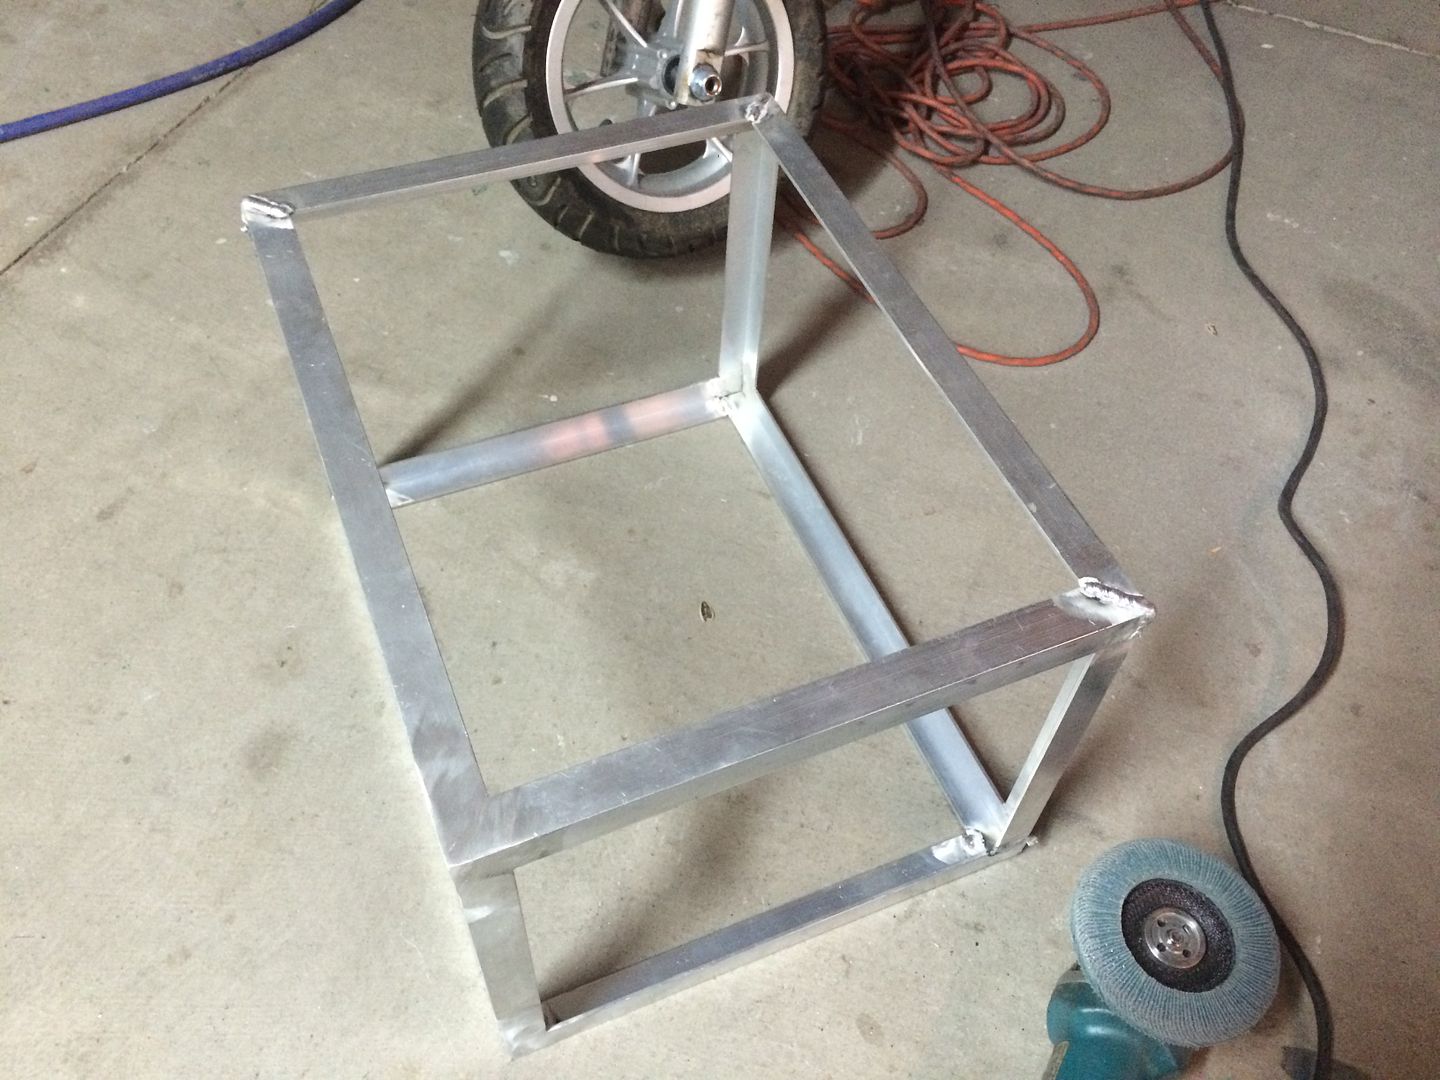
needed to figure out where to put the radiator and fan...
in the end, decided to put it in line with the back of the motor for the pump, thinking it would help keep that cool also...
needed to figure out where to put the radiator and fan...
in the end, decided to put it in line with the back of the motor for the pump, thinking it would help keep that cool also...
LS Customs
- LS Customs
-
Ace
-
Posts:
-
Joined:Tue Feb 23, 2016 11:56 pm
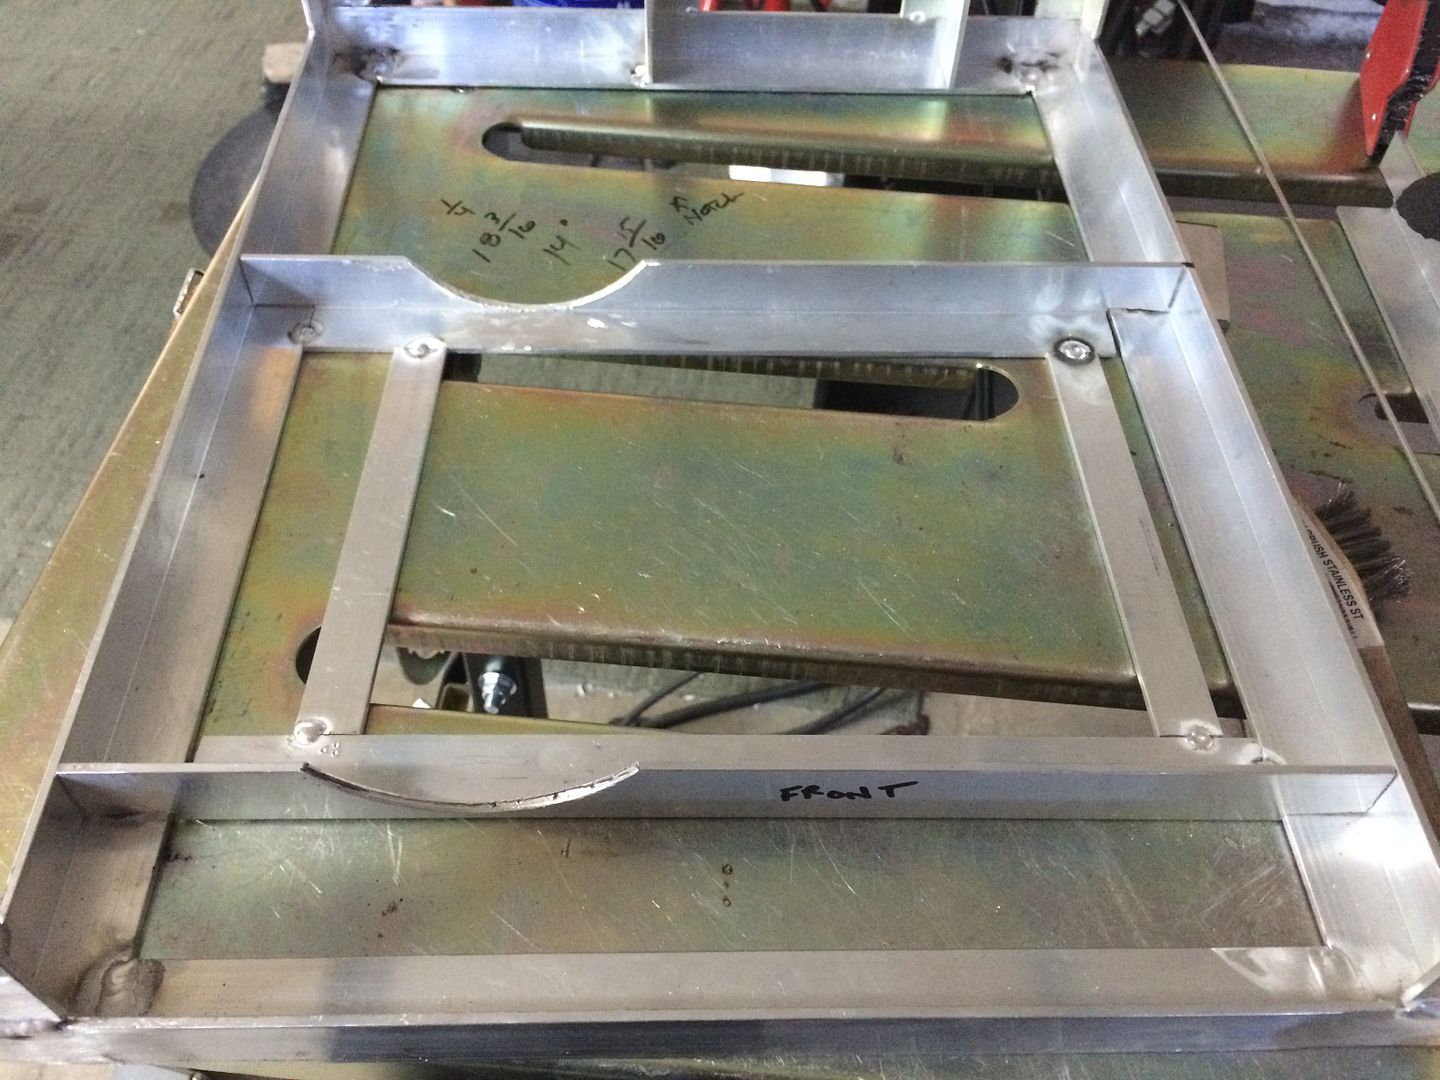
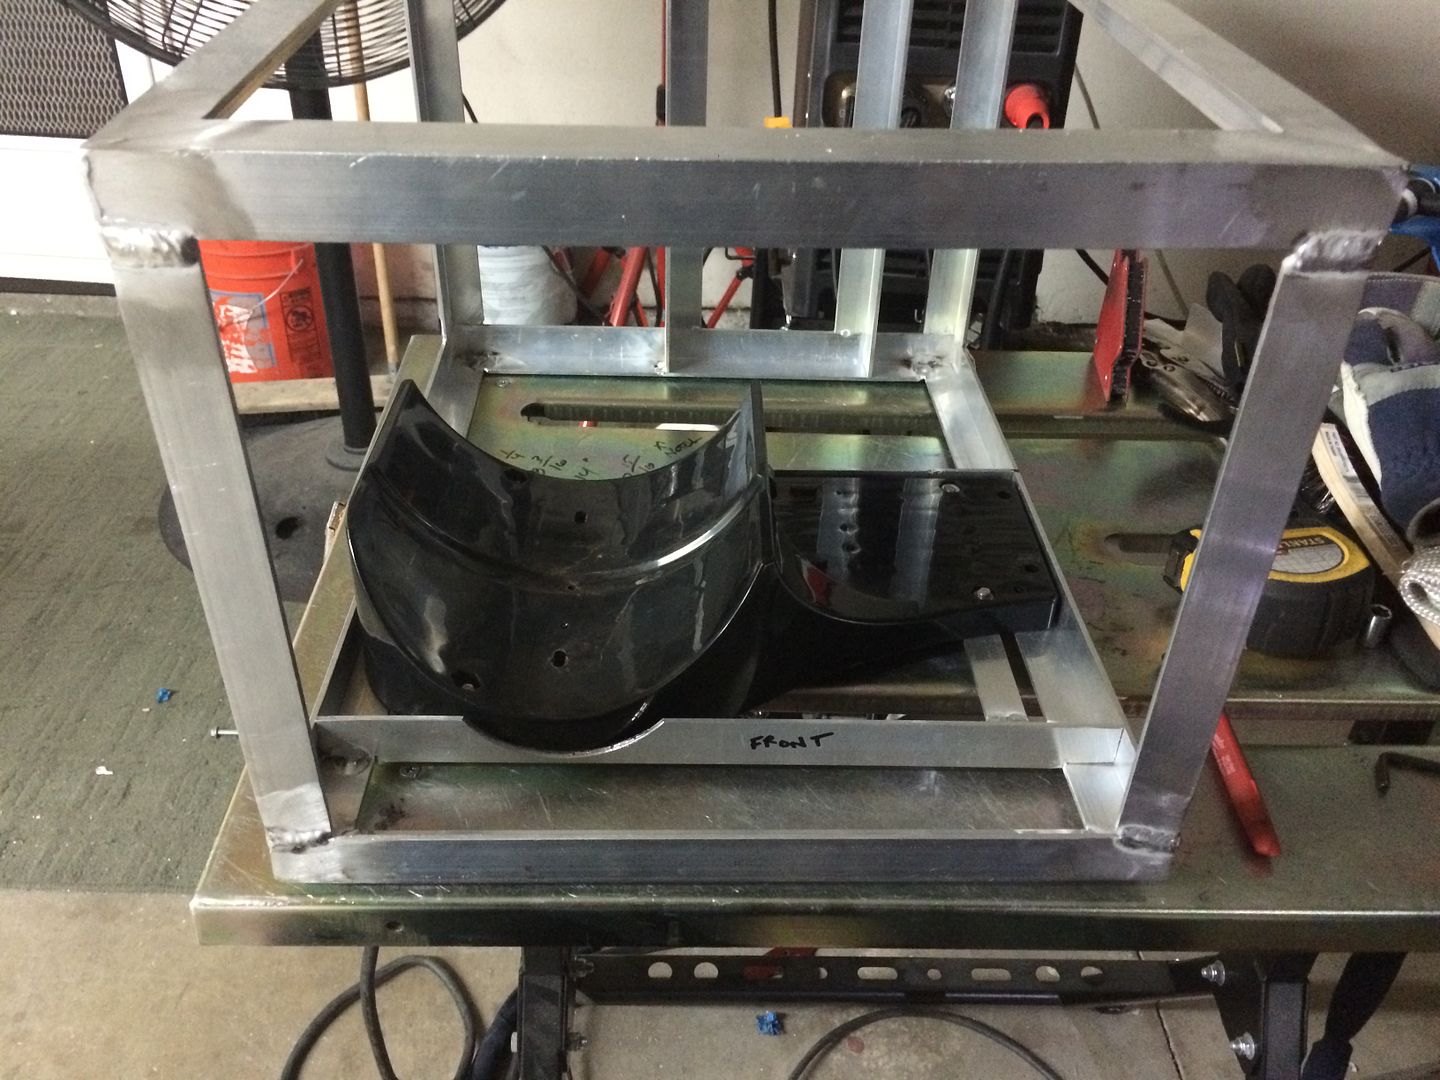
started making the mounting locations for the component (and bracing the frame at the same time) using more angle...
had to notch the pieces to fit around the tank, once it is mounted in the frame...
there are little rubber feet on the bottom of the factory mount, so the tank would sit a little lower and hit the aluminum if it werent notched
had to notch the pieces to fit around the tank, once it is mounted in the frame...
there are little rubber feet on the bottom of the factory mount, so the tank would sit a little lower and hit the aluminum if it werent notched
LS Customs
- LS Customs
-
Ace
-
Posts:
-
Joined:Tue Feb 23, 2016 11:56 pm
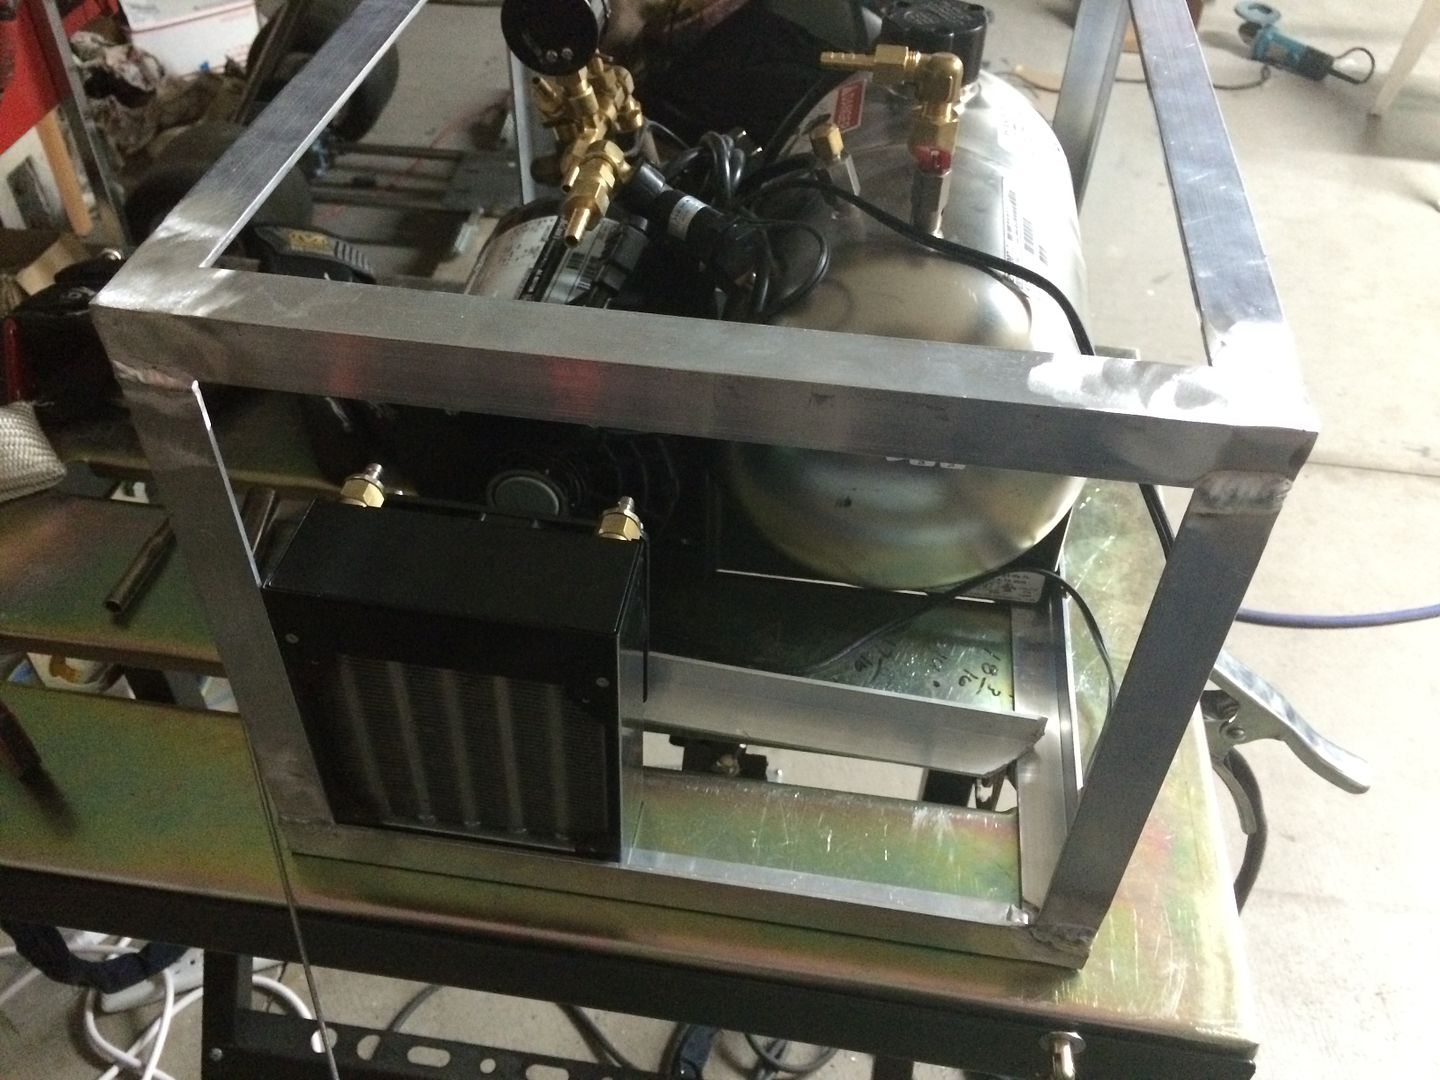
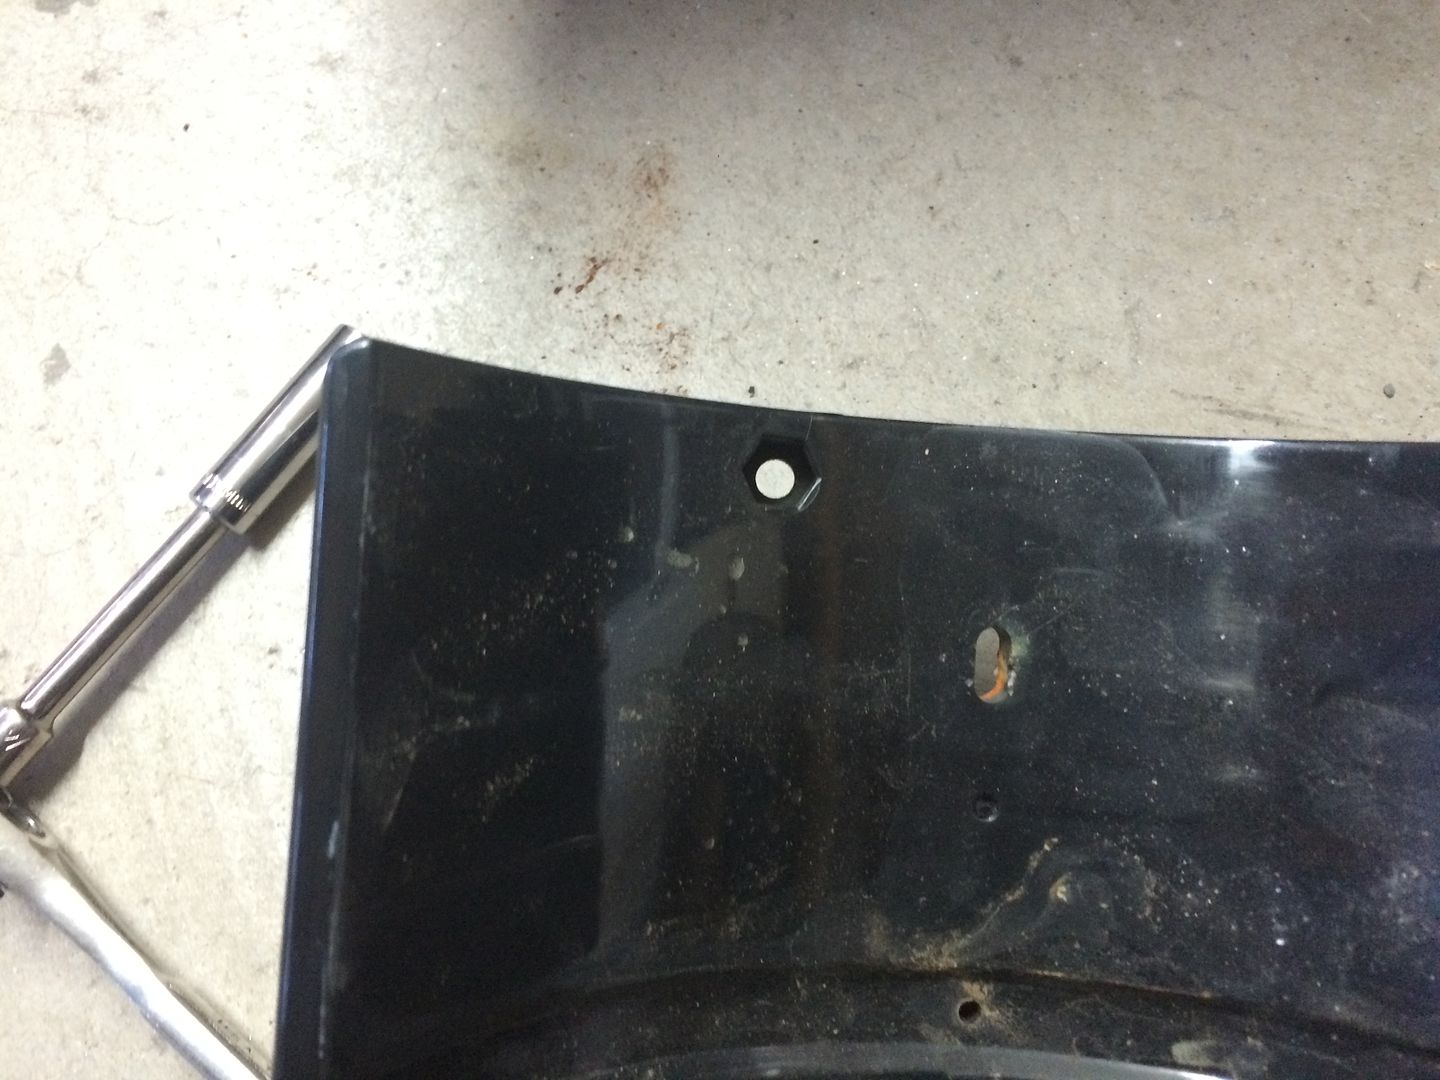
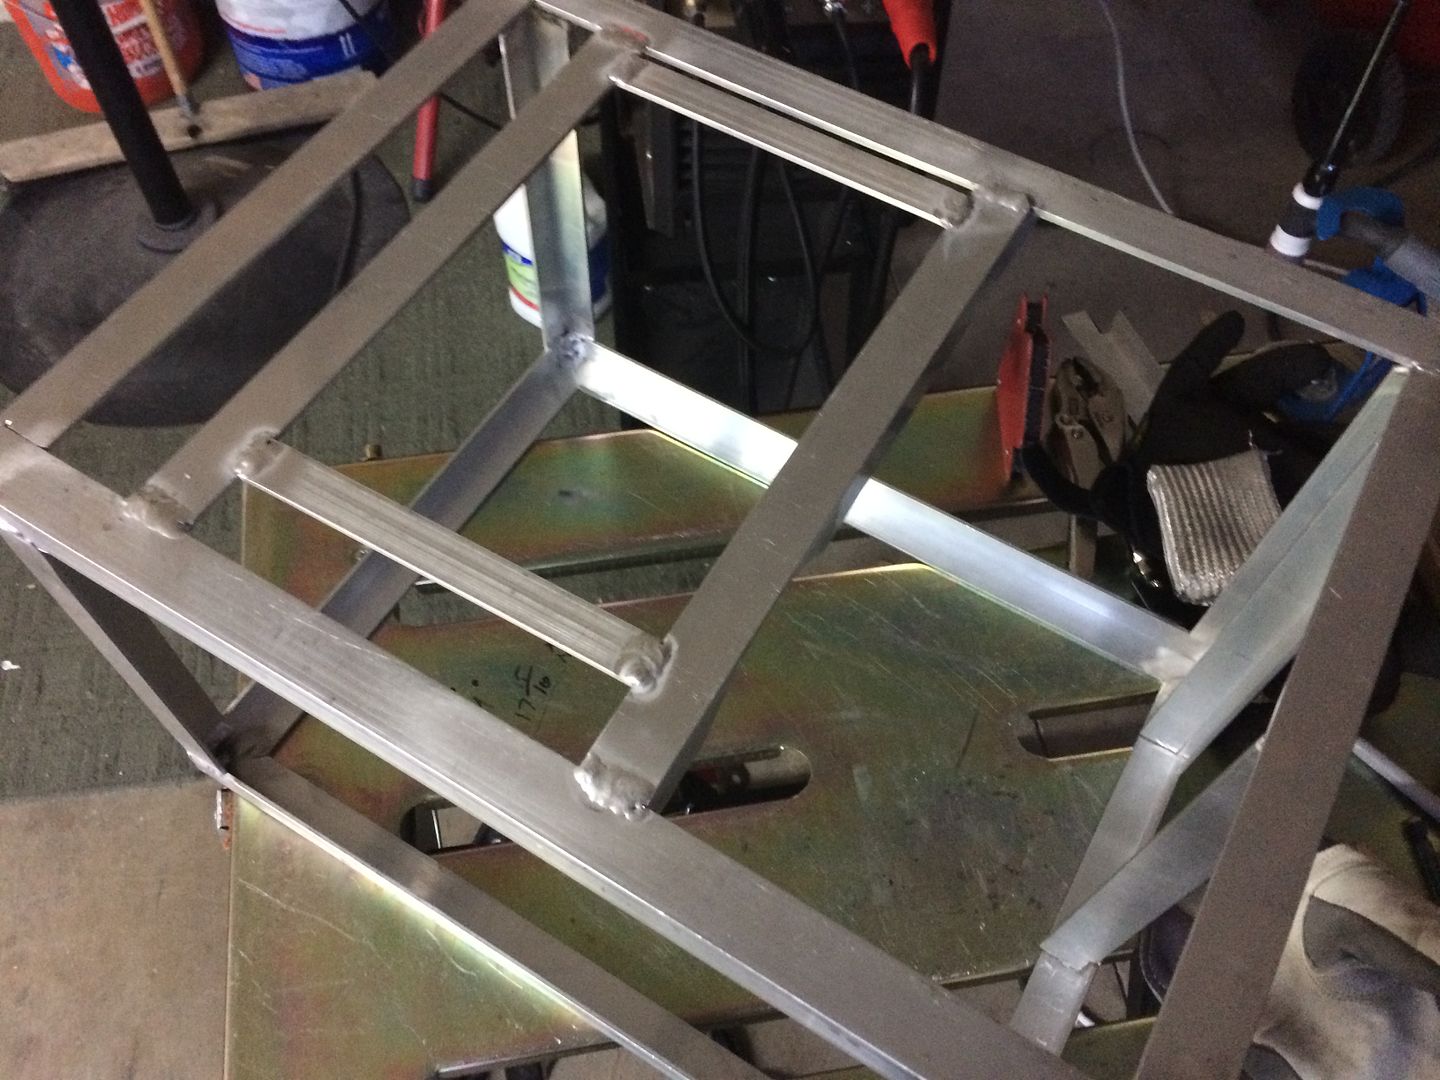
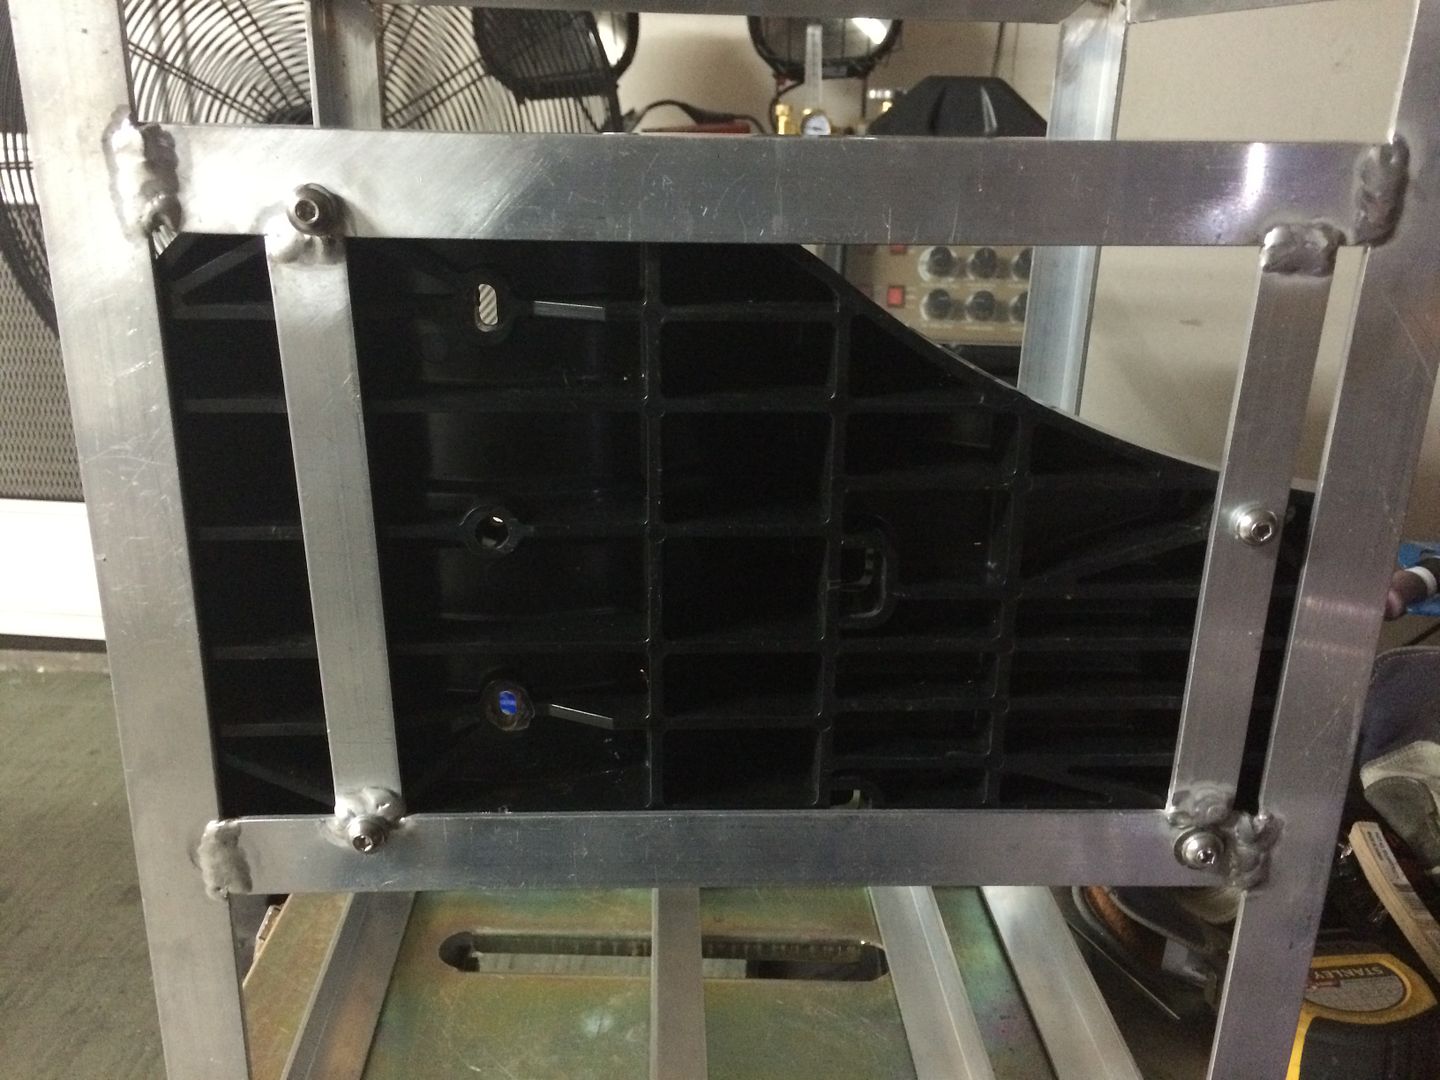
also, to mount the fan and radiator (and provide more bracing the the frame), used more angle... notched the pieces so that they would fit flush inside the framing, or fit more like a puzzle, prob doesnt make a difference, as just doing best i could to make it cleaner where possible and to practice good habits, with fit up...
put the radiator in there, with 1/8" spacers on each side, so that i could tack the stuff in place, then clean and weld everything up...
put the radiator in there, with 1/8" spacers on each side, so that i could tack the stuff in place, then clean and weld everything up...
LS Customs
- LS Customs
-
Ace
-
Posts:
-
Joined:Tue Feb 23, 2016 11:56 pm
took the pump and tank setup off the factory mount it came on and noticed when i took the rubber feet off the bottom, the mount had provisions for 1/4-20 nuts and bolts... decided to used these locations to mount the setup to my frame...

LS Customs
- LS Customs
-
Ace
-
Posts:
-
Joined:Tue Feb 23, 2016 11:56 pm
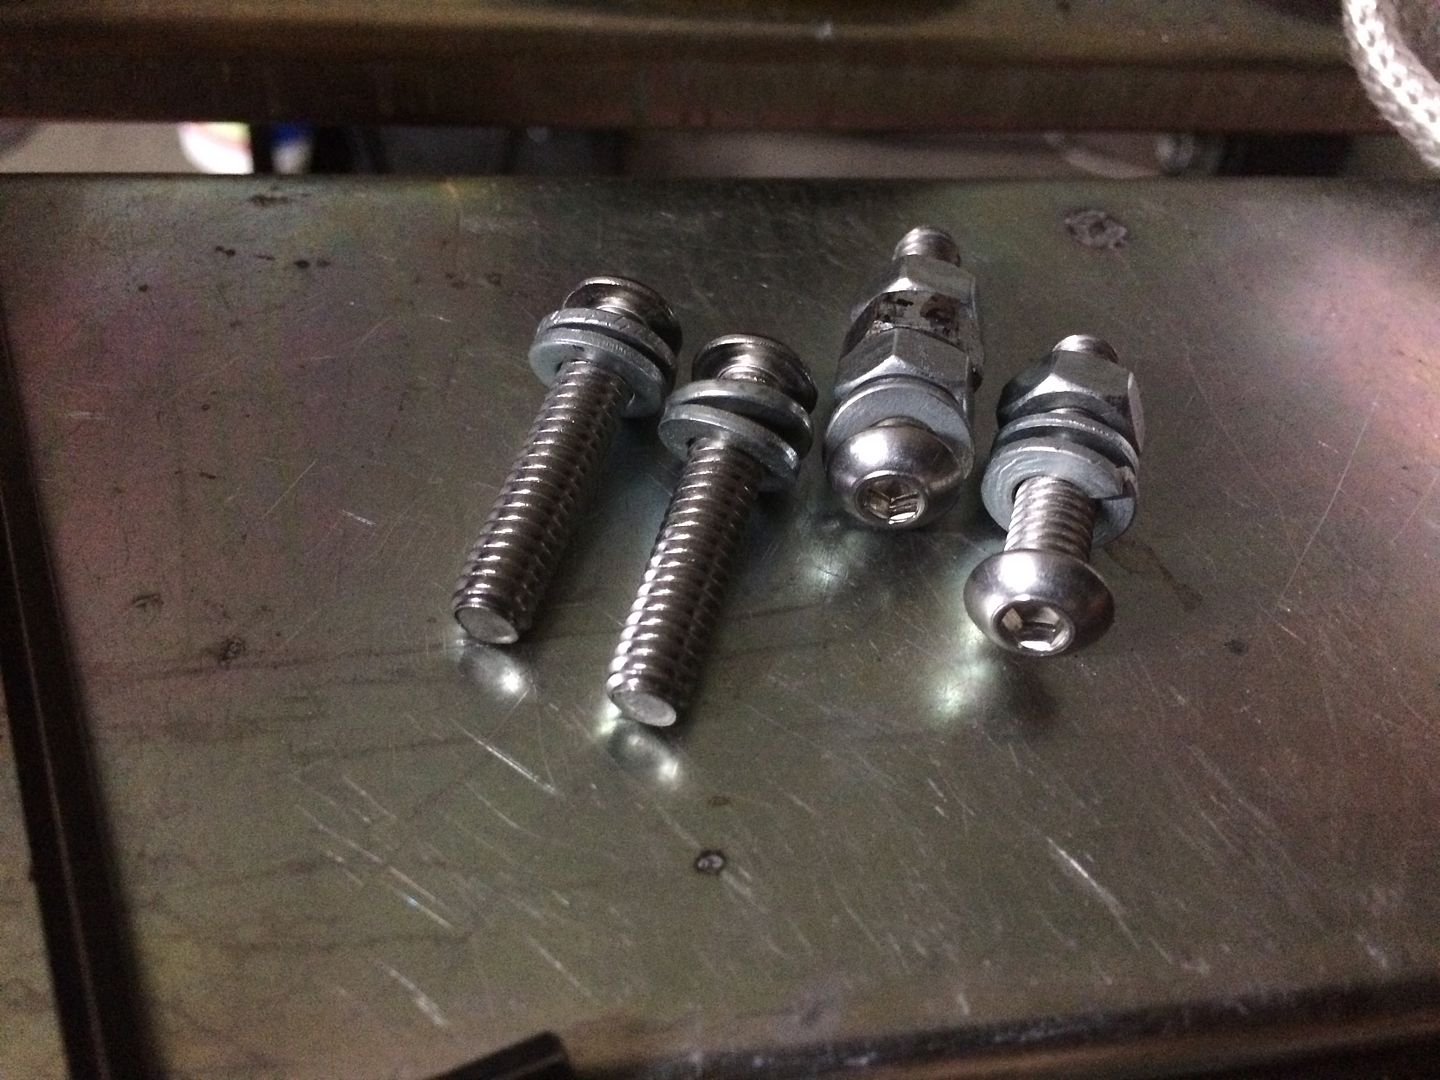
found proper fitting hardware in my misc hardware box..
mocked everything up, tacked, cleaned.. and then welded...
mocked everything up, tacked, cleaned.. and then welded...
LS Customs
- LS Customs
-
Ace
-
Posts:
-
Joined:Tue Feb 23, 2016 11:56 pm
tacked in place, then wire brushed everything... cleaned with acetone, and welded up...
welded top and bottom, etc...
welded top and bottom, etc...
LS Customs
- LS Customs
-
Ace
-
Posts:
-
Joined:Tue Feb 23, 2016 11:56 pm
LS Customs
- LS Customs
-
Ace
-
Posts:
-
Joined:Tue Feb 23, 2016 11:56 pm
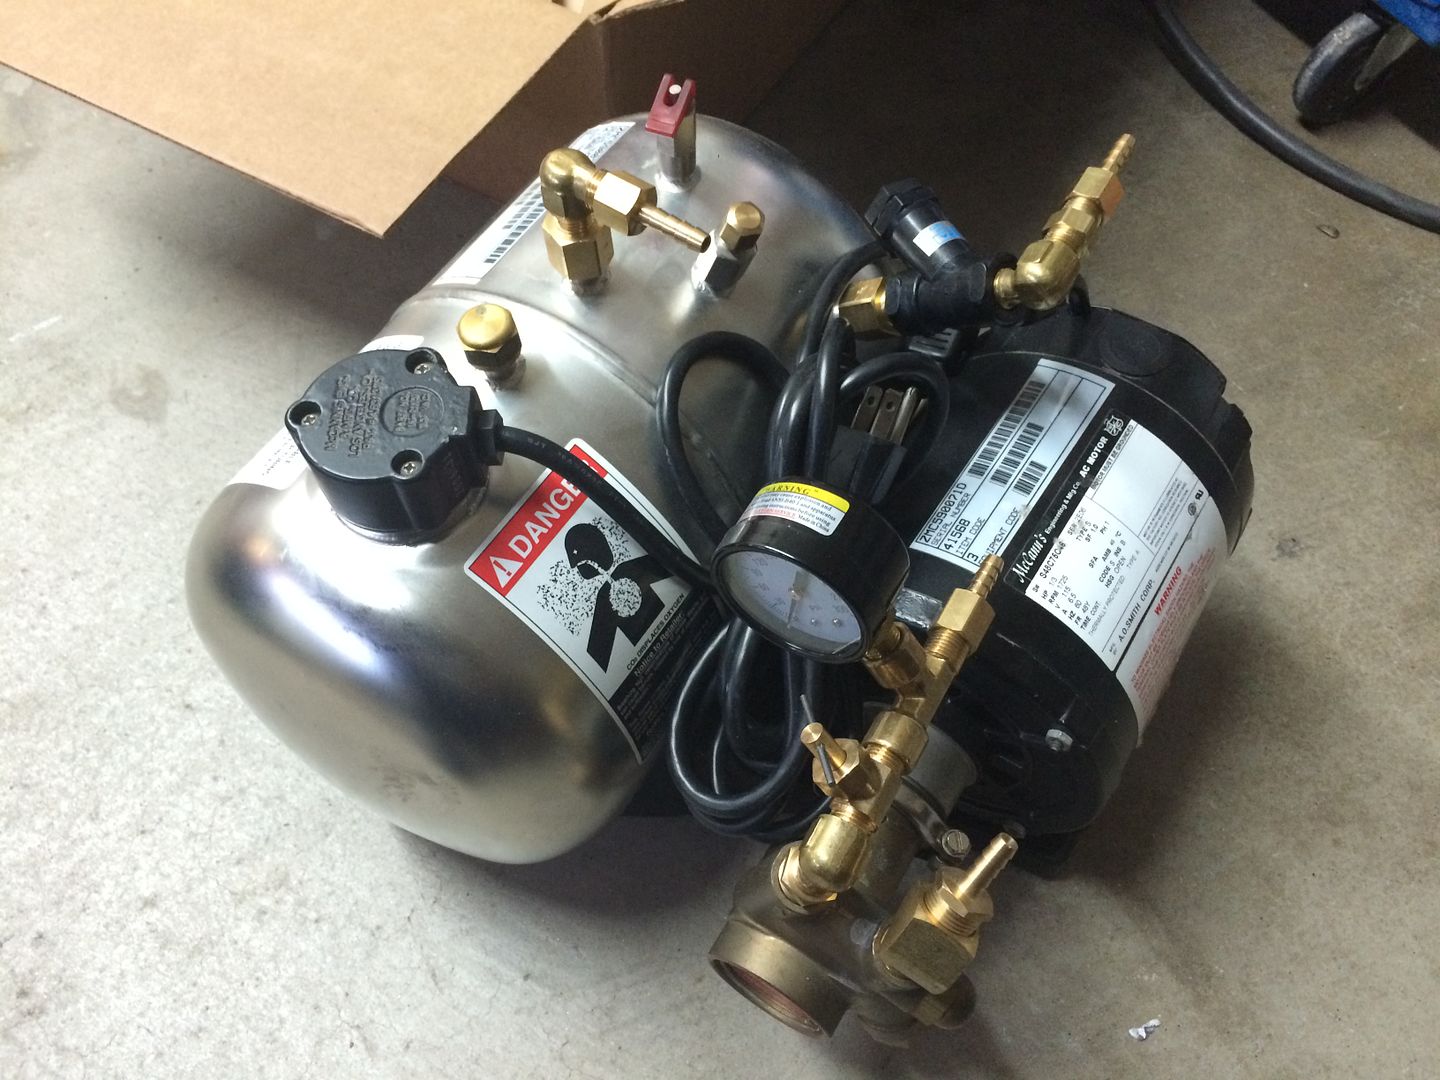
mounted the equipment back in the holder, all fits nicely and securely fitted to frame...
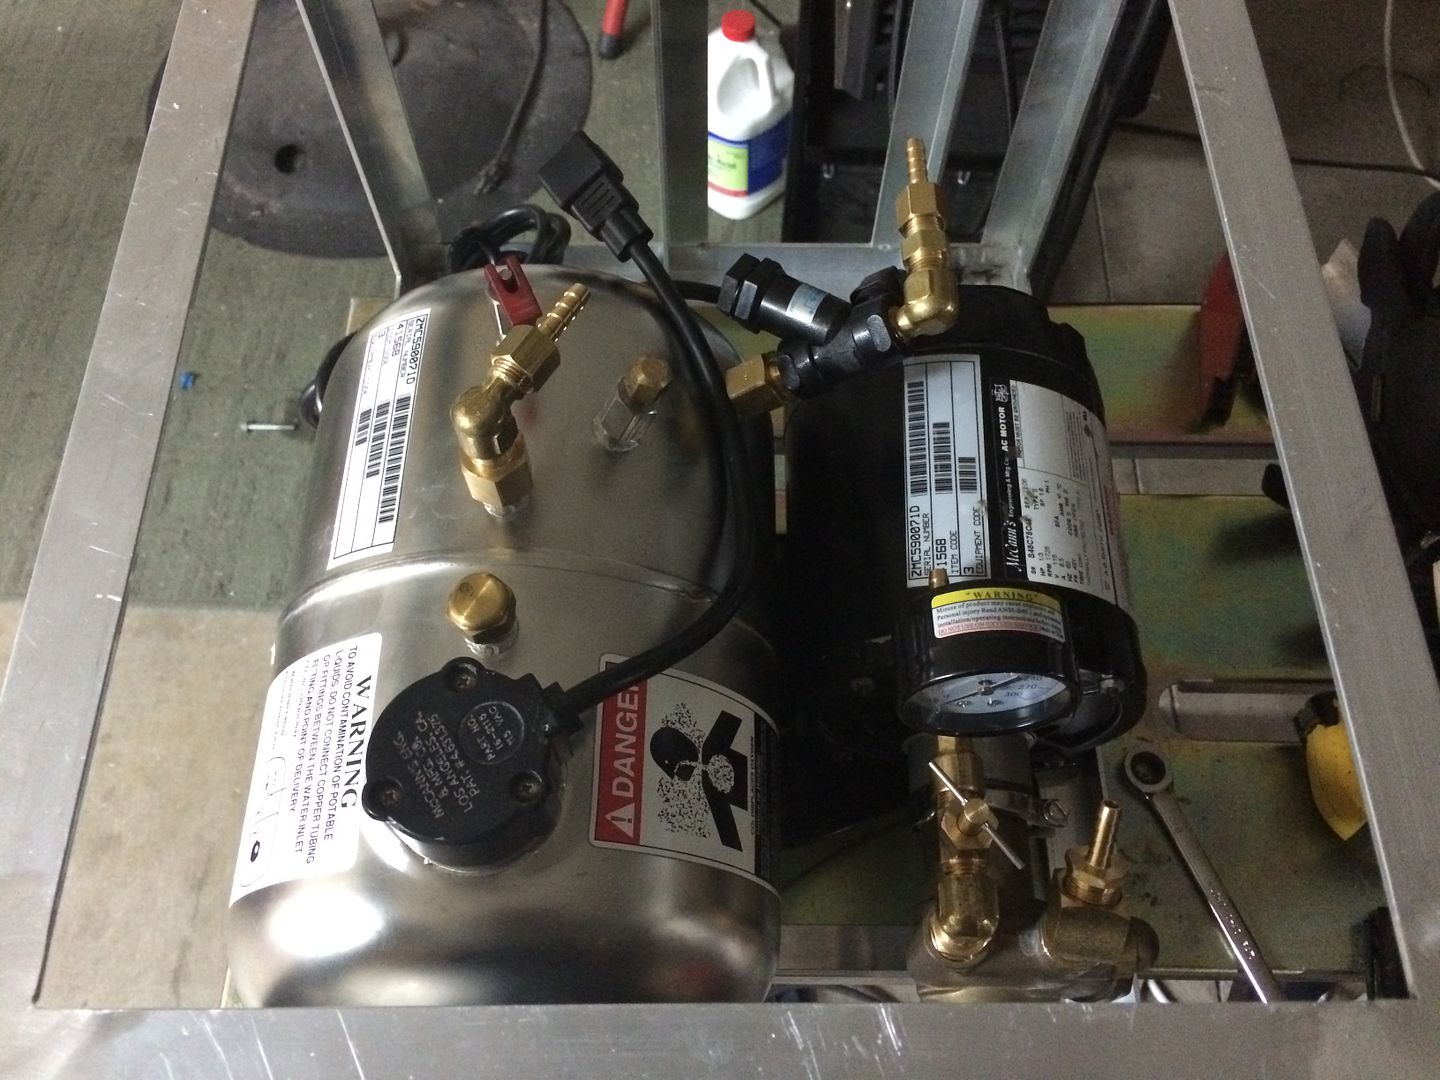
radiator and fan fit nicely too and held in (in the pic) with a snug fit due to the spacers... just have to drill the holes and bolt it on... then on to the next part...

radiator and fan fit nicely too and held in (in the pic) with a snug fit due to the spacers... just have to drill the holes and bolt it on... then on to the next part...
LS Customs
- LS Customs
-
Ace
-
Posts:
-
Joined:Tue Feb 23, 2016 11:56 pm
i put a pressure gauge on the pump, but i may mount the pressure gauge, etc on a front panel, along with the quick connects for the torch, water flow indicator of some sort and a switch to power it up... i intend to weld some aluminum tabs on the inside of the frame, where a panel could sit flush with the outside of the frame on each side... then bolt on and off... as i dont want to grind the welds down flat... have to find a flow indicator and grab a switch or push buttons, or whatever i will be using to switch this on and off... maybe a temp gauge too, to see what temp the setup is running at... i also picked up some Weldcote Metals, "blue coolant" for the setup...
Return to “Welding Projects - Welding project Ideas - Welding project plans”
Jump to
- Introductions & How to Use the Forum
- ↳ Welcome!
- ↳ Member Introductions
- ↳ How to Use the Forum
- ↳ Moderator Applications
- Welding Discussion
- ↳ Metal Cutting
- ↳ Tig Welding - Tig Welding Aluminum - Tig Welding Techniques - Aluminum Tig Welding
- ↳ Mig and Flux Core - gas metal arc welding & flux cored arc welding
- ↳ Stick Welding/Arc Welding - Shielded Metal Arc Welding
- ↳ Welding Forum General Shop Talk
- ↳ Welding Certification - Stick/Arc Welding, Tig Welding, Mig Welding Certification tests - Welding Tests of all kinds
- ↳ Welding Projects - Welding project Ideas - Welding project plans
- ↳ Product Reviews
- ↳ Fuel Gas Heating
- Welding Tips & Tricks
- ↳ Video Discussion
- ↳ Wish List
- Announcements & Feedback
- ↳ Forum News
- ↳ Suggestions, Feedback and Support
- Welding Marketplace
- ↳ Welding Jobs - Industrial Welding Jobs - Pipe Welding Jobs - Tig Welding Jobs
- ↳ Classifieds - Buy, Sell, Trade Used Welding Equipment
- Welding Resources
- ↳ Tradeshows, Seminars and Events
- ↳ The Welding Library
- ↳ Education Opportunities